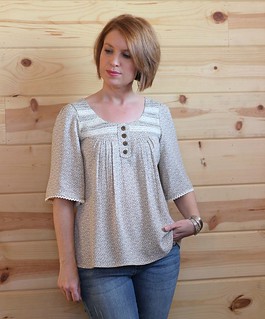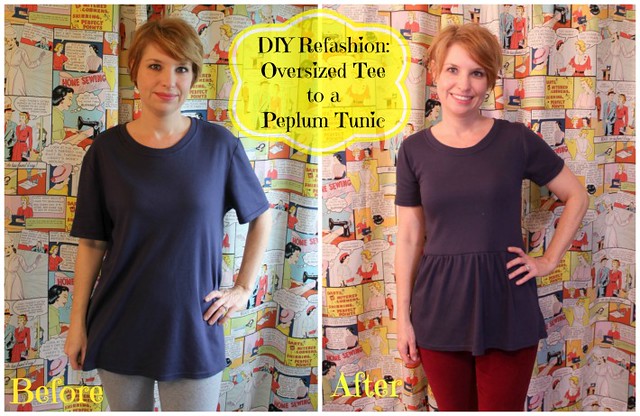
My Me Made May pledge was to wear at least one handmade piece 3 times a week and to tackle my refashion/wip stash. Let's see how the last two weeks played out shall we?
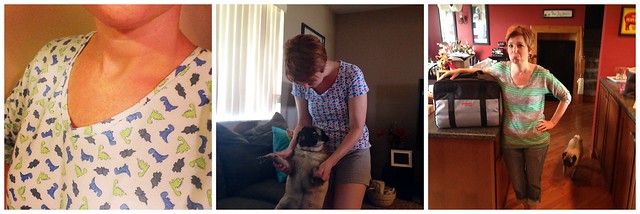
Handmade/DIY
The Fabricista Fabric Challenge: Week 1 ~ Recycled Challenge
Sunday, September 15, 2013
Well week one of the Fabricista Fabric Challenge went by in a blur. This challenge was to recycle. You all know I enjoy a good thriftstore recycle so this challenge was right up my alley. Here are the offical rules:.
First Challenge: Recycled Challenge
You have one week to complete this challenge.
The challenge: Make a garment out of recycled materials or materials that would have otherwise been thrown away, such as scraps from your sewing room or grocery bags. You can reconstruct a garment to make it more fashion forward and utilize unconventional items to add accessories and embellishments. Be creative!
This challenge will be judged first by the Fabricistas on creativity, functionality, personality, and fit.
Then our readers will get a chance to vote for their favorite design.
-------------------------------------------------------------------------------------------------------------
My plan was to refashion something from my heaping thriftstore pile to show off my personality and to show my creativity by accessorizing with trash. Let's take a look at what I was working with...

The only thing this shirt has going for it is the polka dots. To make it more fashion forward I cut a high-low hem, aka: mullet hem and cut out the shoulders. I also altered the size by taking it in 2 inches on each side. I replaced the boring buttons with some white rose buttons and I trimmed the shoulder cut outs with some lace trim from my stash.


My jeans were also thrifted. I added heart patches to give them some personality. I love refashioning so I thought the hearts were the perfect thing for this outfit. I simply cut out the hearts, patched them with red scrap fabric and used embroidery thread to attach.
I wanted to do a head to toe recycle so my shoes are also recycled from an old pair of flip flops that were literally days away from meeting the trash can. I replaced the straps with an old white cardigan that was in a donation bag on it's way to the Goodwill and some o-rings that I found in my junk stash.
I wanted to do a head to toe recycle so my shoes are also recycled from an old pair of flip flops that were literally days away from meeting the trash can. I replaced the straps with an old white cardigan that was in a donation bag on it's way to the Goodwill and some o-rings that I found in my junk stash.

Now on to the "trashier" part of my outfit..the accessories. My belt is made from crocheting plastic grocery bags!

I just started learning how to crochet again. I use to crochet several years ago. Nothing major just easy scarves but I decided I wanted to take it up again and maybe crochet me a hat or sweater or something. This belt is just a single chain stitch, the only stitch I ever knew so I'm hoping to eventually add to it and learn more stitches. I've definitely got the basic stitch down pat now after making this belt. My buckle was from my junk stash from an old belt I had that fell apart... Yes I never throw away anything!

The other recycled accessories in this outfit are a fabric scrap necklace, fabric scrap flower ring, earrings made using the old buttons from this shirt and my favorite...a fabric scrap bracelet made out of pop tabs!

I really like how my outfit turned out. I have to be honest, about halfway through I was having major doubts. I feared Saturday evening would roll around to me frantically trying to rethink my whole strategy and come up with a whole new outfit but after trying everything on for the first time and seeing how it all tied together my doubts were quickly squashed.


This outfit totally represents my style and is something I will wear again and again. Heck I'm even going to rock out that plastic bag belt because c'mon it's just awesome! I'm really excited to see what everyone else came up with. Entries should be up on the Fabric Mart blog soon so keep your eyes peeled. We've already got a sneak peek at the next challenge and I'm really excited about it so fingers crossed I make it to the next round!

~Peace~Love~and Recycle~
xo,
Shanni
Handmade/DIY
Completed: Sis Boom Meghan Peasant Dress and a DIY cropped jacket
Thursday, August 29, 2013
Brick-a-bracka, firecracker, Sis Boom Bah, Bugs Bunny, Bugs Bunny, Rah Rah Rah!!
Gotta love Bugs! Every time I worked on this dress I got this cheer stuck in my head. I got as far as firecracker, firecracker, sis boom bah...I couldn't remember the rest, not that I didn't have fun making up my own versions..kick em in the knees and kick em in the.... Maybe that's why I didn't make the cheerleading team in the 5th grade. After a Google search good ol' Bugs came to the resuce with a quick fix of nostalgia. Memories came flooding back of me and my bother in our Underoos, sitting mere inches from the t.v. watching cartoons and eating cereal on a Saturday morning. Oh the good old days...but I digress
I was unfamiliar with Sis Boom patterns until I seen the Meghan Peasant dress made up by Meg on Kollabora. Isn't it the cutest! I thought this pattern would be a good match for my Mood Ikat knit. What do ya think? A little busy??

A long maxi was not was in my original plan. For some reason when cutting out the skirt panels I didn't find it odd that I was cutting 34 inch length for my 5 foot 3 inch (and some change) frame. I was thinking it was going to hit me right below my knees. C'mon goof you hem your pants up to a 31 inch length. After trying it on I was kinda all like, Yay! Finally got me a long maxi! It is however quite busy and makes me look shapeless. I posed the question, Long or Short? with pics on Instagram and Facebook and 90% of you said short. And I promise you it will be short...come next summer. I figured Fall is coming (soon I hope) and this would be a good transition piece for my wardrobe. Next summer I'll cut it off short and it'll be like a whole new dress.
Let's talk about the pattern. This was a pdf and don't freak, it's 200 pages long! Buuttt you don't have to print all those pages. The pattern tells you exactly what pages to print for what style you are going for. I ended up with about 40 pages total. The bodice has 3 neckline options. You can show some cleavage or keep em' covered. I don't have any cleavage to show so I kept it at a happy medium. Next time I think I can get away with the lowest neckline. There are 3 sleeve options: cap, long and bell as well as tons of diagrams showing the different sleeve and skirt lengths based upon your height.

Did you spot it? The total goof up I did on my bodice? Aahh I'm all cockeyed, wonky doodle doo..(I'm losing my mind). The bodice is to be cut on the fold. Which I did and didn't have my fabric pattern matched up correctly like I thought. I should have cut it on a single layer of fabric to ensure I got my patten matched up. Oh well lesson learned. Nothing a little d.i.y. cropped denim jacket can't cover up!

 |
I got this denim shirt at a consignment shop for $4. I just chopped it
off at the waist and took in the sides an inch and a half. Eventually I will replace the buttons with some silver ones.
 |
| No I don't have hairy feet, that's the cat crying out for some love. |
The deets:
Pattern: Sis Boom Meghan Peasant Dress, pdf $10
Fabric: Ikat knit from my Mood $200 gift card win!
Notions: 1/4" elastic from my stash
Alterations: nada
Likes: Very comfy, lots of options, quick make
Dislikes: nada
Make again?: yes, next time I will use a lightweight cotton.
Time to make: a day
Total cost: $10, paired with my refashioned denim shirt total $14

If your interested in this pattern Sis Boom is having a Back to School sale going on now. Buy two pdf patterns and get 40% off. So if you bought two patterns at $10 a piece it would only cost you $12, that's almost like getting one free! Get on it peeps!
I've been on the fence on whether or not I was going to blog this refashion. I love the Kelly pattern I used however I'm not really happy with the way I had to put this skirt together like a puzzle piece which resulted in seams that shouldn't be. First let's take a look at the tragedy it was before...

I know your looking at it thinking, whaaa?? Well the first thing I thought when I seen this was Megan Nielsen Kelly Skirt. I've been wanting to make this pattern for quite some time but you see my sewing machine turns into a real bitch when it comes to buttonholes. I can't figure it out. I can practice for hours and it works perfect but when it comes time for the real thing I end up with the most janky looking buttonholes known to man. I thought this would be the perfect way to cheat and use the existing buttonhole placket. I'm also a fan of green. While it's not really this particular color of green it did however win some bonus points with me.

So first things first I cut that awful looking waistband with belt loops off and prayed I'd have enough from the excess length to make the waistband. I also cut the the side seams open so I ended up with one back piece and two front pieces. For the front since I already had my button placket I placed the pattern piece accordingly and cut with fingers crossed and did the same with the back piece. So far so good. The only difference so far between my Kelly and yours is that my back piece already had a cb seam so I just had to deal. All was well until it came time to cut the waistband and pockets. I didn't have a long enough piece for the waistband so I had to piece two together which resulted in two seams, the existing cb seam and the one I had to create. It would of been cheesy if the two seams would of perfectly aligned with the side seams but that was not the case. Oh well, I was not defeated since I planned on wearing a belt with this skirt anyway. I somehow managed pockets. I had to make them a lot smaller and used some leftover fabric from my stash for the insides. I can barely get my hands in them but hey whatevs!!

The construction of this skirt was great..well of course it was I got to avoid probably the hardest part, the button placket!! I only had two buttonholes to make and yes they turned out janky! argh!!! I used a contrasting thread and topstitched as the pattern suggested. I switched out the buttons for some plain white ones and really like how they pop.

I do have to say it's a major improvement from it's former self. And it's sooo dang comfy!!
Here you can see that seam in the waistband I was talking about...sigh...


Don't you hate when you have a belt with a floppy end??
It just kinda wants to hang there and flop around.

My hubby was outside washing his truck when I was taking these pictures. He was jamming to Pantera so I just felt like I needed to...

So I dunno, not my favorite refashion..that waistband seam just really bugs the crap out of me! But no one has to know as long as I wear a belt, eh? I do however love this pattern and will make properly once I figure out my buttonholer!!
Here's what I'm working on next..
 | ||
| Sis Boom Meghan Peasant Dress ~ Ikat knit Mood Fabrics |
Has anyone worked with Sis Boom patterns before? I just happened to run across this pattern on Kollabora and thought the Ikat jersey knit I had from Mood would be perfect for it since I didn't have enough for the Miz Mozelle I had originally planned. sniff, sniff.
It's baaaack! If you remember back a few months ago I was doing a weekly post called Thriftin' Thursday where I'd show new life to a garment I thrifted from the local Goodwill. Not sure what happened... I guess I got in a slump and was uninspired by what I had in my thrift pile. That's all changed because I recently went thrift shopping and I left with a big ol' bag of inspiration and some stinky clothes. I mean not stinky like b.o. or anything but that old musty smell every Goodwill seems to have. Anyhoo let's start with this glorious piece of fabric ....
 |
| Whoa, what's so glorious?? |
I fell in love with this bold print and instantly thought pencil skirt with a black peplum top. I was really excited when I seen it was handmade as well. It's just a simple gathered skirt with an elastic waistband and pockets. And speaking of elastic waistbands I'd like your opinion..How do you feel about pants or skirts made with elastic waistbands? Lazy man's way out?....it's all about comfort?...who cares if no one's gonna see it....or no way! Peeuuuu! I have mixed emotions on the topic. I mean I'm all for elastic waistbands in lounge pants but not so sure about work attire. When i think of elastic wasted pants I picture a toddler running around screaming with a melting Popsicle in one hand, snot running down his face and a padded behind from his full diaper or that nice little old lady in the grocery store wearing skirt pictured above with panty hose and SAS shoes who's so sweet to let you go before her because she has all the time in the world. Elastic waistbands aren't so bad are they??
For this transformation I pulled out Simplicity 2258. I didn't want to spend a lot of time and I knew this would be a quick make. I had to size down my pattern because the size I had was 14-22, I'm more of a size 10. To do this I looked at the finished garment measurements, and figured the difference between a 10 and 14 = 3 inches. I then cut out the size 14, cut each pattern piece in half then overlapped the pieces by 1.5 inches. I have no idea if this is the correct way to size down a pattern but it worked for me. After washing my stinky skirt I cut out the elastic. I started with a seam ripper because I was hoping to salvage it but HOLY MOLY look at all those zig zag stitches...

The deets:
Pattern: Simplicity 2258 - won from a giveaway hosted by the adorable Sally from The Quirky Peach
Cut the side seams apart and I had just enough fabric to squeeze out this pattern. It was fate I'm telling ya. The skirt was a cinch to put together. I used my serger for the first time and I'm in love. The inside looks so neat and professional. (should of got proof) I finished the bottom hem using my blind hem foot. It needed to be lined but I opted to wear a slip underneath.
 |
| Pug approved |
The deets:
Pattern: Simplicity 2258 - won from a giveaway hosted by the adorable Sally from The Quirky Peach
Fabric: Woven cotton/poly I'm guessing. Goodwill skirt cost me $1.25
Notions: 1 1/4 inch elastic - given to me by my Hubby's sweet ol' Granny
Alterations: Graded down the size 14 pattern to a size 10
Likes: Simple and easy. Made in a few hours
Dislikes: shaking my head no
Wear/Make again: I'm going to try the shorts next for some comfy lounge attire
Time to make: 3 hours
Total cost:$1.25 WOWZA!
 |
| I believe I'm picking Pug hair from my shirt. oh oh and it even has pockets! |
 | |||||
| I really like the exposed zipper on my top. (Top from JcPenney) |
 |
| Excuse the wrinkles...I sit on my butt all day |
I think this is one of my favorite remakes so far. I was able to take this outdated frumpy skirt and make it young, hip and fresh again. (well I hope it looks hip and fresh anyway..)

Hope ya'll are having a good week so far. You working on any special projects?...Tofino jammie pants or a Bombshell perhaps? Or maybe THIS sexy little number...that's ok too, I don't judge.
Peace out ~ xoxo
Well let's all take a little gander at this beauty...


At first glance, beautiful is probably not the first thing that comes to ya'lls mind I bet. I only picked this shirt off the Goodwill rack cuz I was like, What the hell is going on here? But when I looked closer a thing of beauty it quickly became...it was homemade!! Someone made this shirt and wore it proudly. And proud they should be because they did a mighty fine job! The inside was so neatly stitched and serged. And just look at those gathers...perfection!


I examined the inside of this garment from head to toe for what felt like hours trying to find any imperfections to make me feel better about my own shoddy workmanship. I could find none. Lady, I'm impressed! I know practice makes perfect and this person probably has years of experience on me (and a serger) but I hope to one day be proud of what my shirt looks like on the inside as well as the out.
I really hated ripping this shirt apart but I'm sure whoever made it would be glad that I was trying to breathe new life into it. I ended up making another Renfrew with it...a sleeveless Renfrew. I had every intention of putting the sleeves back in and I tried and tried but they looked pretty ridiculous. Because they were originally gathered sleeves they just didn't look right with the style of the Renfrew and I was too lazy to start from scratch. After chucking the sleeves across the room I finished the armholes with bias tape.
 I
I 
Any ideas on how old you think this shirt is? The fabric reminds me of something my Granny would of wore in the 80's. It's really a soft, cozy fabric and I will probably use this as a lounge/sleep shirt. I really hope to find more handmade garments at the thrift shop. It was fun remaking it and thinking about the person who made it. What kind of person was she? How long had she been sewing? Where did she wear this shirt? Was she as proud of her workmanship as I was for her? Does she still sew her own clothes today? I hope one day a piece from my homemade wardrobe will find it's way into the hands of a young girl and she will look at it as I did this piece and be inspired.

So I got my hair did the other day, a trim and a dye job. It's such a refreshing feeling walking out of the hair salon. You feel like a new person. A slightly brighter, better version of your former drab self. Well that's how I feel anyway. I was thinking about this as I was going through my closet. I have a few items that I have totally worn the shit out of. I've worn them so many times I'm absolutely sick of looking at them, much like my hair by week five when the gray starts showing. Your clothes can start looking gray to you as well. Take for instance this white shirt....

Last fall/winter this shirt was in weekly rotation. It was perfect to pair under my favorite green cardigan. Great for those once a week work days when I get up and don't want to have to think about what I'm going to wear. Well it has started to look a little gray. The white is no longer a bright white anymore and the armpits...let's not even go there. I could never wear this without a cardigan because of those scary yellow deodorant stains. Don't need to scare anybody, all though I've probably scared y'all. Sorry, just keeping it real. Anyhoo I remembered I had a bottle of brown Rit dye and decided to give my first dye job. If it didn't work out I wouldn't be too sad about having to trash this shirt, even though it was my favorite, it's seen better dayz.
First thing I did was to remove the white buttons. I then got a 3 gallon stock pot and filled it half the way full with water and cranked up the stove to bring it to a boil. While I was waiting for the water to come to a boil I rinsed my shirt in hot water and wrung it out thoroughly. Got an old dishpan that I didn't care if it stained and filled it with the boiling stove water. Added about a half cup of the brown dye (which was probably more than enough) and added my shirt to the mix. Now the directions say to stir your clothing continuously for 30 minutes to an hour. Alrighty then, I don't think so... I stirred it for about 10 minutes continuous (till my arm got tired) then off and on, letting it soak for a full hour.

After letting it soak a full hour I removed it from it's warm, toasty bath and rinsed it under warm water until the water ran clear. Threw it in the washer and washed it on the hot/cold cycle then of course tossed it in the dryer. And here is the end result...

This is after a full day of wear so don't mind them wrinkles. It's turned out a little lighter than expected because of the cotton/poly blend fabric. I like how the thread around the ruffle provides a nice contrast. I mixed the buttons up to keep it interesting.

In this close up you can see the marbly (is that a word) effect the dye had on cotton/poly blend.

I'm excited to get some more wear out of this shirt. It's like new again. This is just one way you can do some thriftin in your own closet and breathe some new life into those over worn garments. Have any of you dyed your clothes to give them a new look?
I love going to thrift stores. Sometimes I find gems, sometimes I find turds. But even a turd can be polished into a sparkling gem! All you need is an imagination, a clothes pin and a sewing machine. Quick projects for me are making over thrift store turds. This one here was a little challenging because it was about 5 times too big.

First thing I did was cut out the sleeves. Sleeves are my nemesis so I hated doing this because I knew they'd be a bitch for me to sew back in. But I sucked it up and grabbed the scissors. I then tried it on and figured out how much I needed to take in the sides. I took in each side 3 inches and it was still a little big and prego looking. I decided to use elastic to gather the waist to make it more defined. I marked off where my waist hit on the shirt, measured out my elastic the size of my waist, pinned the elastic to my shirt matching up to my chalk line then started my machine and hoped for the best. While sewing the elastic I gently pulled on it so it would gather up (if that makes any sense at all).

I then tried my sleeves on and pinned how much I needed to take in. I also had to adjust the armholes because they hung way past my shoulders. I just marked where I wanted them to hit on my shoulder then cut away the excess. I found a good tutorial here on how to do that, pretty easy actually. Sorry I forgot to take pictures. Shoot me. I debated on if I even wanted sleeves, really only because I didn't want to sew them back in - I sensed a hissy fit coming my way - but the majority vote on my Instagram pic was sleeves and it definitely looked better with after I shortened them about 5 inches. I didn't mess any with the length of the shirt because I wanted a tunic look. I need more longer shirts to wear with skinny pants and boots. For some reason when I wear skinny pants I want my butt fully covered. Oh and I
almost forgot the best part. I didn't like the look of the collar so I
just pinned it on the inside, sewed around the neckline and turned it into a facing!
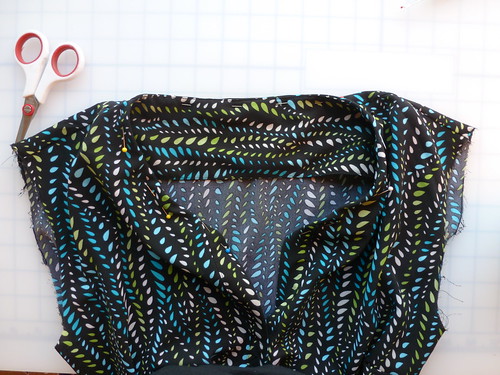
The front opening gaped open quite a bit so I made a button closure.


Let me know if you'd like to see more of these posts! I could make this a weekly Thursday tradition.
Hope y'all are having a good week. Vito says, "Breathe...it's almost over!"