
DIY: Inspirational Banner
Sunday, August 30, 2015
I created this tutorial for Cut Out and Keep's website back in January and never got a chance to share it here on the blog. Sewing life is stagnant at the moment so now is as good a time as ever to share this easy project with you all. We need a little inspiration sometimes to get us going or just a little reminder that it's OK, mistakes happen, just pick up your seam ripper and move on. So if your interested in DIY'ing your own inspirational banner to jazz up your sewing space then please read on.
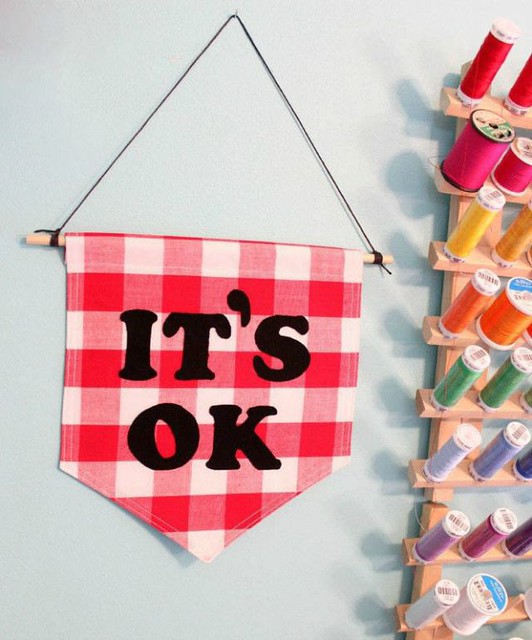
I spotted a similar banner online retailing for $90! Thank you but I think I'll save my $90 for a rainy day and use up some of my fabric scraps.
What You'll Need:
- Fabric for the banner and letters
- Liquid Stitch fabric glue or other permanent fabric glue
- Paper & pen
- Wood dowel rod - at least 1/4" thick in diameter
- Twine or cording
- Iron on interface
- Scissors
- Thread
- Computer/Printer
- Sewing Machine
~~~~~~~~~~~~~~~~~~~~~~~~~~~~~~~~~~~~~~~~~~~~~~~~~~~~~~~~~~~~~~~~~~~~
STEP ONE:
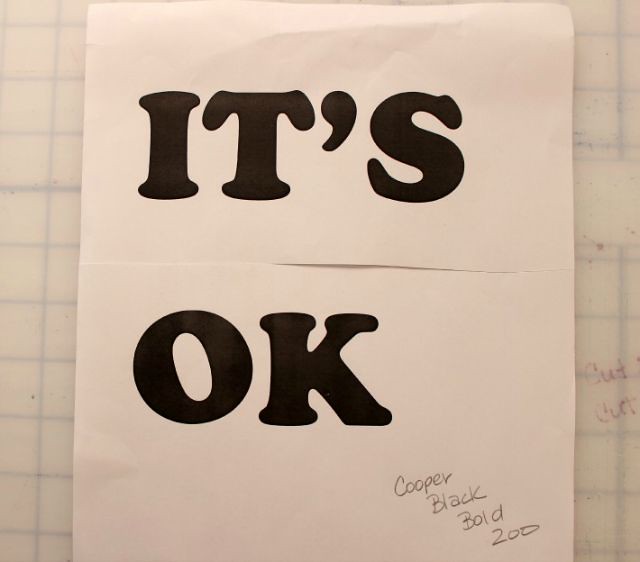
Using Word document type your inspirational saying using the font and size of your choice and print on to paper. My font was Cooper Black Bold at a size of 200.
~~~~~~~~~~~~~~~~~~~~~~~~~~~~~~~~~~~~~~~~~~~~~~~~~~~~~~~~~~~~~~~~~~~~
STEP TWO:
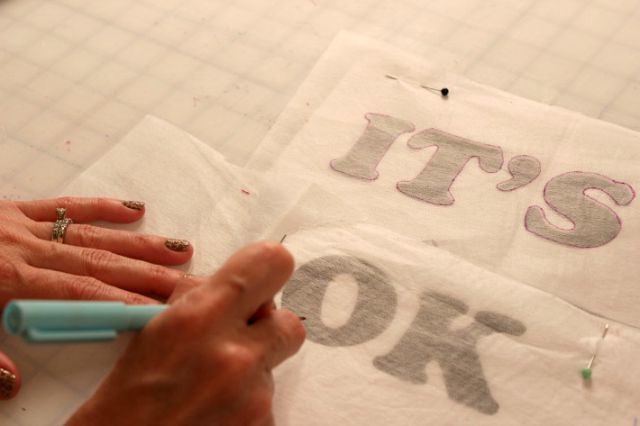
Trace your letters onto the fusible interface. IMPORTANT NOTE: Make sure the fusible side of your fabric is facing up when tracing otherwise your letters will come out backwards when you iron the interface onto your fabric (please don't ask me how I know). I also suggest using a really dark colored marker pen that is easily visible on the other side of the interface.
~~~~~~~~~~~~~~~~~~~~~~~~~~~~~~~~~~~~~~~~~~~~~~~~~~~~~~~~~~~~~~~~~~~~
STEP THREE:
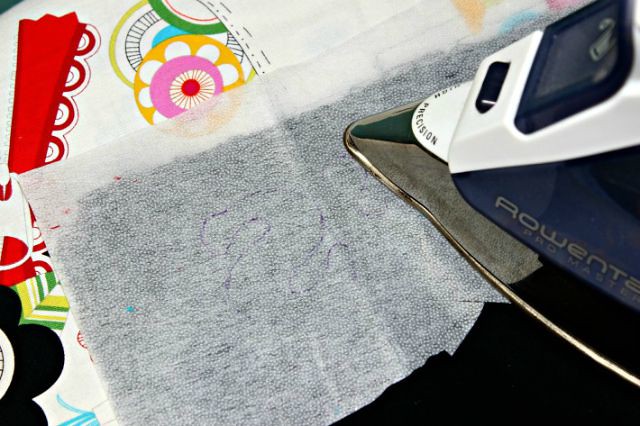
Fusible side down iron your interface on to the wrong side of your fabric. Notice how the letters are backwards..that is exactly how you want to see them. Weird I know but trust me on this one.
~~~~~~~~~~~~~~~~~~~~~~~~~~~~~~~~~~~~~~~~~~~~~~~~~~~~~~~~~~~~~~~~~~~~
STEP FOUR:
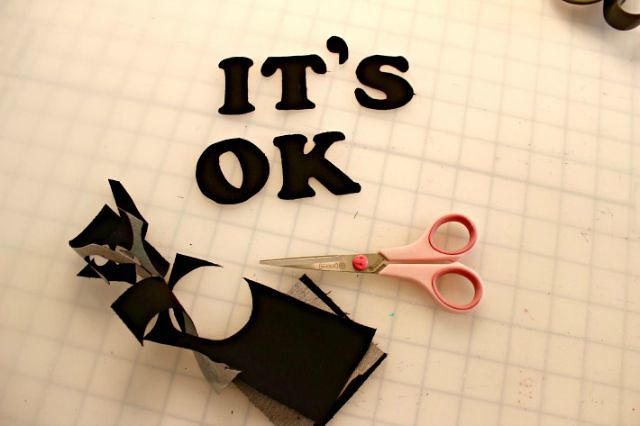
Cut out your letters. The interface will keep your fabric from fraying.
~~~~~~~~~~~~~~~~~~~~~~~~~~~~~~~~~~~~~~~~~~~~~~~~~~~~~~~~~~~~~~~~~~~~
STEP FIVE:
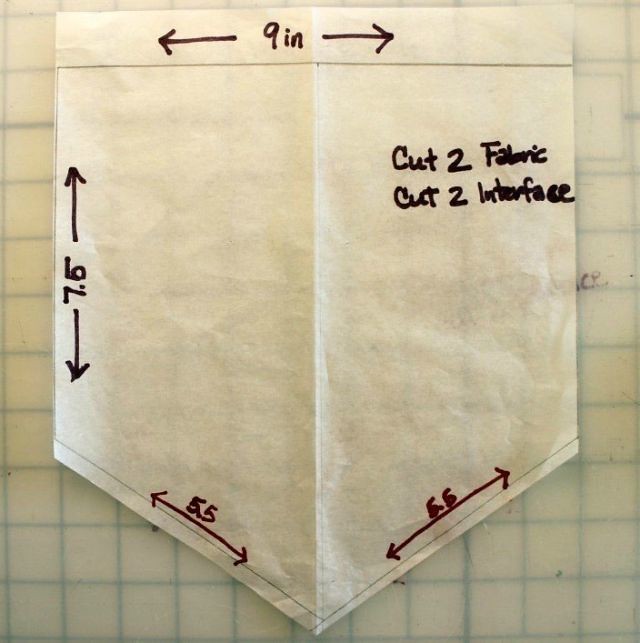
Using your paper you'll want to create a template for your banner. Make it as big or small as you want. My banner is medium in size and the measurements are noted above.
~~~~~~~~~~~~~~~~~~~~~~~~~~~~~~~~~~~~~~~~~~~~~~~~~~~~~~~~~~~~~~~~~~~~
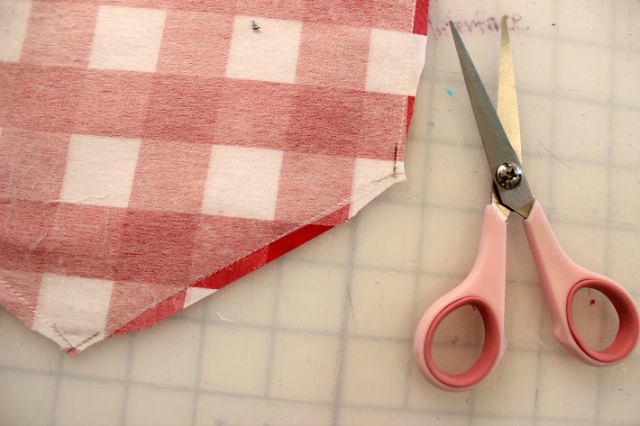
STEP SIX:
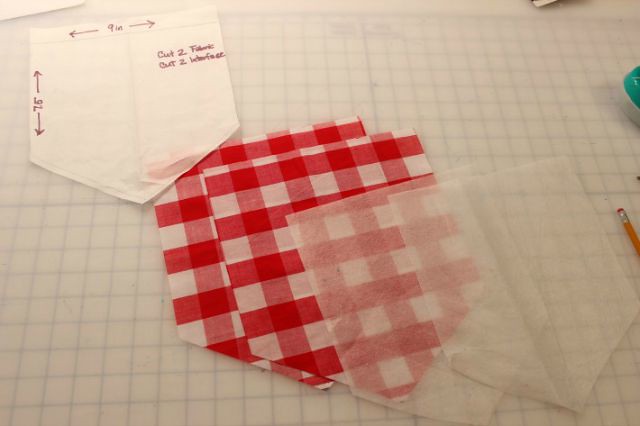
Using your template cut two of your banner fabric and two of your fusible interface. Trim your interface down about 1/4 inch on all sides to avoid adding extra bulk to your seams.
Iron the interface on to the wrong side of your fabric.
NOTE: I didn't want my banner to be flimsy and I only had lightweight interface so that is why I cut two pieces of interface, one for the front and one for the back. If you have a heavier weight interface you could probably get away with only cutting one piece.
~~~~~~~~~~~~~~~~~~~~~~~~~~~~~~~~~~~~~~~~~~~~~~~~~~~~~~~~~~~~~~~~~~~~
STEP SEVEN:
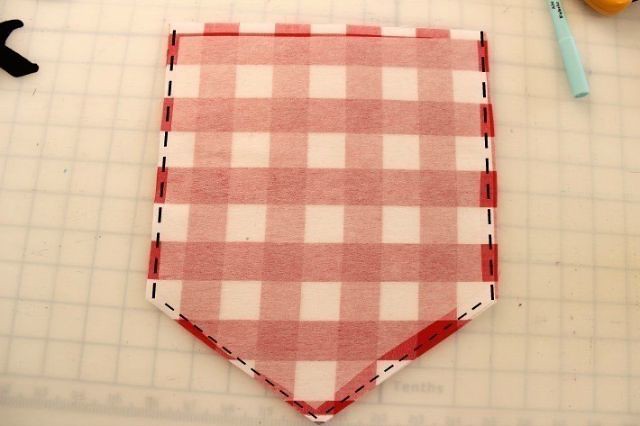
Place your fused banner pieces right sides together. Leaving the top open sew the other four sides using a 1/4 inch seam allowance. I find it helpful to use my seam gauge and mark the seam allowance on the corners so I know exactly where to stop and turn when sewing.
~~~~~~~~~~~~~~~~~~~~~~~~~~~~~~~~~~~~~~~~~~~~~~~~~~~~~~~~~~~~~~~~~~~~
STEP EIGHT:
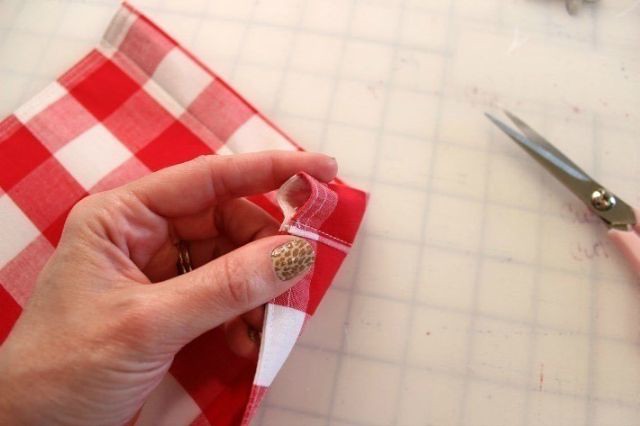
Trim the seams at each corner so you get a well formed point. Turn the banner right side out and use a point turner or a dull pencil to push your corners out. Iron flat.
~~~~~~~~~~~~~~~~~~~~~~~~~~~~~~~~~~~~~~~~~~~~~~~~~~~~~~~~~~~~~~~~~~~~
STEP NINE:
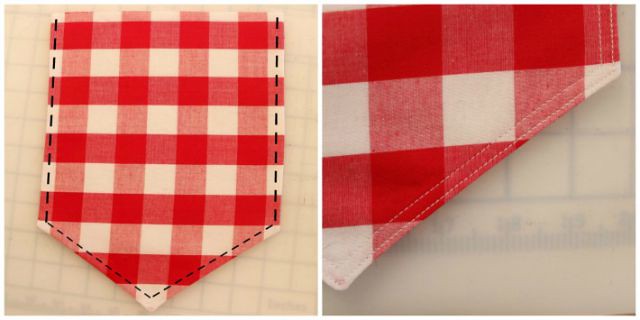
Topstitch around the banner about 1/8th inch from the edge. Following that row of stitches topstitch again 1/8th inch away.
~~~~~~~~~~~~~~~~~~~~~~~~~~~~~~~~~~~~~~~~~~~~~~~~~~~~~~~~~~~~~~~~~~~~
STEP TEN:
Fold your top edge under 1/4th inch and iron. Fold over again 1 inch, iron and sew about 7/8th inch away from the top edge. You now have an opening for your dowel rod.
~~~~~~~~~~~~~~~~~~~~~~~~~~~~~~~~~~~~~~~~~~~~~~~~~~~~~~~~~~~~~~~~~~~~
STEP ELEVEN:
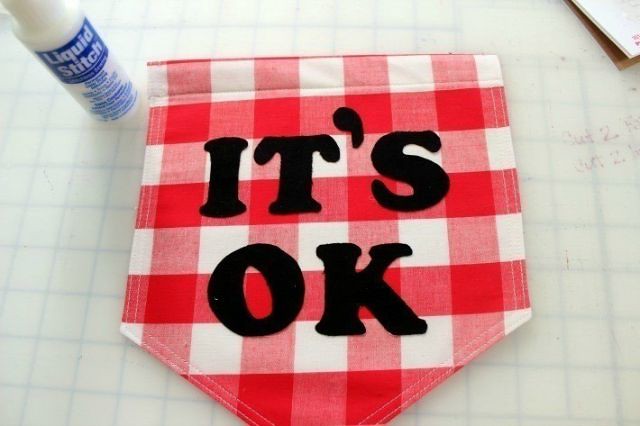
Position your letters on your banner and glue into place with permanent fabric glue.
~~~~~~~~~~~~~~~~~~~~~~~~~~~~~~~~~~~~~~~~~~~~~~~~~~~~~~~~~~~~~~~~~~~~
STEP TWELVE:
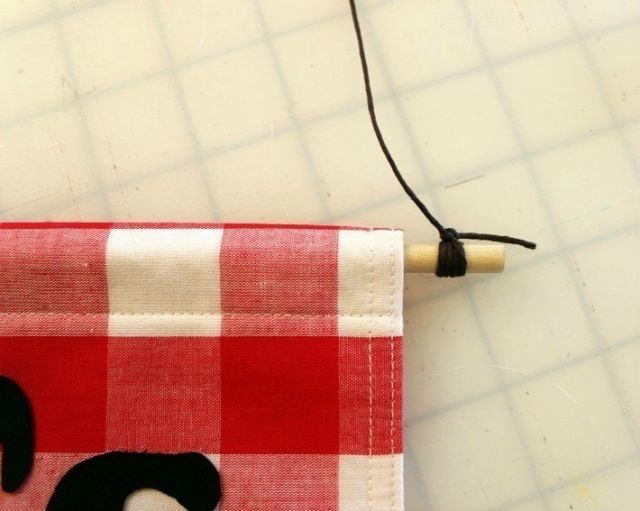
Cut your dowel rod down to the length needed. I used a carpenter's knife...be very, very careful. Insert into your banner. Wrap twine or cord onto both ends of the dowel rod and knot.
~~~~~~~~~~~~~~~~~~~~~~~~~~~~~~~~~~~~~~~~~~~~~~~~~~~~~~~~~~~~~~~~~~~~
STEP THIRTEEN:
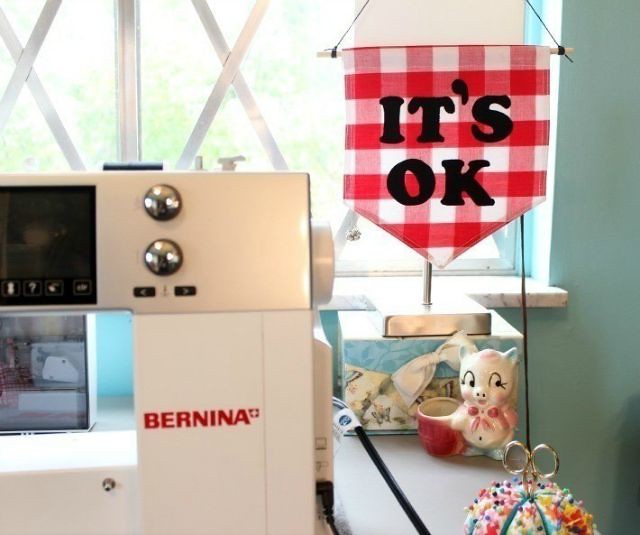
Hang whereever a little inspiration is needed!
Hope you enjoyed this tutorial! If you make your own I'd love to see. I've got a couple more tutorials to share on the blog including some really cute candy corn bunting for Halloween. Stay tuned for those.
Have a great week everyone! xoxo :)
Hope you enjoyed this tutorial! If you make your own I'd love to see. I've got a couple more tutorials to share on the blog including some really cute candy corn bunting for Halloween. Stay tuned for those.
Have a great week everyone! xoxo :)


0 comments