
Handmade/DIY

I'm back, I'm back and just in time folks because today is the last day for the Crazy Dog Lady Sewing Challenge! I love dogs and I'm a lots crazy so let's sew something up to celebrate, aye?!
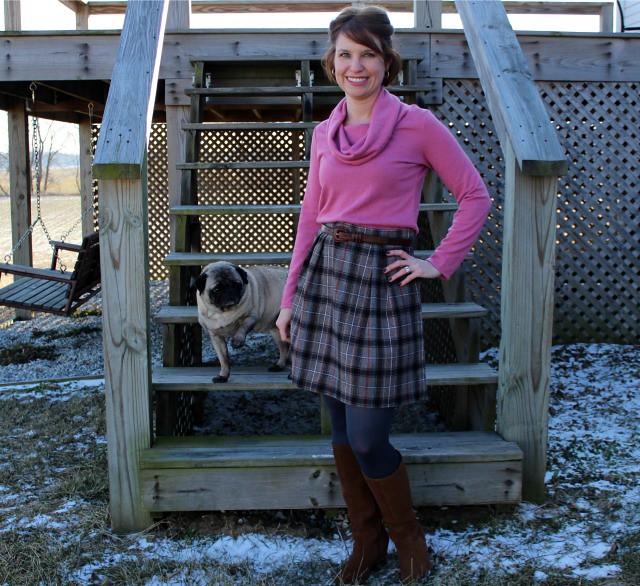
The weather is not always agreeable when it comes to blog pics. I'm never happy with the way my photos turn out inside the house, never enough lighting, so I decided to tough it out in the cold. As I'm heading out the door camera and tripod in hand my husband says, "You know it's 20 degrees out, right?" "Eh, it's not the bad" I say. Vito begs to differ.
Handmade/DIY
Crazy Cat Lady Challenge: Leopard Print Wrap Tunic..Meeowww
Thursday, November 06, 2014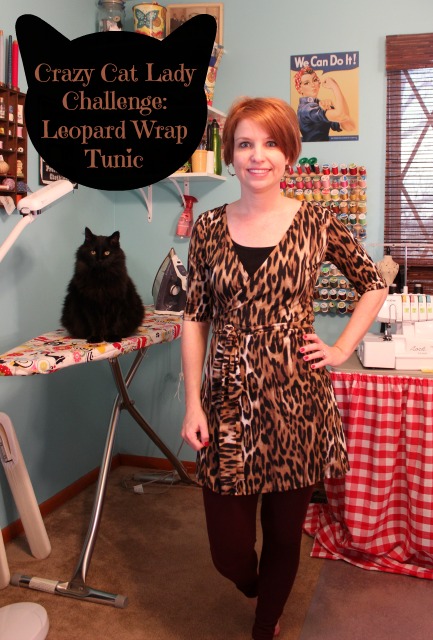
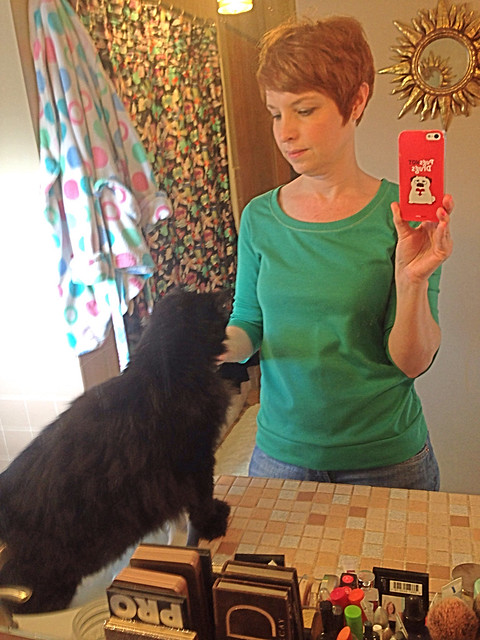
According to Wikipedia a cat lady is a "single lady who dotes upon her cat or cats". Throw the word crazy in there and suddenly that young lady has turned into an old widow who has dozens upon dozens of cats (see Urban Dictionary). In the sewing world a crazy cat lady isn't defined by her age or even the number of cats she owns. Nope! Successfully sewing a wearable garment out of a cat themed fabric crowns you as the crazy cat lady in our world. Me crazy? Yep! I've got the clothing to prove it and the 3 cats...all in the house... and I'm allergic...
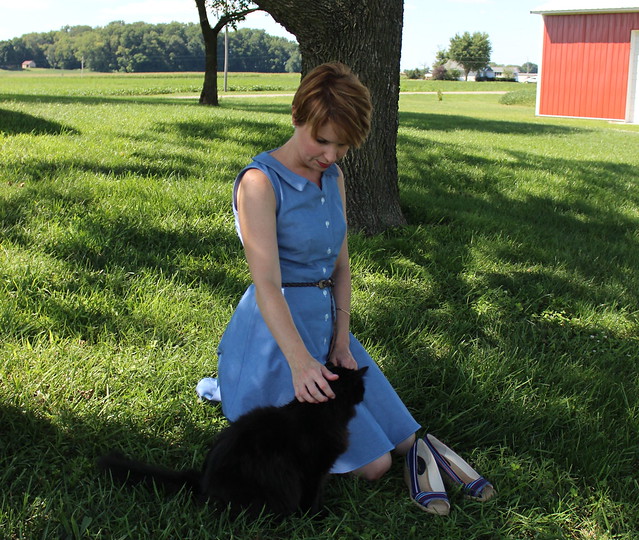
I'm finally getting some of my summer sewing list done. Funny huh? It's almost the end of August yo. Where the hell did summer go? I wanna know. Not that I'm sad about it or anything. It's been unusually cool here and I'm loving it. Making me long for cozy sweaters, falling leaves and smore's from a bonfire...not from my gas stove....
Wheee I've got something fun to start off your Monday! I hope you've all been following along with The Rambo Project if not you've totally missed out so allow me to catch you up. The Rambo Project is the brainchild of the smart & super crafty SeamstressErin. You see she's got connections, the kind of connections that gets you the goods. And what exactly are these goods?...
Only a whole lotta fabric used in the movie RAMBO III!!!!
 |
| Photo Source: SeamstressErin |
A fairly quick post tonight to document Me Made May week one and to finally blog about another Maria Denmark Olivia tee that I've had complete for several weeks now.
Let's begin with the Me Made May round up.
Let's begin with the Me Made May round up.
Since we only had 3 days this week and I decided on May 1st to join in I've only got two outfits to show ya...way better than none huh? Also if you follow me on Instagram you've seen these pics already.
Friday, May 2nd....
Sewaholic Renfrew blogged here
And a cat named Orlando that likes to stand in the sink while I get ready for the day.
Saturday, May 3....

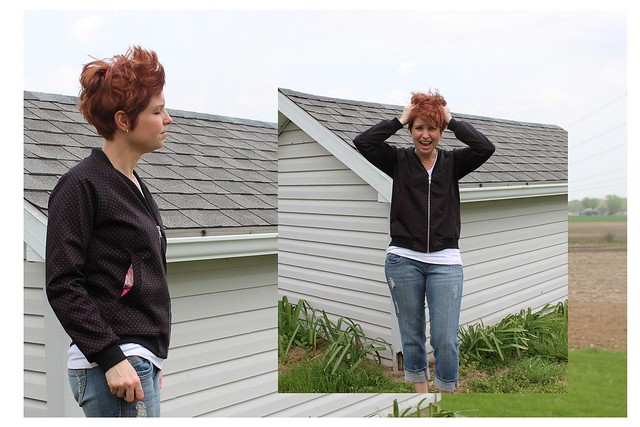
My most recent make, Papercut Pattern's Rigel Bomber blogged here. I swear I've worn this everyday since making it. I can't get enough of it. I was on my way to take a class on my new sewing machine so no explanation needed for the happy-goof face. I learned a lot about my machine. My Bernina dealer knows her stuff fo' sho! I can only hope to one day be so knowledgeable about the ins and outs of my machine.
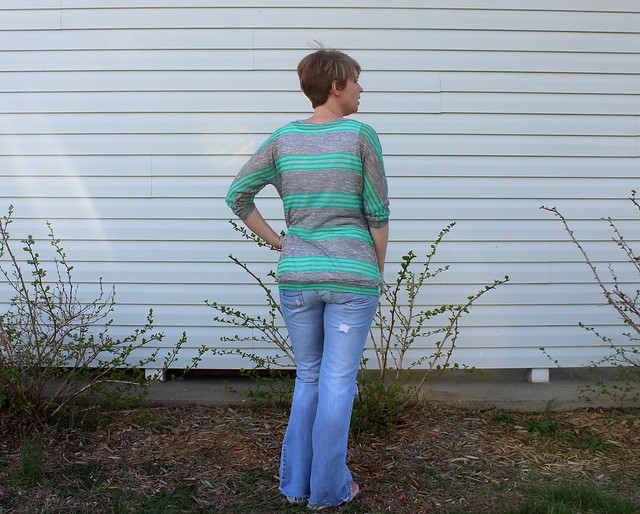
I've made a total of 3 Maria Denmark Oversized Olivia Tee's. One was a wearable muslin that I wear to bed, sure to make an appearance in Me Made May. The second one reviewed here. And here's my third and favorite version so far. Sure to make an appearance in Me Made May as well.
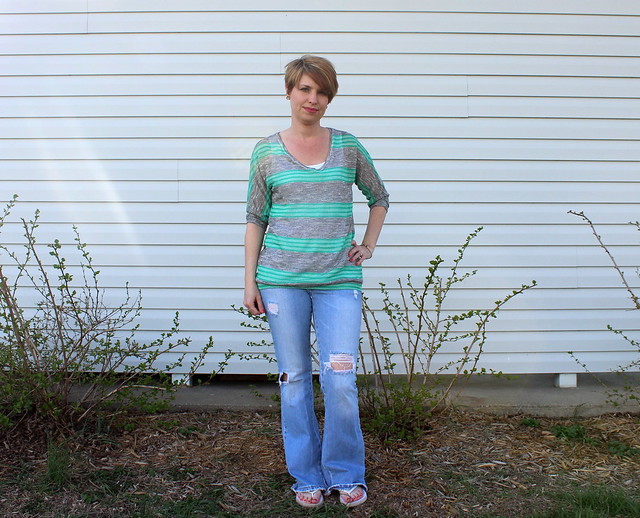
I've worn this several times and it's super comfy and breathable during warmer days. My neckline looks a little wonky and stretched out in this picture but trust me it's not. My fabric was a green/white heathered effect striped sweater knit from Fabric Mart. It's a very sheer sweater knit so I have to wear a tank underneath.
Notice my favorite pair of jeans. Yes I bought them with the holes. My husband can't believe anyone would spend money on a holey pair of jeans. I've worn my own hole in the behind. One of those where you squat down and whoops! There's your sign that they should probably, mayyybe be tossed. That sign is not big enough for me. I patched up the hole and I'm still squeezing myself into them. Please tell me you all own a similar pair of jeans.
I believe I can fly....I believe I can touch the sky...(sing with me now) think about it every night and day...spread my wings and fly away....

Vito, he's not to sure how to feel about the whole flying thing...
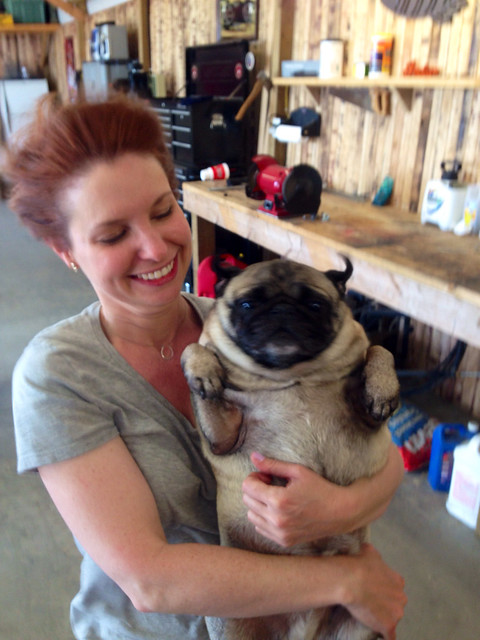
We were standing in front of my hubs shop fan cooling off. This dog cracks me up so much!
Name that tune. I had no clue what rigel meant so I looked it up..allow me to enlighten you. Rigel is the brightest star in the constellation Orion and the seventh brightest star in the night sky. Then it all made sense to me. Oh yeah ya big dummy the name of the collection by Papercut Patterns was the Constellation collection. Doh!
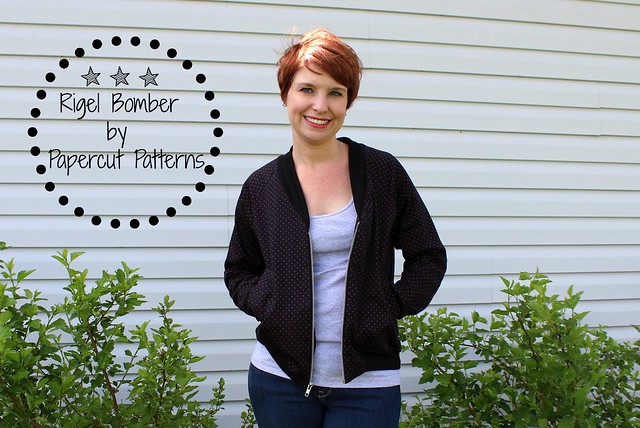
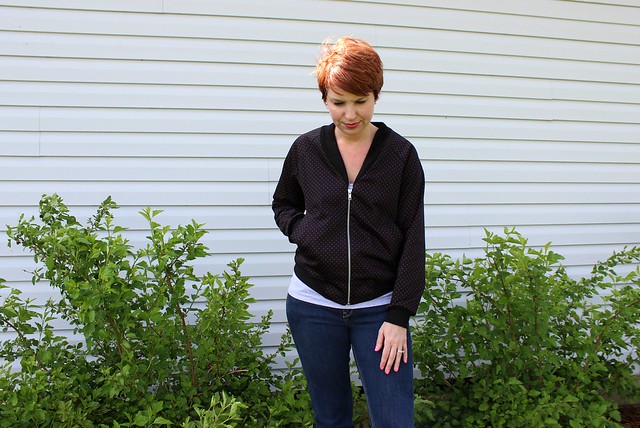
PAPERCUT PATTERNS RIGEL BOMBER
An easy peasy unlined jacket featuring welt pockets and raglan sleeves with two different options, plain or with geometric details.
The perfect lightweight jacket to wear on a cool night looking at the stars.
Ingredients:
Pattern: Paper pattern available here for $30.00
Fabric: Hot pink polka dot cotton sateen from Fabric Mart. I lined mine with a rayon challis from
Joann Fabric. The knit ribbing is from Stylish Fabric's etsy shop.
Notions: 14 inch seperating zipper bought here. Medium weight fusible interface.
Needle: Universal 80/12
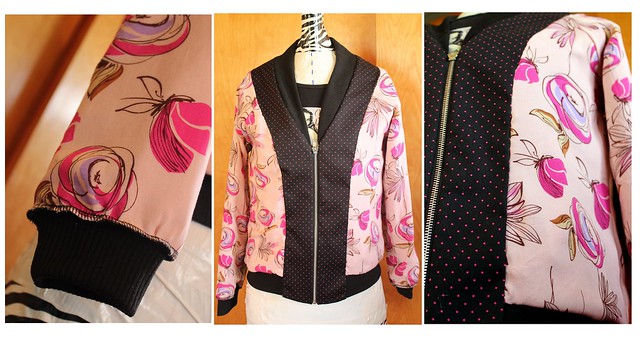
Pattern Assembly: There is no assembly required but I wanted to touch base on the paper pattern itself. I've never ordered from Papercut before and was hesitant when I seen the $30 price tag. All of the floral bombers I've seen floating around the Internet were my enablers. The pattern arrived in a sturdy cardboard envelope. Inside that cardboard envelope was another square cardboard envelope containing the pattern. The pattern itself is printed on thick paper, reminds me of a brown paper bag, not that flimsy tissue paper that rips easily. After your pattern is cut out it can be hung from the envelope that transforms into a hanger. This gives it a workroom look. Love that! You can get a visual here.
Fitting: I first traced the XXS and made a quick muslin. Not thinking or even reading for that matter I basted with a 5/8 seam allowance. The jacket was a little snug. I finally picked up the instructions and seen that a 3/8 seam allowance was included in the pattern. So I did some unpicking and basted again with the correct SA. Perfect fit! What a difference 1/4 of an inch can make! I was super happy no fit adjustments were needed.
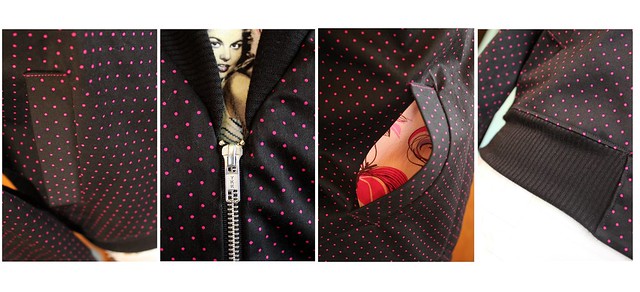
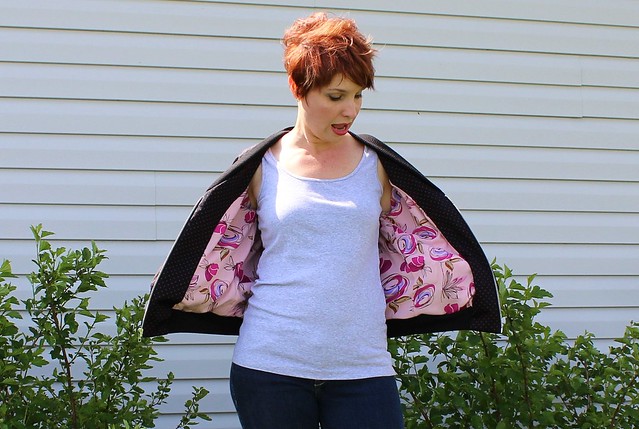
Construction: Attaching those welt pockets got a little tricky for me. I had one of those moments where I read the instructions twenty times and it just was not clicking in my little ol' pea brain. I started to get in a rage so I had to slowly step away. Got myself a little snack (ice cream it was!) and was ready to roll again. Then it kinnndda clicked for me. Well not really but I muddled through it. I think next time I'll approach it a little differently than the instructions by following this video tutorial. I also added a lining to my jacket and pretty much followed this tutorial by Elizabeth. All of my seams are hidden except for the sleeve hems. Doesn't matter because no one will see them and I serged them all nice and somewhat neat. I ran over a pin and messed up the blade..whoops. I slip stitched my facing to my lining while watching Dallas Buyers Club for the second time. Good movie and man it's crazy how skinny Matthew McConaughey had to get for that role.
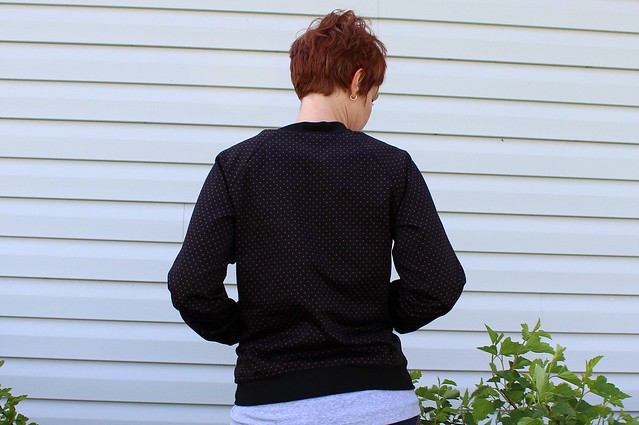
Regrets: None! However I would like to find a more stable knit ribbing for my next jacket. The ribbing I used tends to stretch out as the day goes on.
Loves: I anticipated working on this jacket for a week. Sewing a jacket seems like a long process to me. WRONG! I made this jacket in two evenings. That makes me happy! It's also very comfortable. Today was a cold and rainy day and I wore it all day while crunching numbers at my desk.
Next time: There will be many next times and I'm now looking into my next Papercut Pattern. The $30 was totally worth it. Any suggestions? For this jacket I've been thinking of my fall version and how to draft a pocket into the lining to hold my iphone. oooh that might make for a fun sewalong!
I'm submitting this on Kollabora as part of my Selfish Sewing Week entry. Is anyone else joining in on the fun? Like I need an excuse for selfish sewing. It's all me sewing all the time, bahahaha.
I have no idea what my face is doing here and the wind always playing mean tricks with my hair!
C'mon work with me here!
Different day, different pants, same relentless wind.
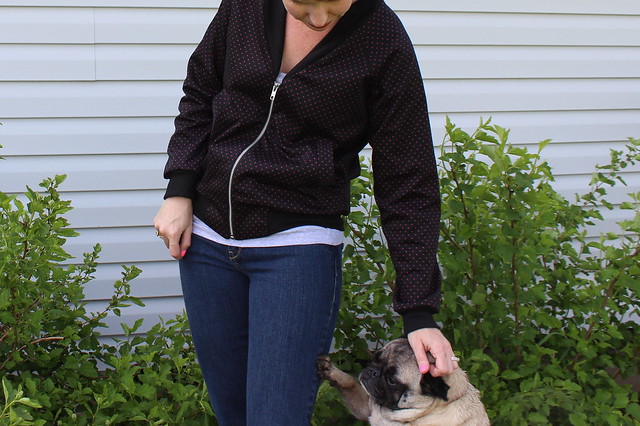
Oh, Vito wanted to pop in and say hi.. did someone say treats? I mean I did just potty over there...
No matter what you call them.. fails, wadders, ufo's, flouders, flops or f@&kups we all have them from time to time. And because you spend so much of your time working on a garment it can be very disheartening to have it flop. How you choose to recover from that can be a cautionary tale. Mine vary from full on temper tantrums, slinging profanities that would make a sailor blush to burying my head in a tub of ice cream. Doesn't ice cream solve everything?
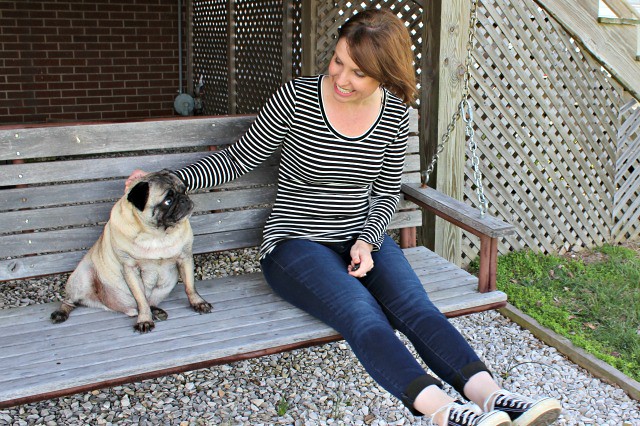
New Look 6097, a faux wrap dress, is one I have on my TNT pattern challenge list. I was excited when Fabric Mart announced their sewalong and thought this was the perfect motivation to get me to finally sew it up. I've had it stuck in my to do pile with my fabric swatch pinned to it since last Fall. Needless to say my fabric choice has missed it's season and I really just wasn't as excited about it anymore. I'm really trying to practice the art of "stash busting" so I refrained from buying anything new. Even though this was a flop for me let's go ahead and do a proper review shall we?

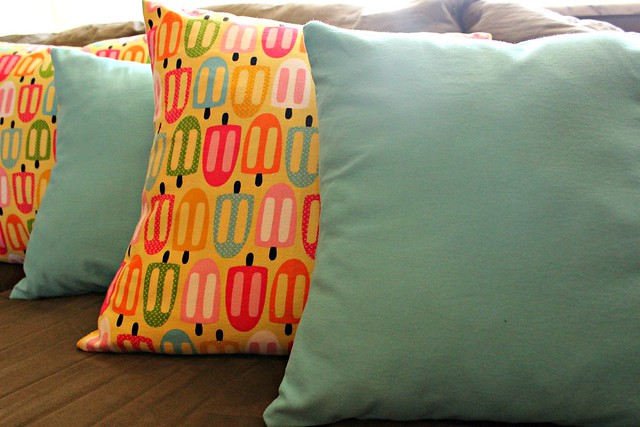
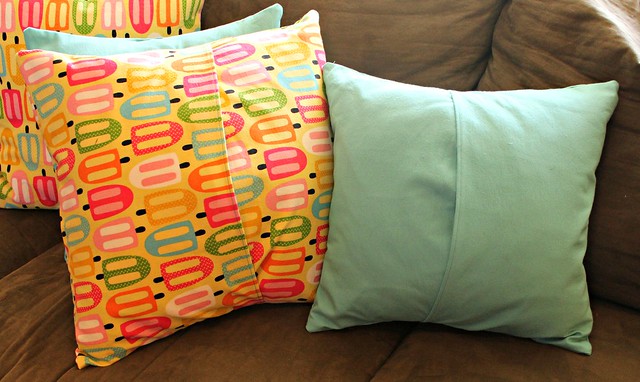
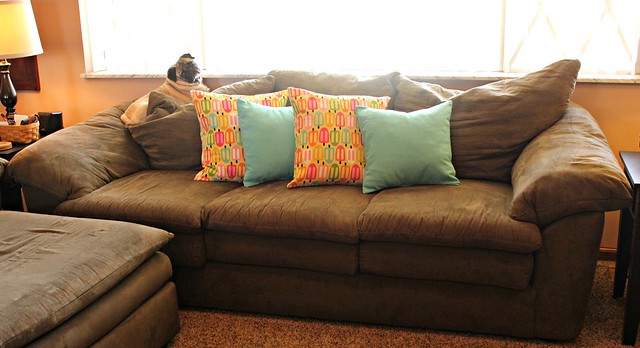
My couch is the ugliest color of green and really needed some jazzing up. I found this home decor fabric at Joann Fabric and it just makes me so happy and I want to lick my pillows. I made four envelope pillows with french seams in about 3 hours. You can find a super easy tutorial here.
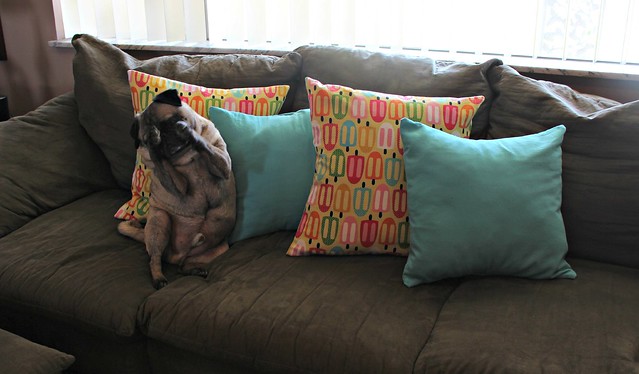
As you can see the couch gets much love....from a Pug! He's got his spot all wallered out perfect for watching and barking at passing cars.
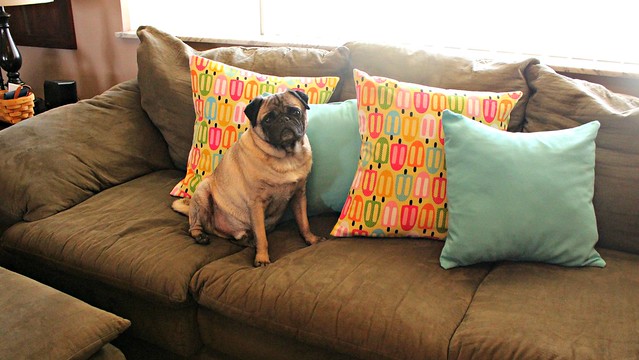
Come on! Enough with the pictures already. I'm camera shy!
New Look 6097, a faux wrap dress, is one I have on my TNT pattern challenge list. I was excited when Fabric Mart announced their sewalong and thought this was the perfect motivation to get me to finally sew it up. I've had it stuck in my to do pile with my fabric swatch pinned to it since last Fall. Needless to say my fabric choice has missed it's season and I really just wasn't as excited about it anymore. I'm really trying to practice the art of "stash busting" so I refrained from buying anything new. Even though this was a flop for me let's go ahead and do a proper review shall we?

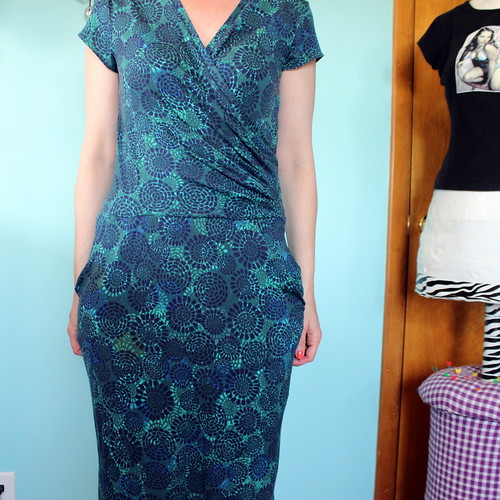
NEW LOOK 6097
Misses belted faux wrap dress with neckline and sleeve variations
Ingredients:
Pattern: Paper pattern from The Project Runway collection. Readily available at Joann Fabric.
Wait for the 99 cent sale!
Fabric: Designed for stretch knits. I used a jersey knit from Joann Fabric
Wait for the 99 cent sale!
Fabric: Designed for stretch knits. I used a jersey knit from Joann Fabric
Notions: 1/4 in wide elastic, Buckle for belt
Needle: Ballpoint
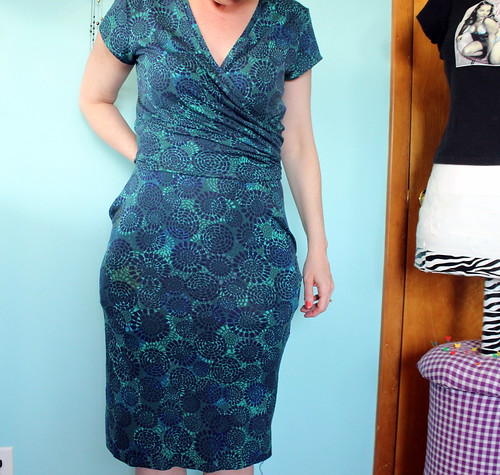
Fitting: The smallest size for this pattern starts at a size 10. I fall right into that size in Simplicity and usually have little to no fitting problems. Knits can be somewhat forgiving so I really wasn't to worried about the fitting. I failed to remember that this is one of the Big Four and we all know that the ease in these patterns can be ridic. The seam allowance is 3/8th and I ended up taking it in a total of 1inch and could still stand to take it in more. You can also see I really need to shorten the waist as well probably about a good inch.
Construction: The pattern is a breeze to construct. I didn't get as far as attaching the elastic. After I tried it on I was like what's the point. My waist is too low and can you spot my saggy pockets? I really wish I would of omitted the pockets to begin with then maybe this dress would of been salvageable. I can understand pockets with a more stable knit but in a light weight jersey they are easily distorted and kind of flop around uncomfortably under the dress.
Here's a picture of the waist pulled up to wear it should be. A little better but Oh God those pockets! My eyes, my eyes!!
This pattern has tons of rave reviews so I don't think I've given up on this pattern just yet. Next time of course I will omit those pockets. I will also shorten my waist and grade the pattern down another size.
To soothe my bruised ego I buried my head in tub of ice cream but not in the literal sense. Popsicles more like it and in comfy pillow form!
My couch is the ugliest color of green and really needed some jazzing up. I found this home decor fabric at Joann Fabric and it just makes me so happy and I want to lick my pillows. I made four envelope pillows with french seams in about 3 hours. You can find a super easy tutorial here.
As you can see the couch gets much love....from a Pug! He's got his spot all wallered out perfect for watching and barking at passing cars.
Come on! Enough with the pictures already. I'm camera shy!
I've learned it tis' better and less exhausting to recover from a sewing fail by following up not with profanities and temper tantrums but with a fun, satisfying project. Something that requires little to no brain cells and requires NO fitting!
How do you recover from a sewing fail?
Ho hum I don't know how to even begin this post. It makes me sad/mad. Do you want the good or the bad first? Ok let's start with the bad. After wearing her for three days straight (no shame) I just pulled my freshly washed Archer out of the dryer excited to wear her tomorrow.
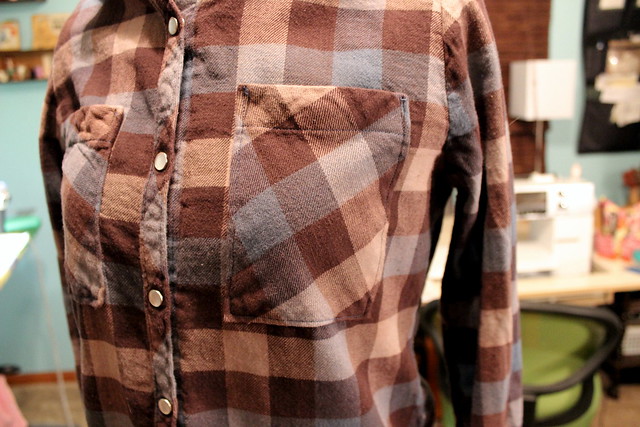
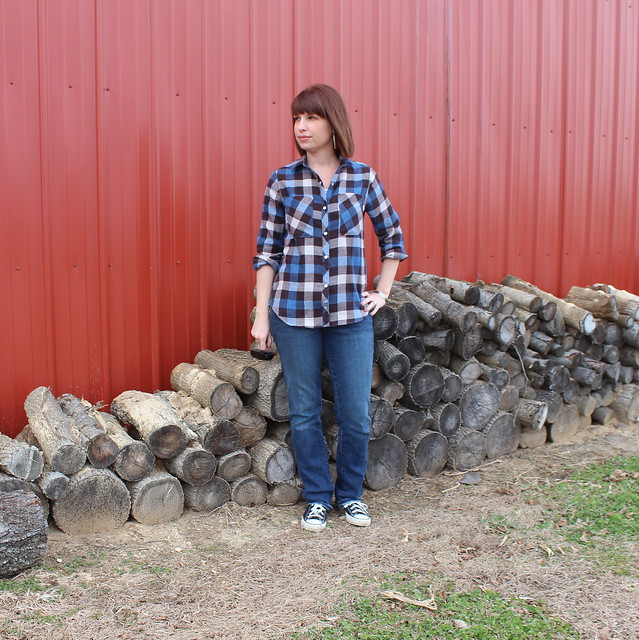
Ok so what's the big deal you may be asking yourself other than the fact that I did a piss poor job in the plaid matching department and it could use a good iron. Well let's take a gander at the before wash picture.


Well this shirt was fun while it lasted. I do have some plaid from Mood that I'm going to make my next one out of. I promise to do a better job at the plaid matching. My husband has requested a shirt now. He eyeballed mine the whole three days I wore it and I kept telling him to stop molesting my shirt with his eyes, it wasn't going to fit him! I'm debating on what pattern I should use for him. I've seen the Colette Negroni and and also Simplicity 1544. Let me know if you've used any of these patterns.
Excited to have the next three days off. My plans are lots of sewing to ring in the New Year. How will you be celebrating?
Aaah it makes me sick! Look away, look away!!
I don't understand what happened with the color. I prewashed this fabric and after I wore it I washed it in the same manner as I did before. Nothing else in the wash with it was discolored. It's like it faded all over itself. The "Shanni Made" clothing label on the inside was even ruined. I knew and expected it to fade a little but this is a major difference. It doesn't even look like the same shirt. I purchased this flannel from Joann Fabric. I've really been disappointed with their fabric quality with the last three or four items I've made. I'm totally not upset over the money involved but more so my time and the fact that I absolutely loved this shirt (I did wear it three days in a row!) When you put so much time and effort into a project it's really disheartening to have it ruined only after one wash.
Ok enough sulking. Erase that hideous "after wash" picture above from your minds. Let's take a look back at when my shirt was happy and let's talk about how awesome the Grainline Archer pattern is!!
This is my second Archer and certainly NOT my last. You can see the first one I made here for the Fabricista Challenge. The only changes I made to this one was shortening the shoulders an inch and I used pearl snaps instead of buttons.
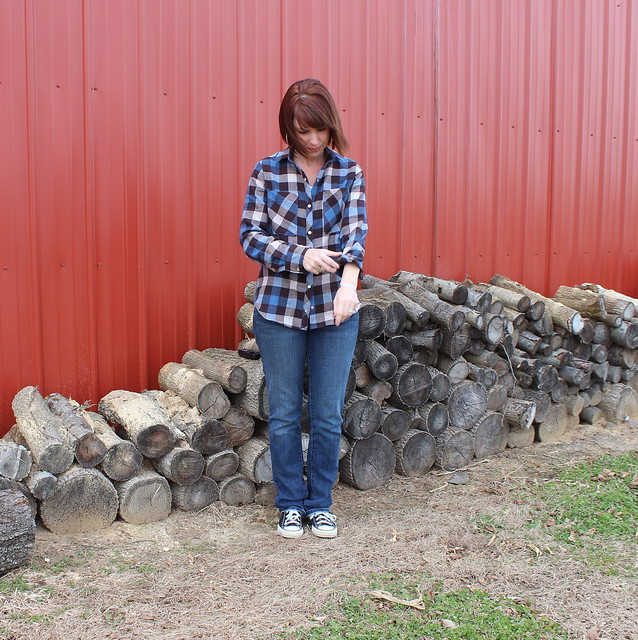
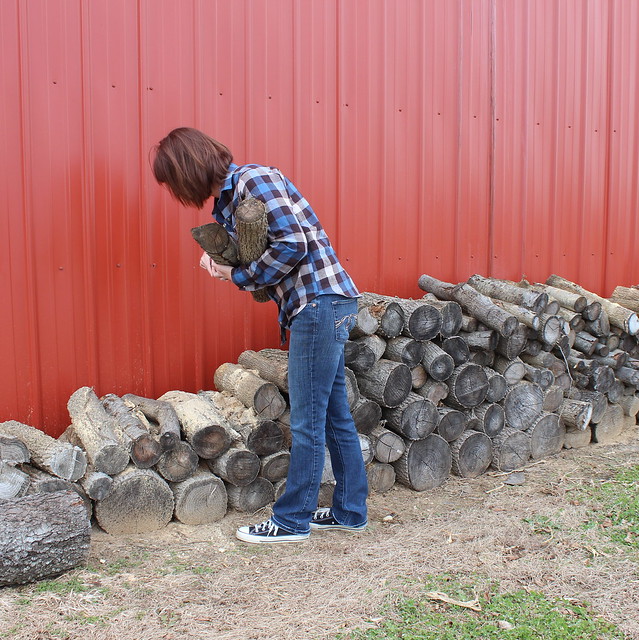
These pearl snaps were a real bugger to get on. I managed to crack the first one because I pushed to hard (in fear that it was going to fall out). I used the Dritz snap pliers and I just found them rather awkward to use. Whenever I would try to push the snap into place it would fall out of the pliers. They have little rubber bumpers to avoid this problem but I found them even harder to use with these in place. I know practice makes perfect and if anyone has any tips on using these please share.
Jen has a great sew along of the Archer on her blog that I've followed each time I've made this pattern. Lots of helpful pictures and even a few videos when it comes time to attach the collar stand. Attaching the collar stand was pretty tricky for me. I seemed to have gotten it correct the first time but the second time around I could just not get it right. I ended up making up my own way. Next time I'm gonna give Andrea's tutorial a try which is attaching the collar in a different order and looks like it may be a little easier for me.
I hate to admit it but I made an effort to match my plaid. Boy I really did a horrible job. I tried something different this time and cut my pattern on a single layer of fabric. I read where others have had better luck with plaid matching this way. I'm not quite sure what happened.... My only piece of advice to you on this, don't drink and match plaid.
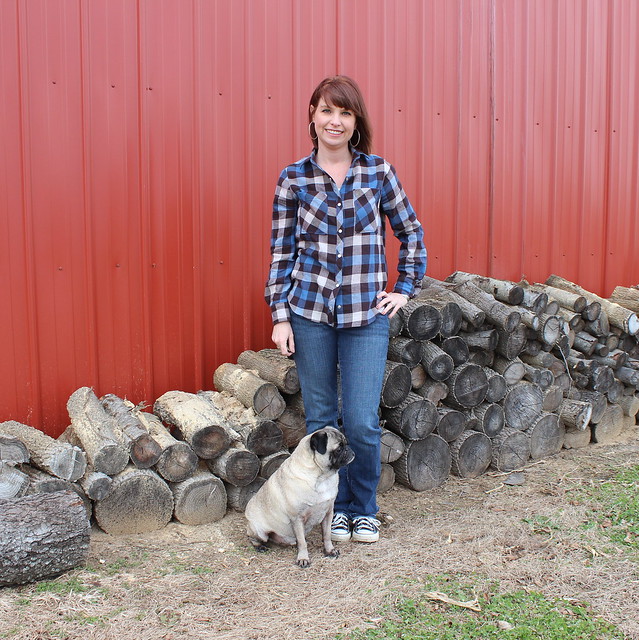
Well this shirt was fun while it lasted. I do have some plaid from Mood that I'm going to make my next one out of. I promise to do a better job at the plaid matching. My husband has requested a shirt now. He eyeballed mine the whole three days I wore it and I kept telling him to stop molesting my shirt with his eyes, it wasn't going to fit him! I'm debating on what pattern I should use for him. I've seen the Colette Negroni and and also Simplicity 1544. Let me know if you've used any of these patterns.
Excited to have the next three days off. My plans are lots of sewing to ring in the New Year. How will you be celebrating?

All snuggled in my Christmas pj's it just wouldn't be Christmas without watching my favorite Christmas movie... A Christmas Story. If you haven't seen the movie well then do yourselves a favor and just watch it....I triple-dog-dare you!
Vito and I want to wish you a very Merry Christmas and a Happy New Year! Much love to you all. Thank you all for reading and supporting this little bitty blog. It's been a great year in the world of sewing. Looking forward to what the new year brings.
I hope you all get plenty of time to relax and enjoy time with your loved ones. Vito hopes you all get plenty of treats in your stockings and that you made sure and left plenty of treats for your four legged friends...good ol' Vito, always looking out for others..wherever treats are concerned.
and...Be sure to drink your Ovaltine... (I could go on forever with The Christmas Story quotes)
Peace, Love and Treats,
Shannon & Vito
xoxo

So if you follow Goodbye Valentino I'm sure you've seen her invitation to join in on the Ready~to~Wear Fast of 2014. That means no store bought clothes for a whole year people!! (underwear, shoes and socks permitted) I was all in as this is something I've contemplated for a long while. Before I started sewing I was a shopaholic. Fast fashion was like a drug to me. Totally addicted my lunch hours were spent buying cheap clothes that I really didn't need. Once I started sewing some 2 years and 6 months ago I really started looking at what I was buying and at what cost. I didn't stop buying RTW completely though. Like a drug addict I had to ween myself off and still suffer from withdrawal every now and then so sue me. Since I've started sewing one thing people ask a lot is, "Is sewing your own clothing cheaper?" And a lot of people assume that it is indeed way cheaper. I mean why would you waste your time sewing the Lady Skater when you can just go buy it at Forever 21 for $8.00? Why not save yourself the time and frustration. I mean there has to be some sort of payoff, so making you own clothing must equal out to pennies right?! Uhm...no...yes....sometimes?? First off the major payoff for me is the satisfaction I get realizing I made something with my own two hands and by golly it fits and looks great! Sure there is some frustration that might go along with it but that's a part of the process. Working through those frustrations (like fit and the secret love affair I have with my seam ripper) is what's really rewarding. (Bonus points for using fabric I found on clearance for $3.00 a yard.) No matter what it cost me $3/yd to $10/yd, sweat, tears, hair loss... in the end it was a learning experience and I enjoyed making it AND to be honest I'm really freaking pleased with myself about it too. We too should also realize not all RTW is Forever 21 prices. If your looking at THIS Skater dress for $248, well then hell yes sewing my own is cheaper, and I'm definitely gonna get a lot of satisfaction outta that!
Besides cost there are lots of other pros and cons we could discuss on the topic of RTW vs Handmade but I don't want to travel down that road right now because I have some other things to share. Instead I want to know.. Why do you sew? Do you sew to save money or simply because you enjoy it? What are some of the pros and cons you see with RTW and handmade? Will you be joining in on the RTW Fast of 2014? Please share!
I Shannon Jordan, solemnly swear to buy NO ready to wear clothing in 2014 (with the exception of shoes and underwear and I do feel I should allow for some thrifting for refashoning purposes).
Wow I felt myself breaking out into a cold sweat as I typed that. I desperately want to go on a shopping binge this weekend.

On with the other things I wanted to share. I haven't sewn any clothing since the FM competition. I've sort of taken a break from clothing and have been keeping busy with alterations and Christmas gifts. Last night I made Vito a pair of snow booties. Here in Indiana the temperature is frigid and there is snow on the ground (and according to the forecast more snow and ice to come, boo!) Watching poor Vito trying to find a spot to relieve himself makes me feel bad for him. By the time he's done his poor little paws are so cold they are numb and he's walking on them like he's got glue stuck to them or something. Quite a sight! So I stopped at Joann Fabric on my way home from work last night and picked up some fleece from the remnants bin and followed this tutorial from Instructables.com. The result was not pleasing to Vito as you will see in the video below. They were a pain to get on his feet. He didn't want to cooperate and I realized I'm going to have to wake 20 minutes earlier in the morning to have time to take him out before work if I want him to wear these ridiculous contraptions. Once he got outside in them he just stood frozen like a statue. So I don't know if these were a total waste of time or not. I'm sure it will take him some time to get used to them and it sure makes for a good laugh watching him walk in them so not a total waste. Enjoy the video. (not the greatest quality, it was taken with my iphone).
Well it's finally here peeps...the final challenge of the Fabric Mart Fabricista Challenge. Here it is..
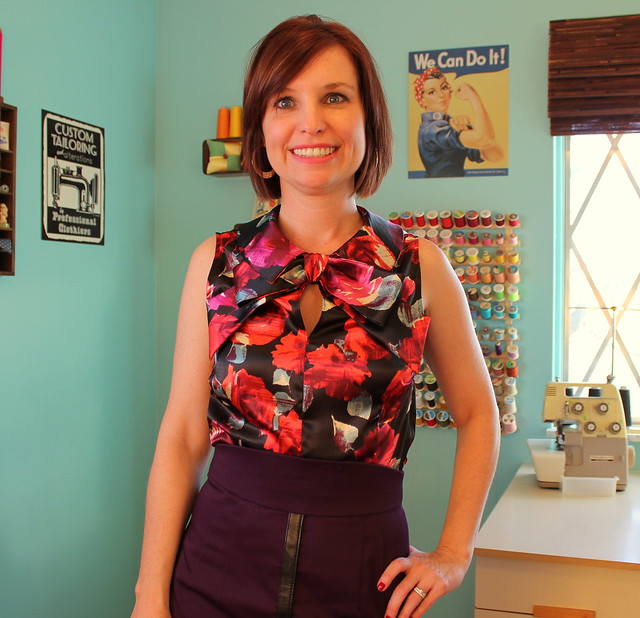
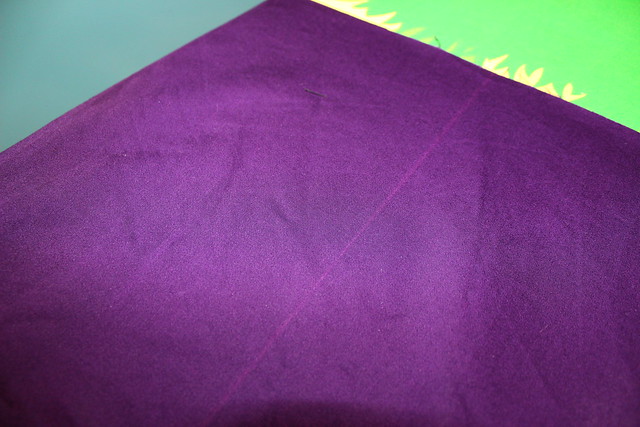
I paired this top with a blackberry cotton sateen pencil skirt. I used the pencil skirt pattern out of Gertie's New Book for Better Sewing. I love this skirt style. It was very easy to assemble and Gertie gives all kind of variations to it in her book. When I was beginning to assemble my skirt front I noticed a line of discoloration running down the middle of my fabric. Argh Joann Fabric this is the third time now!!
3 Piece Outfit/Collection
Challenge: Create 3 pieces that can be worn together as one outfit or 2 outfits that could be worn to the same event. Using the Pantone Fall Color Chart, select 2 fall colors to inspire your outfit.
You will be judged on creativity, craftsmanship, use of color, and fit.
The First Place Winner will receive $25.00 a month for one year to spend on fabric at Fabric Mart (worth $300!) Plus! You will become a Fabricista on our blog!
The Second Place Winner will receive a $100 Gift Certificate and a Julie's Picks Membership.
The Third Place Winner will receive a $50 Gift Certificate and Julie's Picks Membership
 |
| Source |
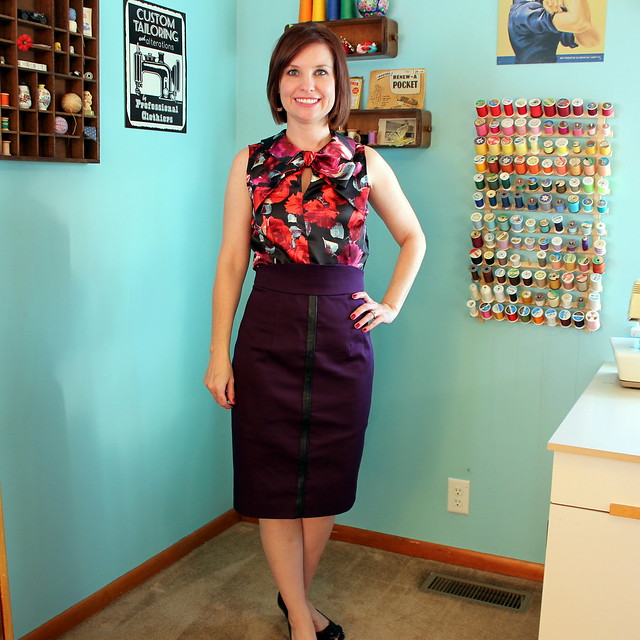
The two colors I chose to focus on were Acai and Samba. Since I'm also on a time crunch, working 40 hours a week I chose to make a 3 piece outfit instead of the collection. I had an idea I wanted to make a jacket (I seriously tried talking myself out of it several times) and I needed all the time I could get to focus on that since it was my first.
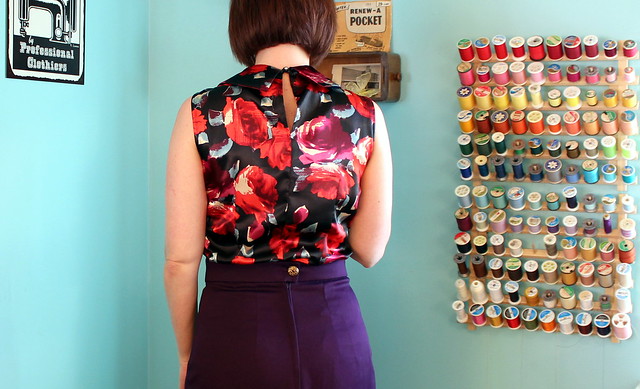
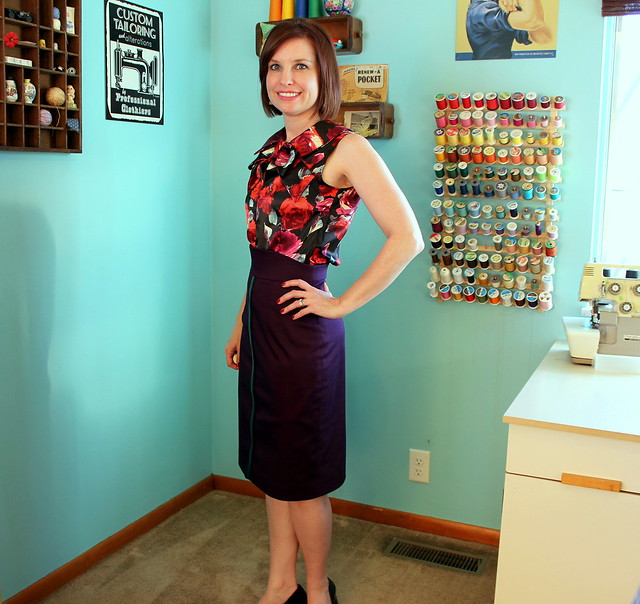
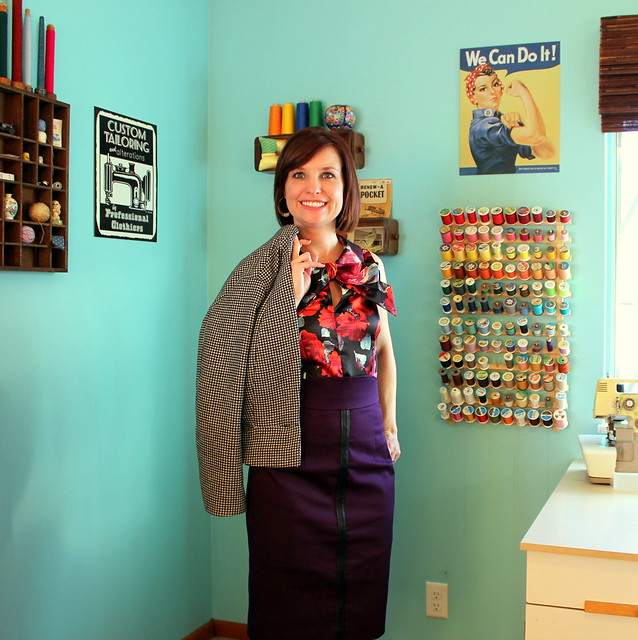
Choosing my two colors all happened by chance. I would of never thought to pair red and purple together but I have to say I really love how the two look together. I spotted these two hanging out on a beautiful floral charmeuse. I used retro Simplicity 2154 to create the bow blouse. I cut my usual size 10 in Simplicity and didn't need any alterations. The back neckline has a keyhole button closure and there is a side lapped zipper. The bow is lightly interfaced to give it some structure.
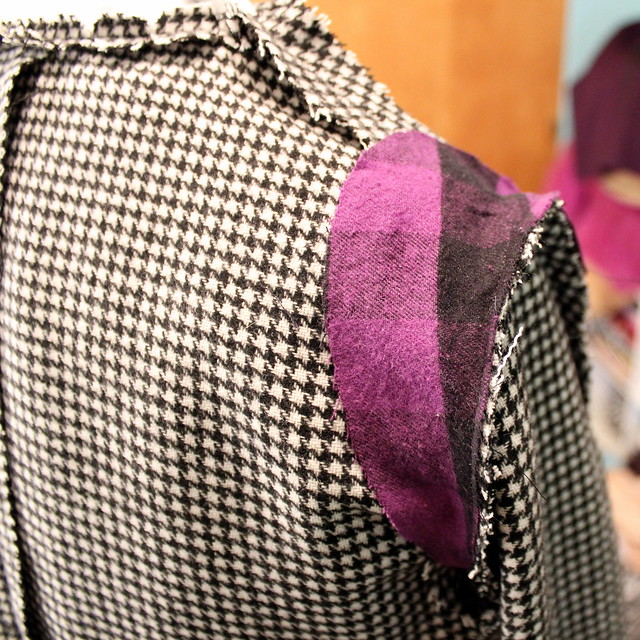
I paired this top with a blackberry cotton sateen pencil skirt. I used the pencil skirt pattern out of Gertie's New Book for Better Sewing. I love this skirt style. It was very easy to assemble and Gertie gives all kind of variations to it in her book. When I was beginning to assemble my skirt front I noticed a line of discoloration running down the middle of my fabric. Argh Joann Fabric this is the third time now!!
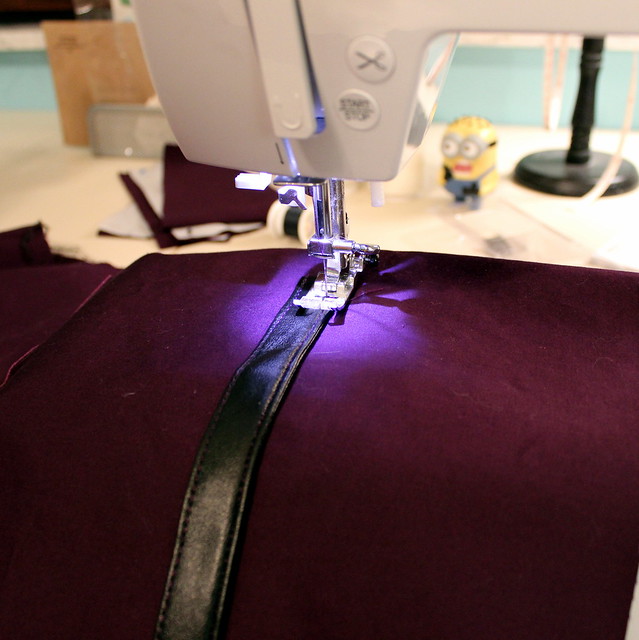
Noticable huh!? I had no extra fabric to spare so I got creative. I found a faux leather strap from an old handbag and attached that to the front covering the line. An unexpected fun detail added to my skirt.
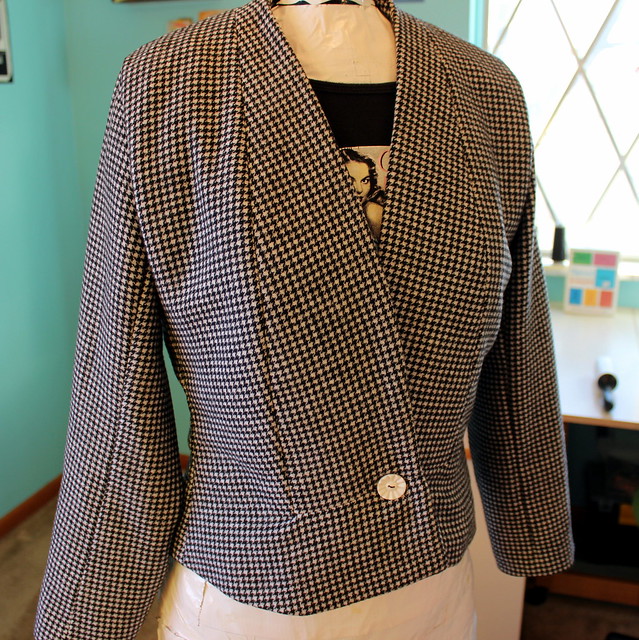
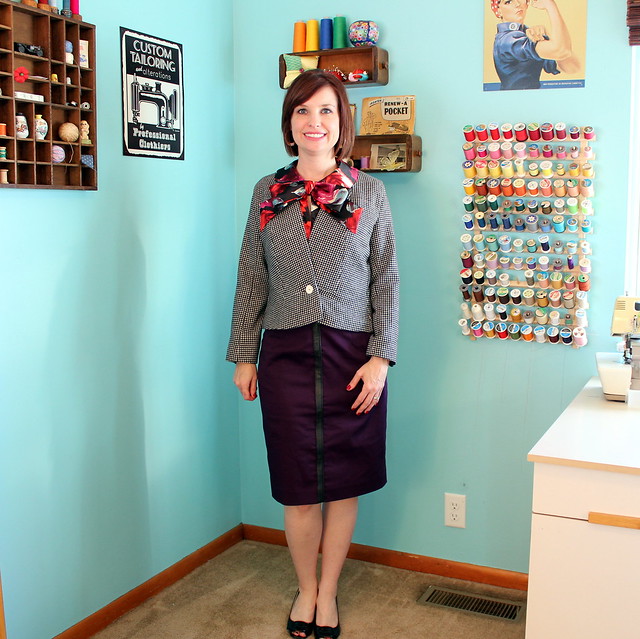
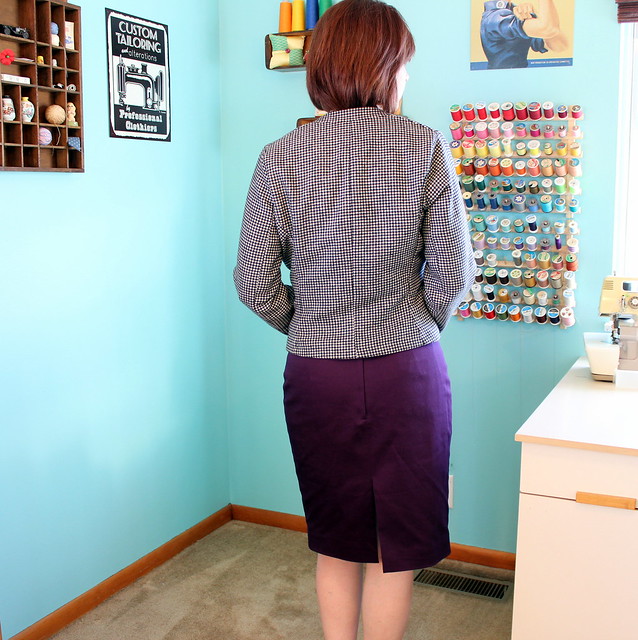
For my third piece I chose Burdastyle's long sleeve blazer pattern 106a. I went back and forth between cardigan - jacket. A plain black cardigan would be easy but I really wanted to push myself and make something I hadn't before. Plus once I picked up this wool houndstooth at Joann Fabric it wasn't going to let me leave the store without him.
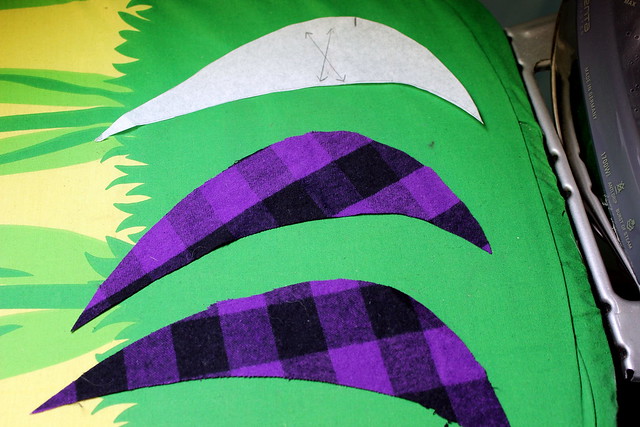
This pattern was rated novice but I always find Burda patterns hard to understand. I cut a 36 and the only alteration I made was narrowing the shoulders by 1 inch. The pattern called for shoulder pads but with the weight of the wool I thought sleeve heads would suffice. I drafted my own out of flannel using the tutorial in the Colette Anise companion I had purchased a while back. (Yes I considered making the Anise for this challenge but I decided I didn't want to rush myself through it)
The sleeve heads help to support the sleeve as to keep it from caving in. They also keep your seam allowances from showing on the outside of your jacket. And with the combined weight of the wool yay for not having to use shoulder pads. I despise those things!
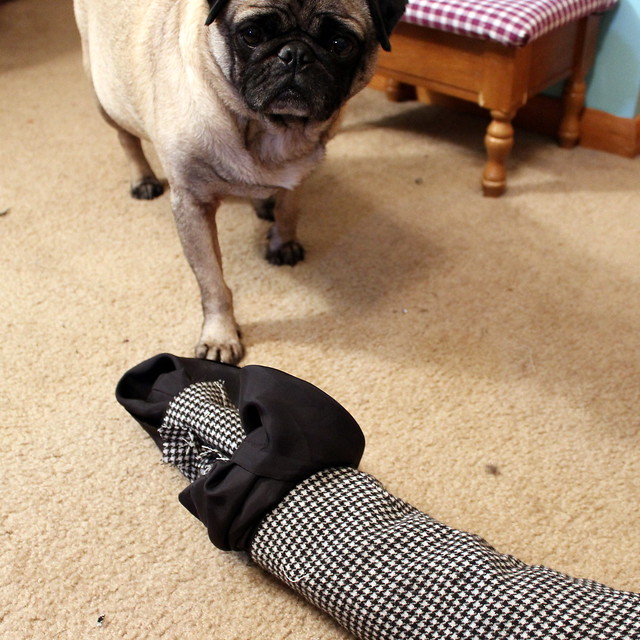 |
| Vito says, "What in the wild wild world of sports is a going on here?" Yes Vito is a Blazing Saddles fan |
Reading other reviews of this jacket lead me to Jen from Grainline Studios tutorial on how to bag a jacket lining. This is a wonderful tutorial and proves to be much easier and quicker then how the pattern suggests you attach the lining (which I kinda glazed over). It was actually the funnest part of making this jacket for me. The entire time your thinking, "This isn't going to work." And then like magic with a little pulling and tugging your sausage roll turns into a fully lined jacket!
I'd like to thank everyone at Fabric Mart for hosting this challenge. It has been a lot of hard work at times but very rewarding. I've learned a lot, grown a lot in my skill and have a lot more clothes to wear! I've met some very nice, talented seamstresses who were all very supportive. And I could never forget a big thank you to all of you lovelies who supported me and cheered me on along the way.
XOXO!!
To see the other two contestants entries and vote for your favorite please *click here*

