
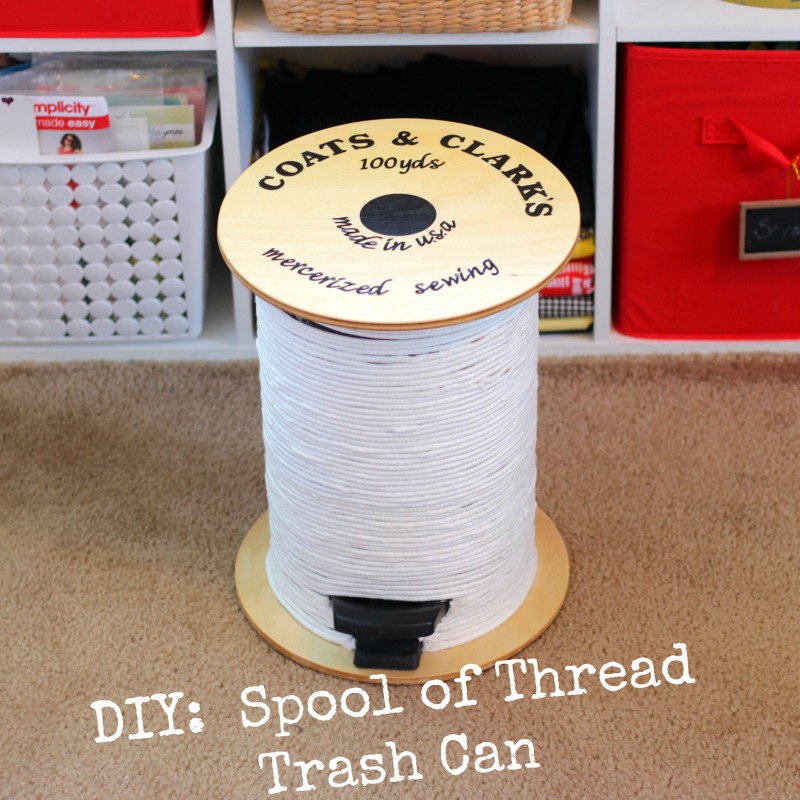
DIY: Vintage Wooden Spool Inspired Trash Can
Monday, April 25, 2016
Whoa guys I feel like it's been a long while! We had a terrible windstorm that knocked our internet out for 2 weeks. We had winds in excess of 60 mph! Yikes!! I have never seen anything like it before. Thankfully the wind didn't blow me away and I'm here to share with you a fun DIY project. Man o man I so wish I could say I'm the genius behind this idea but I am not. This is one of those projects you see and your like, "Man! Why didn't I think of that!?" This idea was shared by a fellow member of a sewing group I'm in on Facebook. Ugh, I'm in so many sewing groups, I'm sorry I don't remember the exact group it was but she had made one for her sewing room and shared a picture. I thought it looked like a pretty fun and easy project to recreate so I thought I'd show you how I made mine. I think every sewing nerd needs a trash can like this!
Here is a rough list of supplies. Some of these are optional and some I didn't even use. I had a few aha moments and swapped them out for something better.
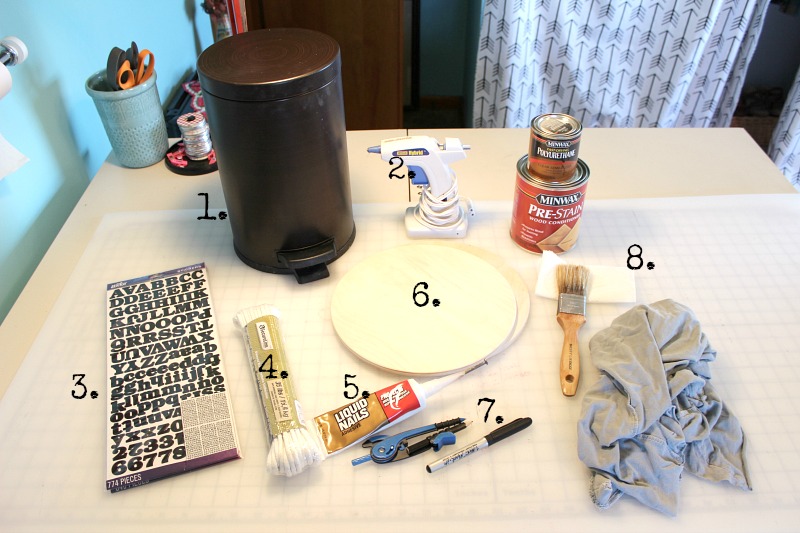
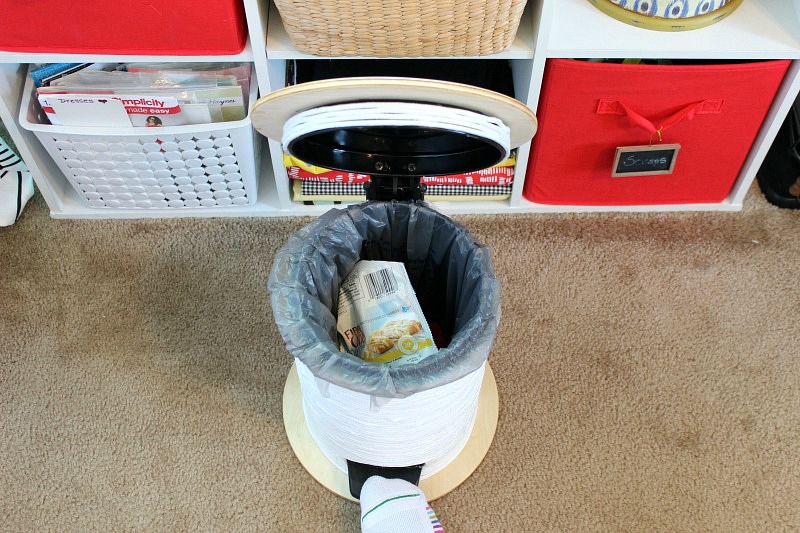
- The most important piece, a trash can with a hands free lid opener. I purchased one at Walmart for about $8 bucks but ended up swapping it out for my bathroom trash can pictured here. The Walmart can had a plastic lid and because of the way I assembled this I didn't think the plastic lid was going to be strong or sturdy enough for the wooden top. My bathroom trash can was all metal and I felt was a better choice.
- Hot glue gun...and A LOT of glue sticks!
- Alphabet stickers for the label. Mine are from JoAnn Fabric.
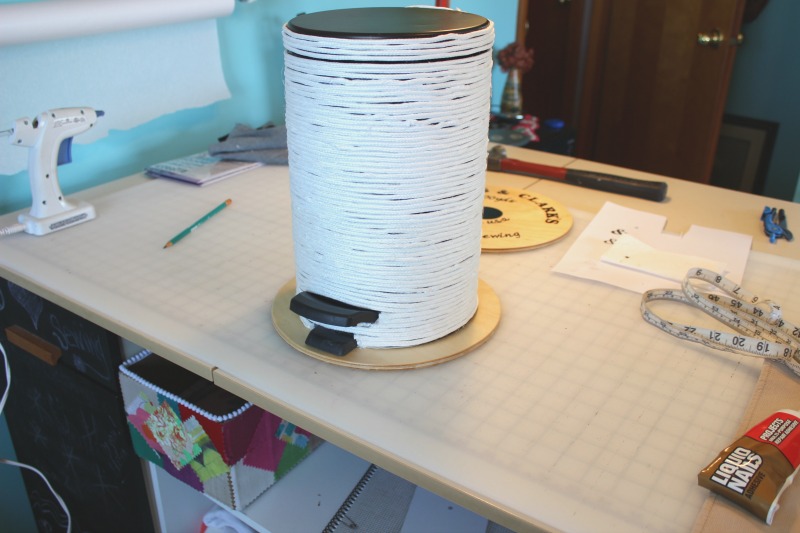
- Utility rope. I purchased mine at Walmart. I chose boring white but any color would work.
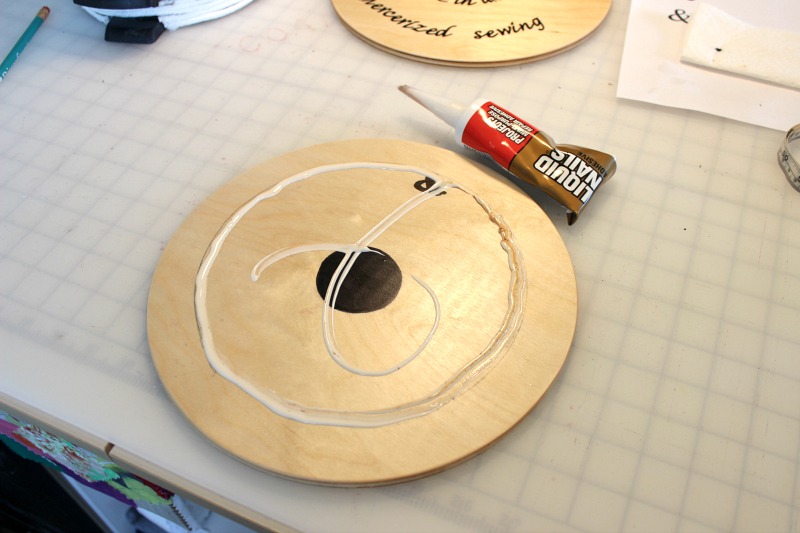
- Liquid nails
- 2 wooden circle plaques. I purchased mine online from Walmart here. You want the size of these to be proportional with the size of your trash can but not too thick that they put to much weight on the lid and make it hard to open.
- Protractor and black marker...fails. These were swapped out with better options that I'll talk about in the instructions.
- Polyurethane top coat. This is important to keep your stickers secure and to protect your wood. The pre-stain wood conditioner below it you don't need. You only really need this if you wanted to stain your wood to prevent it from looking blotchy. I ended up deciding not to stain my wood and left it natural so it would resemble a vintage wooden spool.
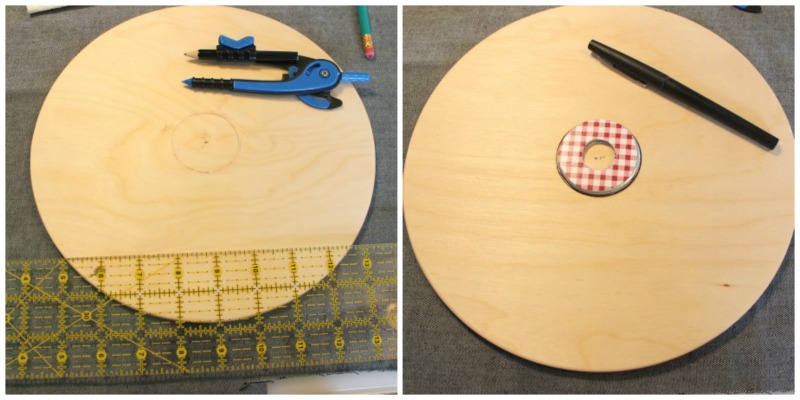
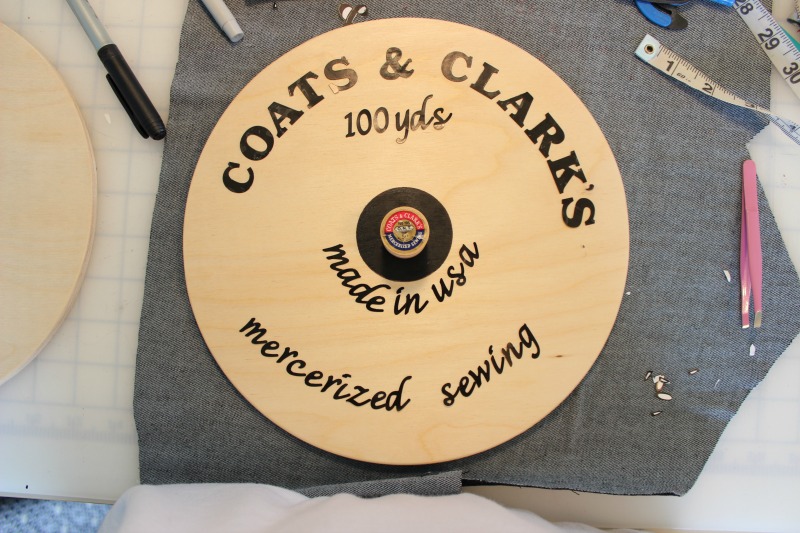
To create the circle in the center of the spool I first found my center and tried to use my dollar store protractor to create a circle. Some things are meant to stay at the dollar store. This is one of them. It was a lot easier to use my washer pattern weight to create a circle. A paint pen vs a black marker to color in the circle is also a lot easier.
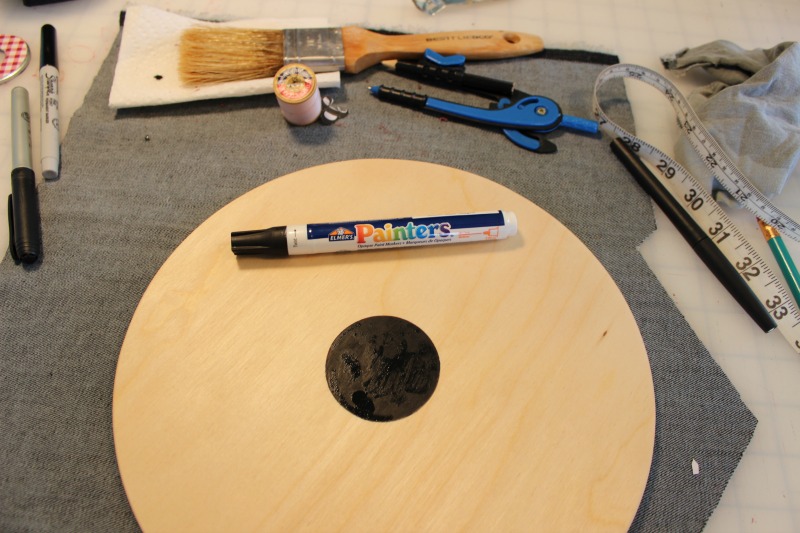
I used a vintage Coats and Clark spool of thread and mimicked the label. I spent an unreasonable amount of time getting my letter spacing to my liking. My labels didn't have the & sign so I had to make my own. I just printed one off the internet, traced it on the top and colored it in carefully with my paint marker. Once I had the letters placed where I liked them I put a coat of polyurethane on the top. I also put a coat of polyurethane on the bottom part of the spool.

Now comes the most time consuming part...hot gluing the rope around the trash can so it resembles the thread. I wish I would of counted the number of glue sticks I went through. Halfway through I ran out of rope and had to make a run to Wally World for more.

One eternity later.....
Now that the fun part is over your ready to liquid nails your top and bottom to the trash can....making sure to hide my goof ups on bottom.
Now how cute is that!? A vintage wooden spool trash can.
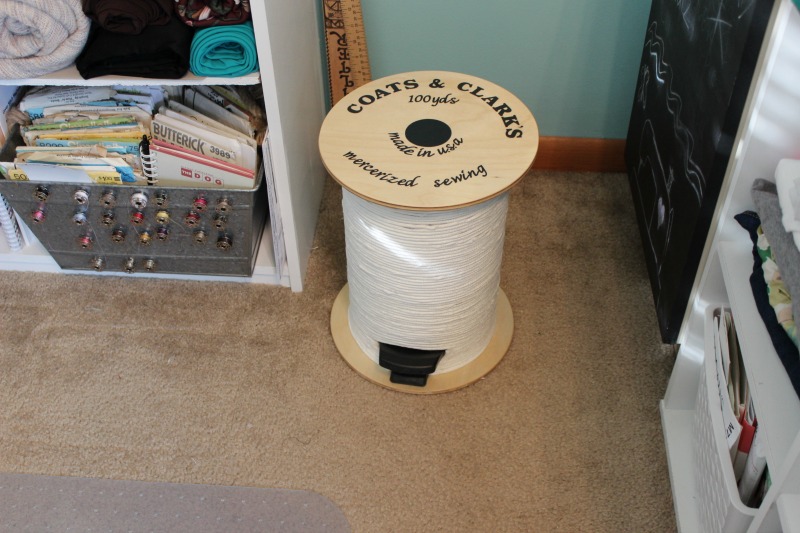
I believe the obvious use for this is as a trash can for your snack wrappers, but you could also use it to store fabric scraps.
Despite my hot glue burns this was a fun project to recreate. I hope you give it a try!
How are you all spending your week? Any Spring sewing projects on your table? I'm finally cutting out a chambray Mila. The first piece of Spring sewing I've been able to get to. Hopefully it'll be done before Spring is over!
Have a great week all!


0 comments