Pattern Testing: The Afternoon Blouse
Sunday, April 13, 2014
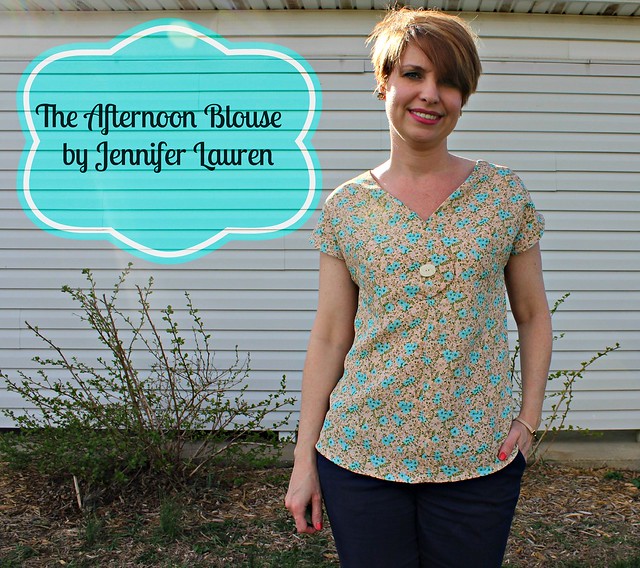
If your anything like me you spend a lot of time daydreaming. "Some say I'm a dreamer...Well I'm not the only one." My work day consists of a lot of daydreaming in between analyzing all those numbers. One of my top daydreams...going home that evening and making a new top to wear to work the next day. Time is usually against me and I haven't been able to make that dream a reality just yet. BUT I'm really optimistic because I've been introduced to a pattern that will allow someone like me, who's slow as a snail, make that happen and I've been fighting with time all week to finally have the chance to introduce this pattern to you all. *big gasping breath* I was more than excited when one of my favorite bloggers, Jennifer Lauren asked me to be a tester for her first ever pattern. So with out further ado I give to you...
Jennifer Lauren Afternoon Blouse
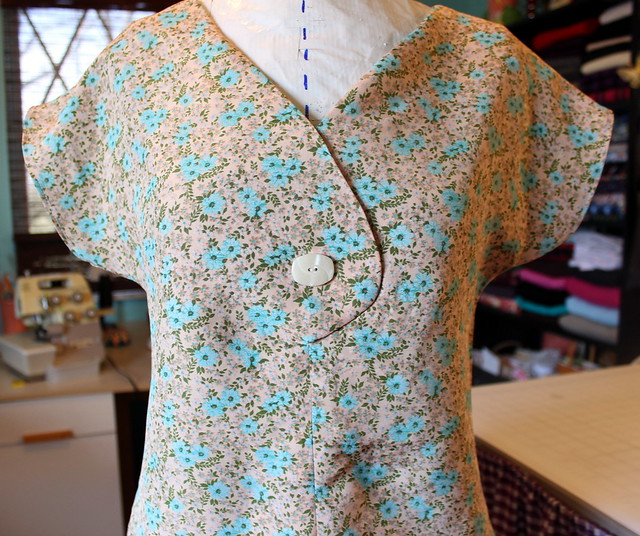
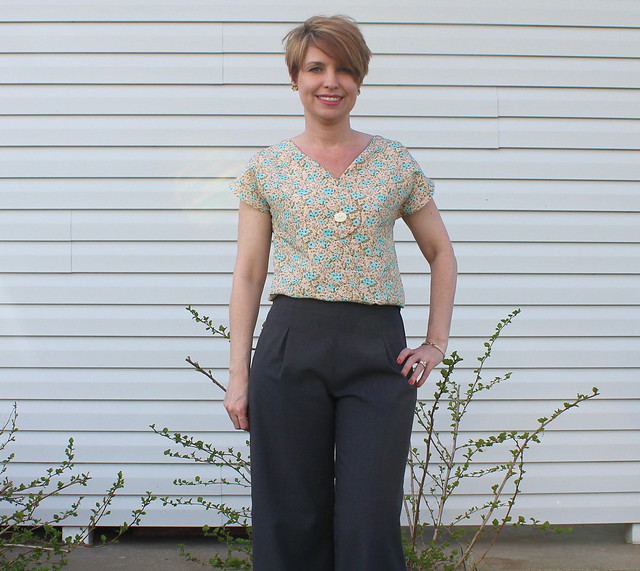
An easy vintage inspired summer blouse with kimono sleeves and two decorative neckline options. This blouse can be whipped up in yes, just an afternoon! Wear it tucked into skirts or trousers for a professional put together look or wear it loose with capris or jeans for a more relaxed look.
Ingredients:
Fabric: Anything with good drape such as lightweight
cottons, silks and rayons. For a crisper blouse use
medium weight fabrics like linens or quilting cottons.
I used a medium weight mystery fabric from my
stash. I'm really unsure of the content but it was slick
and hard to cut and also makes that swishy sound
when it rubs together.
cottons, silks and rayons. For a crisper blouse use
medium weight fabrics like linens or quilting cottons.
I used a medium weight mystery fabric from my
stash. I'm really unsure of the content but it was slick
and hard to cut and also makes that swishy sound
when it rubs together.
Notions: Light to medium interface and one button, size of
your choosing
Needle: For my fabric type I used a microtex needle.
Pattern Assembly: There are 24 pages to this pdf but that doesn't mean you have to tape all 24 pieces together, why, because Jennifer is a genius and made it easy on all of us. Simply choose which version you want to make and print out only those sections needed. I ended up assembling the whole pattern because I knew I'd eventually want to make both versions but what I loved is that the front and back pieces were printed in their own sections. I was easily able to tape each section on my cutting table. Usually I end up on the floor taping together one gigantic piece. Yeah I'm sure we've all been there.
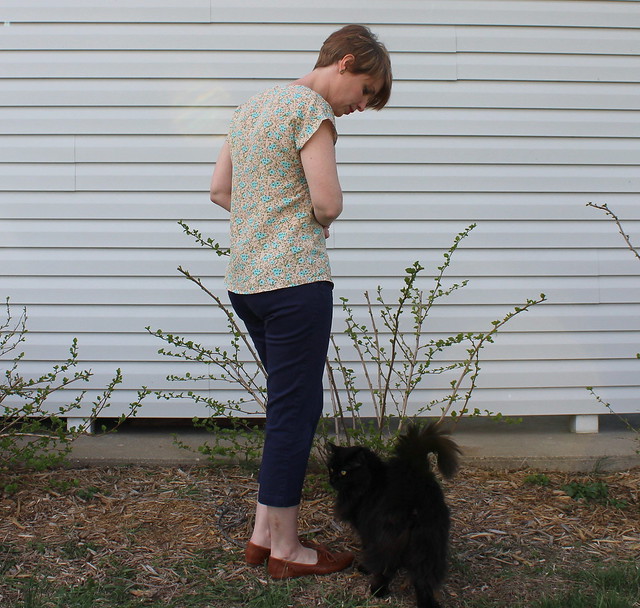
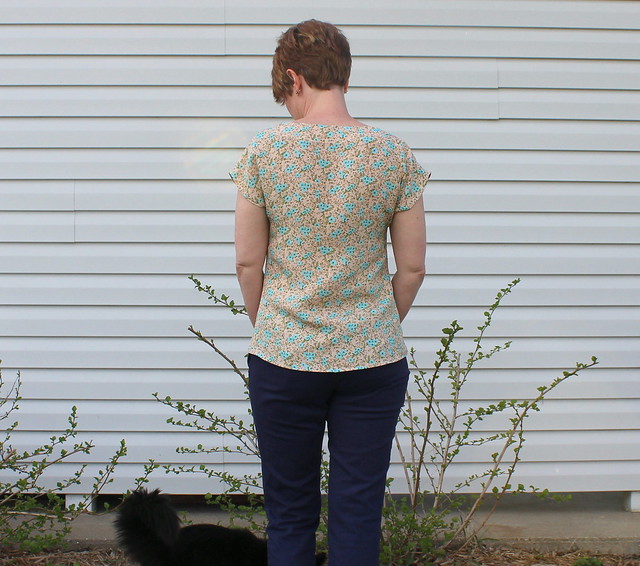
Fitting: My measurements fall into the size 8 but I decided to cut a 6 since this blouse was made with quite a bit of ease. The extra ease is because it's intended to have a blousier fit when tucked into pants. With the type of fabric I was using I didn't think it would really look well tucked in (only so so on the drape factor). I wanted a more fitted look when wearing it loose.
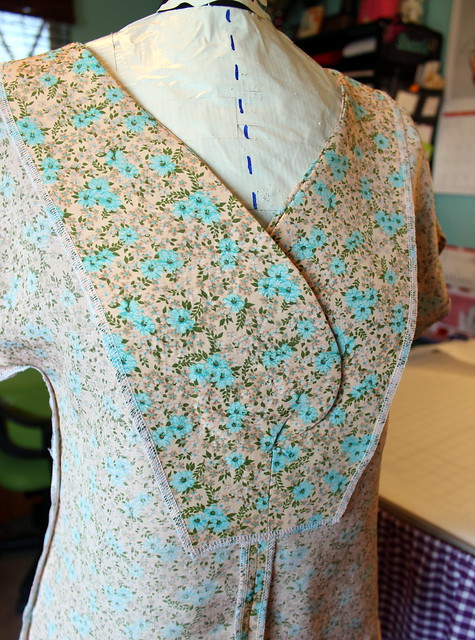
Construction: The only part of the construction that can get a little tricky is when are attaching the facing to the decorative neckline. As long as you slow down and take your time, Jennifer's instructions and pictures allow for no errors. My front and side seams are serged as well as my facing edges. I used a french seam on the shoulders. I intended to use a french seam on the sides but apparently I had a brain fart at that moment and instead they got serged.
Regrets: My only regrets about this top came during the cutting phase. My fabric was slippery and in the back of my mind I had a very vague thought about cutting it on one layer. The sewing angel, dressed in her perfectly tailored gown was on one shoulder saying, "Shannon you should really take your time and cut all your pieces on one layer to ensure your on grain and to avoid any wonky pieces." But on the other shoulder I had the sewing devil dressed in ill fitting rags with a ticking clock in one hand and in the other hand a pin steadily jabbing me in the shoulder saying, "Tick, tick, tick..ain't nobody got time for that!" I listened to the devil and cut on the fold. In return I got wonky pieces just like the angel said I would. When it came time to attach the back to the front I then realized the error of my ways. The bottom fabric had slipped on my back piece, probably during the pinning process and was all wonky. I didn't have enough fabric to cut another piece so I was forced to make it work. I had to trim the one side of the back to make it fit properly with the front. The result is wearable but it's a little tight when I move my arms forward. I wish I could say live and learn here. But what can I say I'm really hard headed and I just can't seem to get that sewing devil off my freaking shoulder! That pin hurts ya'll! If you follow me on Instagram you seen the beautiful Mood silk I was cutting into for a second version. I was so cocky too cutting this time on the fold. I'll show you miss prissy pants that it can be done! This time tho' the front pieces bit me in the ass. I still wanna cry when I think about the beautiful silk I ruined that is no longer available.
Loves: I'm loving anything these days with a kimono sleeve. I also love that this blouse is so quick and effortless to make yet the decorative neckline makes it look rather complicated and that you surely spent many grueling hours whipping it into perfection.
Next Time: Silk I will not admit defeat! Jennifer gave me some great tips on working with silk (she will be putting all those tips in a blog post for you all too!) so I'm on the silk hunt. I think for my next version I will cut a size 8 for a more fuller look when tucked into pants. I do rather like the way it looks tucked into my retro wide legged Simplicity 4044 pants...
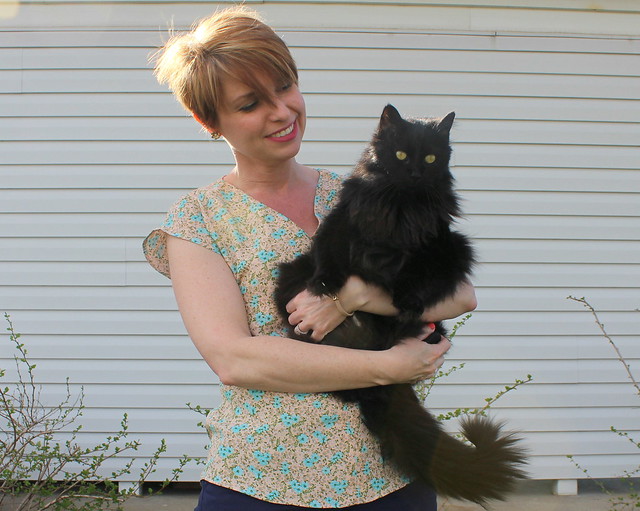
So as I'm scouring the internet for some luscious silk I'm wondering should I go for a print or solid. I had a beautiful cornflower blue silk on order from Fabric Mart but somewhere in between clicking the add to my cart button and paying for my order it sold out and I got a refund. Dang it I hate when that happens! So please link me up a silk you think would be perfect for this top. Orlando and I would be ever so grateful!


19 comments
What a lovely top! I think it would look fabulous in one of the silk/cotton voiles from FM. :)
ReplyDeleteOoh, that fabric is lovely. I've been ambivalent about this pattern until now, you may have convinced me to make it :)
ReplyDeleteLovely blouse - I am making it too in a lovely solid dusky green rayon - mmm the fabri feels lovely, just need to get going!
ReplyDeleteYou have really captured the vintage feel of this blouse. Beautiful fabric. The blouse is quickly creeping up my to make list for times when I need a quick project!
ReplyDeleteI'm seeing so many lovely afternoon blouseson blogs, yours included. Hey Shannon, do I recognise that fabric from a certain giveaway last year?!?!
ReplyDeleteShanniloves,
ReplyDeleteThe blouse turned beautifully. It's a great match with your pants.
I'm loving this pattern, and you've made a gorgeous version! Cute fabric and that centre detail is so effective. As for the pins in your shoulder- that's the one that usually wins out for me too ! Far too persuasive as you've only got so much time, and you want to get on with the sewing, right?!
ReplyDeleteArrrgh your cat is amazing. Like my dream cat (only he's brown).
ReplyDeleteAhem sorry, back to sewing! Sorry about your silk woe. I like how you saved your cotton version. It's such a cute pattern!
Really like this version, it's the first one to make me want to try it myself! I do like the snugger fit.
ReplyDeleteTotally gorgeous Shanni! And Orlando looks so much like my cat Mocha, I did a double take! Can't wait too see your silk version - you'll totally whip it into submission!
ReplyDeleteReally lovely top and I am with you on the kimono sleeve … perfect for summer. Hope you & Orlando enjoy your rendezvous with Mr Draper this evening.
ReplyDeleteOoooh. Love it!!
ReplyDeleteOoh, this is so cute! I'm really loving it on you! I don't really wear many vintage-y style things, but now that I see yours I'm realizing it would look adorable on my little sis so I'll have to whip one up for her!
ReplyDeleteYour version looks really great! :)
ReplyDeleteCute! Love the fabric!
ReplyDeleteWhy you sure do!! I still have the other that I need to use as well!!
ReplyDeleteSo cute! I love it tucked in! I often try to get away with taking short cuts too. It most often takes more than one fail for me to learn my lesson! Happy silk hunting! Sorry I don't have any leads for you...
ReplyDeleteSo lovely! I do love this pattern and can't wait to make it. What a shame about your silk! I hope you find something else suitable soon! This would be so beautiful in silk.
ReplyDeleteThis looks fab Shanni, I love how it looks tucked into the trousers as well. I want to cry for y ou about that silk :(
ReplyDelete