
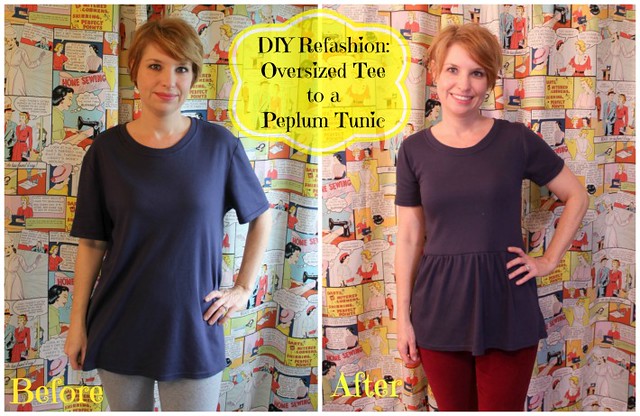
DIY Refashion: Oversized Tee to a Peplum Tunic
Sunday, October 12, 2014
For one of my more recent posts on the Fabric Mart Blog I was asked to make a pattern by Thread Theory for their "In the Studio" Series. I chose the Stratchcona Henley because I thought it would be an easy make for my husband. Boy was I wrong!
Let me first stress that this was no fail by any fault of the pattern. I didn't realize how fitted this tee was and that's not my husband's style at all. It was too tight on him and do I dare say he looked like he squeezed himself into a girl's shirt. I was hopeful it would fit my Dad and it did but we didn't care for the look of it on him either so in my pajama drawer it went. I think I totally forgot to post the shirt construction here on my blog so you can read all about it over at Fabric Mart's blog here if you so desire. It has proved to be comfy as a sleep shirt for me but I wanted to get more wear out of it. After searching Pinterest for some ideas I decided to try a peplum look. I'm pretty pleased with the result and I thought I'd share with your my process for this refashion. You could easily turn any oversized men's tee into a stylish peplum top for yourself.
~~~~~~~~~~~~~~~~~~~~~~~~~~~~~~~~~~~~~~~~~~~~~~~~~~~~~~~~~~~~~~~~~~~~~
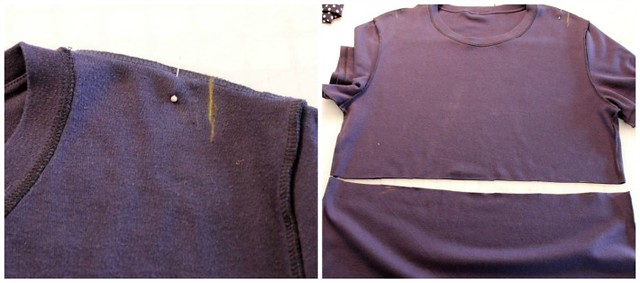
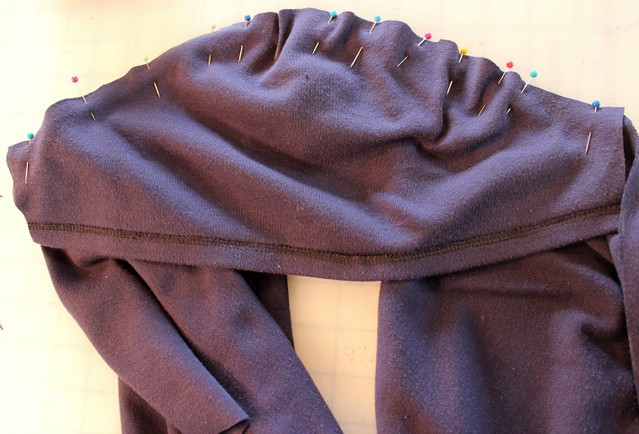
I first tried on the shirt and marked where my shoulder seam should be with a pin. After taking off the shirt I turned it inside out and marked with chalk my new seam line for the shoulder (I added a 5/8th seam allowance). I had a RTW peplum that I liked the fit of so I got that out and measured from the shoulder down to the peplum seam. I then made this marking on my shirt (15 inches from the shoulder) and cut.
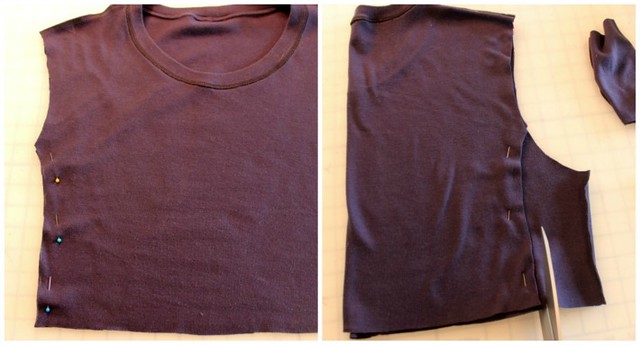
Next I cut off my sleeves and put the shirt back on to figure how much I needed to take in the side seams. I pinched out about 4 inches, took the shirt off, pinned in 4 inches on each side and tried on a second time for good measure. Once I was happy with that I added my seam allowance with chalk and cut. I folded the shirt in half and cut the other side.
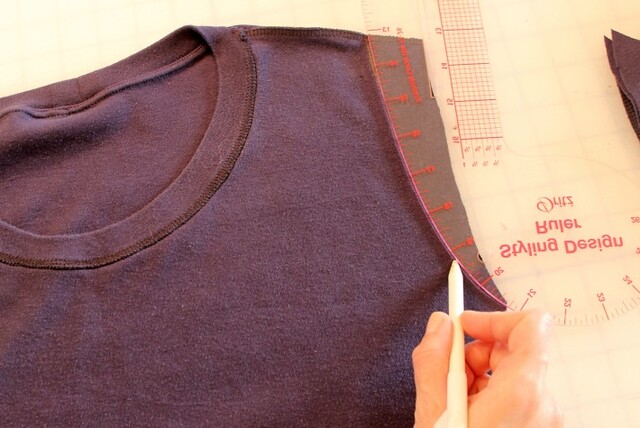
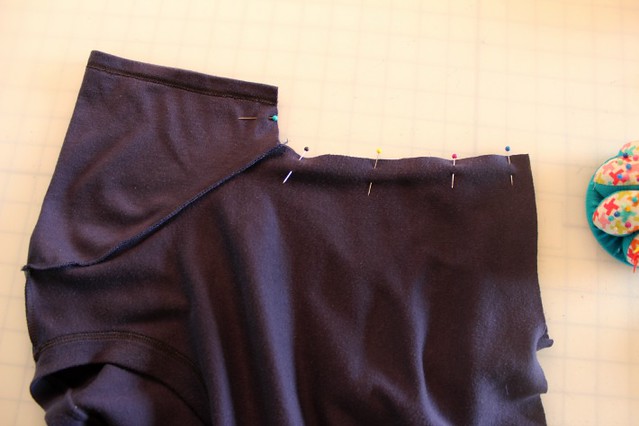
Using my french curve I redrafted my sleeve opening from my chalk marking. However much I took from the shoulder seam (about an inch) I took that same amount from my sleeve cap using my curved ruler. Now I know this is probably not the correct way to do this. I'm no professional. I make my own rules. ;) And surprisingly enough it turned out pretty well!

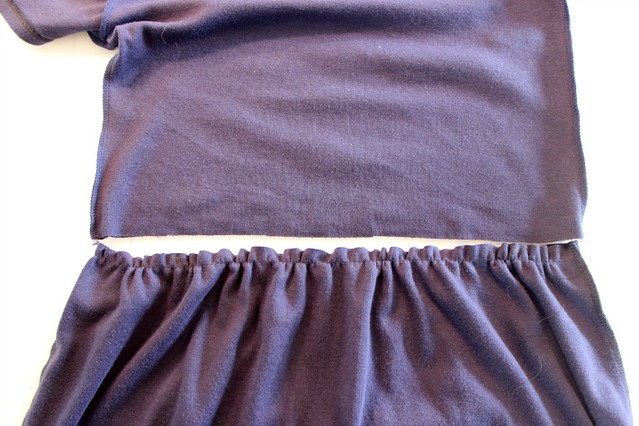
So here is the work I've done so far...I forgot to include the peplum piece. Break time... there are some cupcakes that need baking!

Cupcakes out of the oven now it's time to reattach the sleeves. I like to attach sleeves flat whenever possible so I pinned my sleeve to the bodice right sides together and attached using my serger. Awkward picture up next...
After doing a little happy dance because my hack up was successful I sewed up the side seams.
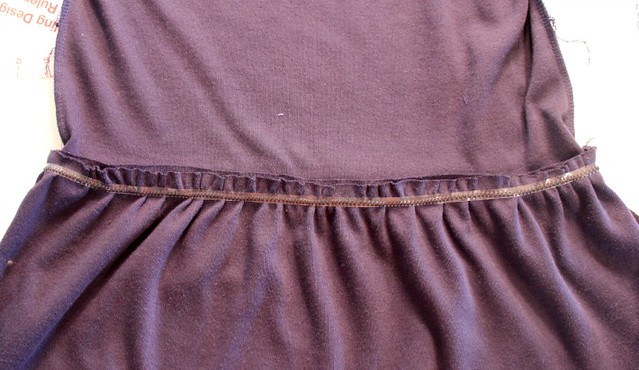
Time for the fun part of this otherwise boring tee, the peplum. I gathered the top edge of the peplum by sewing a basting stitch at 3/8th inch. I fiddled with the gathers until the peplum was the same width as the bodice edge.
I then pinned it to my bodice right sides together.

Since my waistline was now tapered and I would need to stretch over my head and shoulders I used clear elastic to stabilize the seam and prevent any stretching.
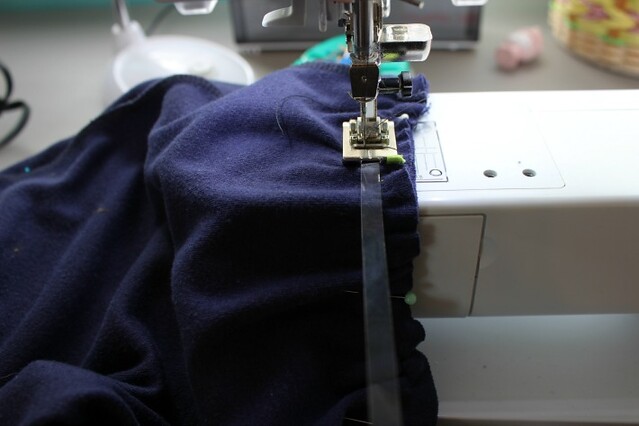
I sewed my waist seam using a zig zag stitch on my regular sewing machine though I could of used my serger...Not quite sure why that didn't happen to begin with. I ended up finishing my seam with the serger...In a cupcake coma at this point.
Time for....more pictures!!
Posing against his will...
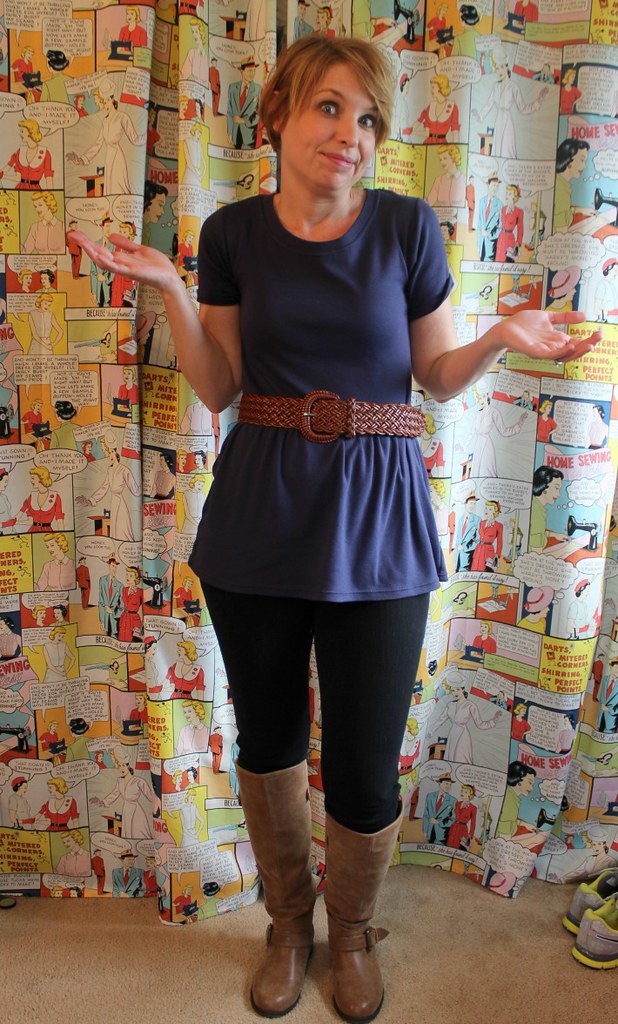
And because my husband insisted I try the top with a belt, apparently he thinks I look good in belts, this one is for him.
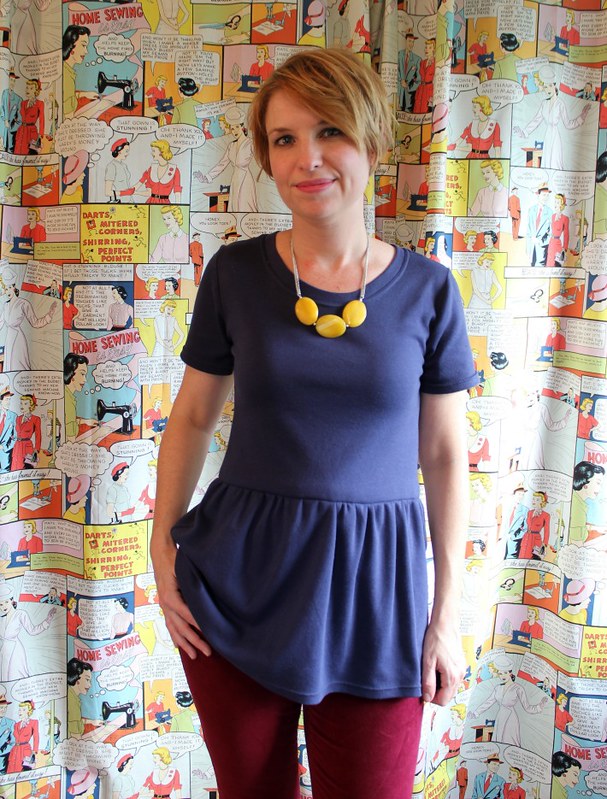
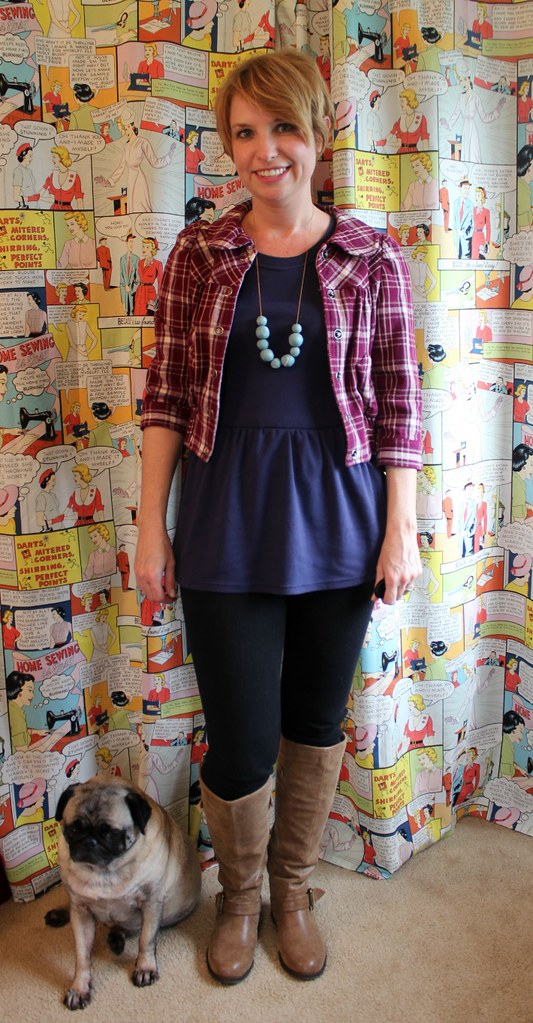
Well if you made it this far congrats! I'd offer you a cupcake but I ate them all. I'm pleased with the way my top turned out..even more after the photoshoot. You probably didn't even notice but I nitpicked my sleeves to death after looking at the wrinkles in these photos so I messed with them some more until I got the fit to my liking (you can see the results of my nitpicking in the first before and after photo). It's the perfectionist in me, rearing her ugly head all.the.time.
Wait don't go yet! In other news Beth from 110 Creations is hosting a 2nd Annual Fear Fabric Challenge. The idea is for the month of October sew a garment using a fabric you are terrified of. I will be participating and you can participate too! Not only will you be a winner by kicking that fear in the ass you can also enter your creation for a chance to be a winner of a gift certificate from Girl Charlee. Check out Beth's post here for all the details.
I will be making the Carme Blouse with my fear fabric...cue chilling Halloween music here...Chiffon....eeekk!
What fabric terrifies you??


19 comments
Great refashion! I think husband is on to something..I like it with the belt! Chiffon! Can't wait to see your blouse. I fear any fabric that someone else brings me to sew something for them. I just finished a large piped cushion for a friend and I was TERRIFIED to cut into that fabric! Terrified me so much I swore off doing sewing for others...well at least that's what I said...what I do is a different story.
ReplyDeleteCute!!!!! My husband always suggests that I try a belt, too... boys! Dude, I hope I NEVER have to sew with chiffon! It seems horrible! Good luck!
ReplyDeleteVery cute!
ReplyDeleteI just picked up a XXL polo for $2.50 at JC Penney. I will be attempting my first refashion! :) This post was timely!
I'm so glad you were able to salvage this make. It looks so cute with the jacket, and I like the belt too. (What is it with men and belts?)
ReplyDeleteThis was my experience with this pattern too. It was great and fun to make up, but when my husband tried it on, he looked like a sausage. LOL. I'm wondering if it just needs a really, really stretchy fabric, like thermal waffle or something.
I have a fear of slippery fabrics - good luck with the chiffon!
WAY cute!!!!!!! And good save!
ReplyDeleteGreat refashion. The fit is absolutely perfect. Love the result, especially with the cute little coat. Thanks for the inspiration.
ReplyDeleteI guess the hubs is right sometimes. :) Ugh I don't like sewing for others either. I'm always afraid I'm going to mess it up! But whenever I'm asked I can never say no.
ReplyDeleteI've tried one sewing with it once and it's still sitting in my wip pile......
ReplyDeleteCan't wait to see what you do with it!
ReplyDeleteHa! mine looked like a sausage too! poor guy! I felt so bad it didn't fit him. I even cut the pattern bigger than the biggest size!
ReplyDeleteI've never tried sewing with leather but I've always been interested in it. I'd like to make a nice leather handbag some day. Hey how about looking at the thriftstores for leather jackets. You could hopefully find them cheap and refashion them.
ReplyDeleteThanks!!
ReplyDeleteThank you!!
ReplyDeleteMe too! I cut the biggest size and graded out a bit. I guess our husbands are just not the right shape for this designer. I have been way too discouraged to try making him anything else, but when I do, I think I'll try the basic Men's t-shirt pattern from Jalie. I'll let you know how it goes.
ReplyDeleteVery cute! I need more tops like this in my closet - thanks for the tutorial!!! :)
ReplyDeleteGreat refashion! :)
ReplyDeleteI bought that Thread Theory pattern too - 'fitted' is an understatement! After purchasing I realised that the largest size would be too small for my dad, who likes tees around the 42" mark. The pattern info says it fits up to an XL (46-48" chest), but the finished measurement for the XL is 41.5". I can't imagine anyone wearing a t-shirt with 6" of negative ease - it would be like a tourniquet!
ReplyDeleteAnyway, love the refashion :-)
Oh wow! I don't think I knew it had that much negative ease. I don't believe I even paid attention. So that's exactly why even though I added a couple inches to the XL it still didn't work. I can't imagine anyone wearing it with that much negative ease either! Especially a guy!!
ReplyDeleteHopefully Thread Theory will sort it out. There are so few men's patterns out there, it is great to see a small company making something that isn't pyjamas and cummerbunds :-)
ReplyDelete