
DIY: Candy Corn Bunting
Monday, October 05, 2015
Last Fall I made some candy corn bunting to decorate my office at work. I wrote up a tutorial and everything and it never did see the light of day on the blog. I did share it back in January at Cut Out and Keep but who really cares about Fall/Halloween decor in the middle of winter?? I patiently waited until the appropriate time to share it all with you.
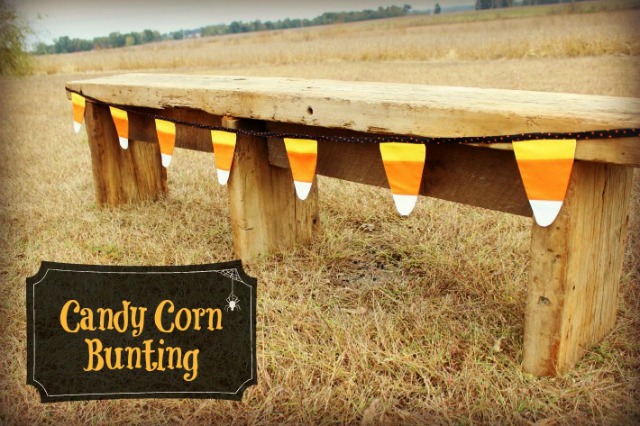
Candy corn, ya either love it or ya hate it. Mix it with peanuts and it taste like a PayDay, the only way I like to eat it. I got the idea for bunting when I seen similar projects on Pinterest using either felt or burlap for the corn strung up with ribbon or string. I always enjoy decorating my office for Halloween and thought this bunting would brighten up my otherwise boring cubie wall.
To make your own you will need:
- Fabric in yellow, white and orange
- Double fold bias tape, premade or make your own like I did
- Iron on interface
- Candy corn template
- Pins, scissors, ruler, thread, iron, sewing machine, etc and etc.
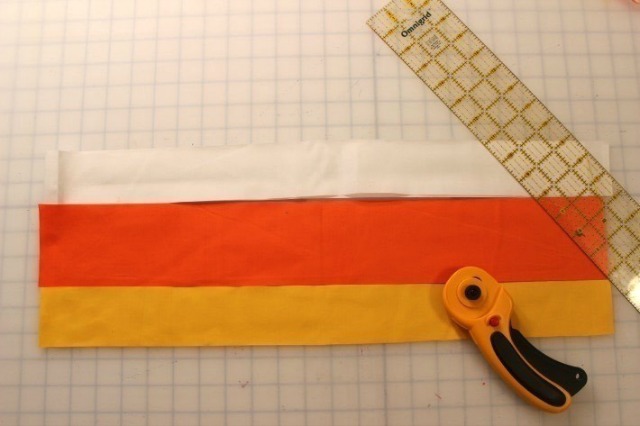
Step One:
Start out by cutting your fabric into the following strip widths:
White: 2 1/4 inch
Orange: 3 1/4 inch
Yellow: 2 1/2 inch
Forgive me I've slept a lot since then but I believe I bought a half yard of each color and was able to get 7 pieces of corn from it. I think I even had fabric left over and could of made more.. I just got lazy.
Forgive me I've slept a lot since then but I believe I bought a half yard of each color and was able to get 7 pieces of corn from it. I think I even had fabric left over and could of made more.. I just got lazy.
Step Two:
With right sides together sew your white strip to the orange using a 1/4 seam allowance. Iron the seam towards the orange. Repeat the same process with your yellow strip. Place it right sides together on the other side of the orange and sew 1/4. Iron and press seam towards orange.
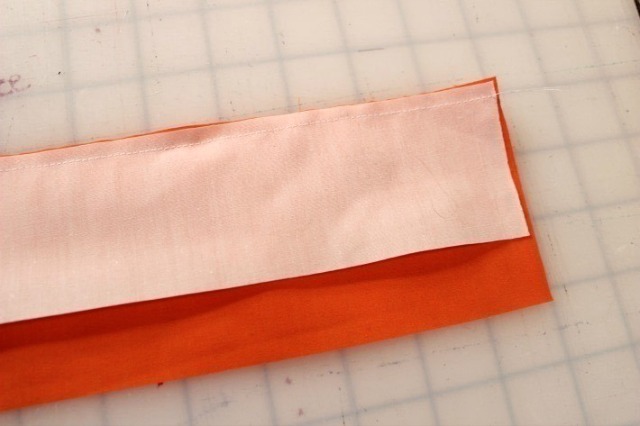
Proving the fact that I've slept a lot since making this tutorial, I was totally confused by this picture..why do I have a seam running down the middle?? Yeah, you don't. I was simply showing the right side vs wrong side of the fabric.

Step Three:
Use tracing paper to draw your template. You can see the measurements on my template below. Use this template to cut out your candy corn fronts.
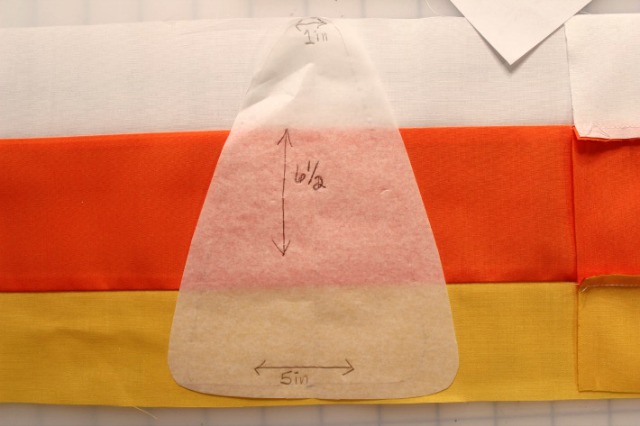
Use tracing paper to draw your template. You can see the measurements on my template below. Use this template to cut out your candy corn fronts.
Step Four:
Use white fabric to cut out the backs to your candy corn. Also cut your interface pieces and fuse to the wrong side of your white backs. Make sure to cut out your interface slightly smaller than your fabric to reduce seam bulk.
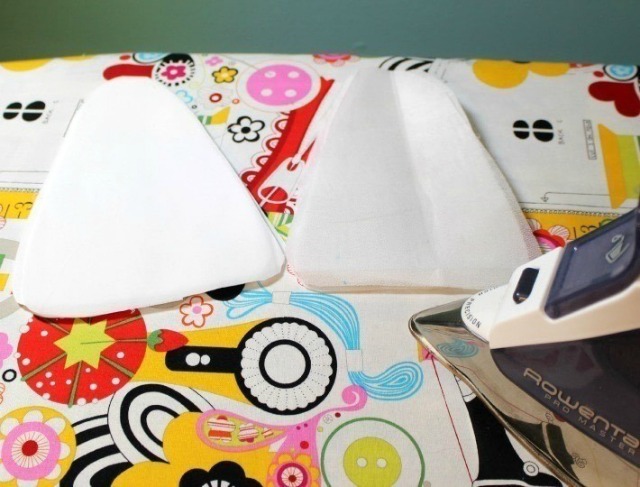
Use white fabric to cut out the backs to your candy corn. Also cut your interface pieces and fuse to the wrong side of your white backs. Make sure to cut out your interface slightly smaller than your fabric to reduce seam bulk.
Step Five:
With right sides together sew your front and back pieces together using a 1/4 inch seam allowance. Sew all the way around leaving about 1.5 inch opening at the top of your candy corn for turning right side out.

Step Six:
Trim your seam allowance around the corners and at the top as pictured. Turn right side out and iron.
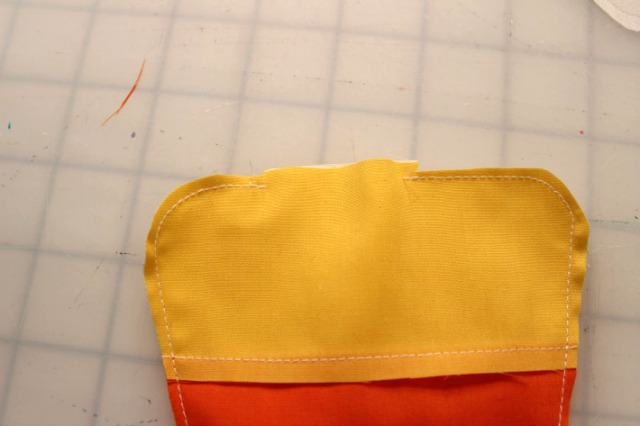
Trim your seam allowance around the corners and at the top as pictured. Turn right side out and iron.
Step Seven:
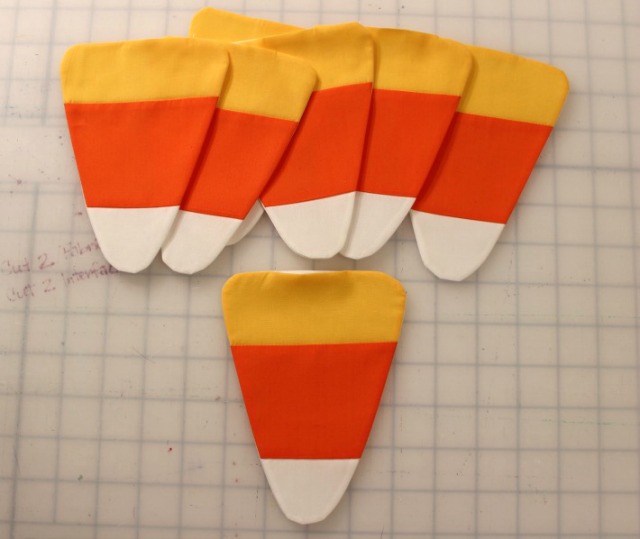
Continue on and repeat steps 1-6 with as many pieces as you want. Look how cute they are!!
Step Eight:
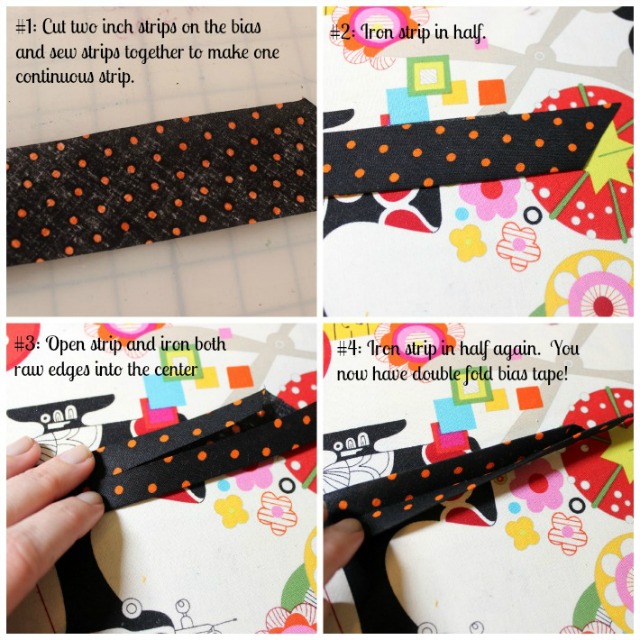
Use bias tape to string your pieces together. You may choose to buy premade bias tape or make your own. I made my own by cutting 2 inch strips on the bias.
Step Nine:
Step Ten:
Use bias tape to string your pieces together. You may choose to buy premade bias tape or make your own. I made my own by cutting 2 inch strips on the bias.
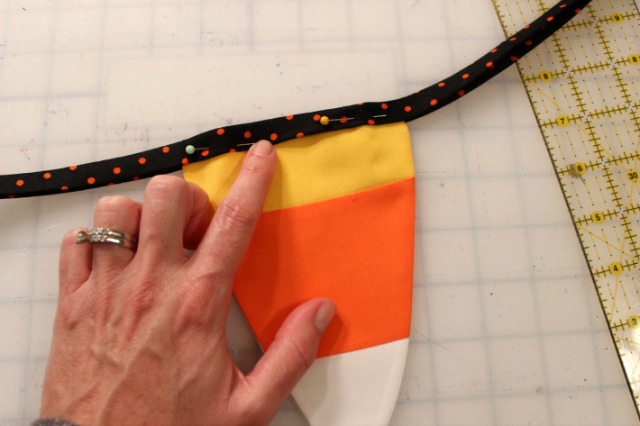
Step Nine:
Sandwich your candy corn pieces in between your
bias tape. Evenly space them apart, pin and topstitch 1/4 inch away
from bias edge. Sew loops onto each end of your bias tape for easy hanging.
Step Ten:
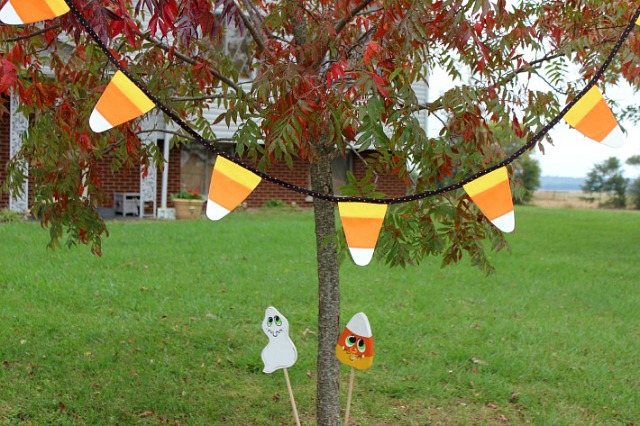
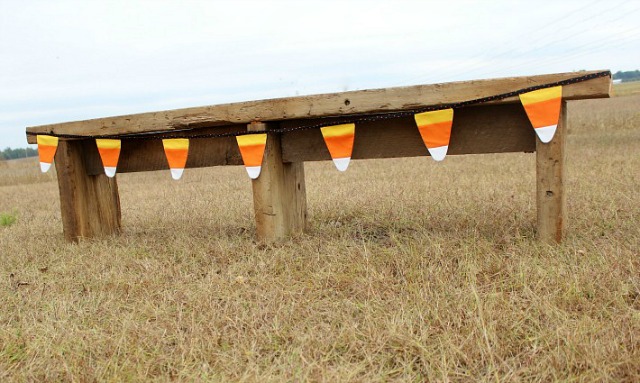
Find the perfect spot to hang your bunting and enjoy! This would look really cute hanging from a fireplace mantle.
There's a Ryan Gosling meme for everything....
Why yes Ryan, yes you could..I lurve candy corn.

There's a Ryan Gosling meme for everything....
Why yes Ryan, yes you could..I lurve candy corn.


0 comments