
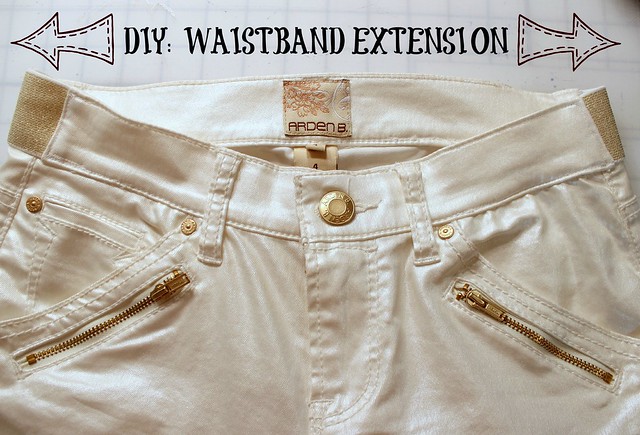
DIY: Waistband Extension
Tuesday, July 29, 2014
I have a tutorial for you today! If your waistband is feeling a little snug don't throw those jeans out just yet. I have a rather simple fix...extend the waistband with elastic.
I was given these snazzy pair of pants and asked if there was anyway I could extend the waistband. She tried them on and I could see they fit her fine however when she buttoned them they were very snug and caused what she called, a muffin top. At first I thought easy enough, just move the button over but is there an easy way to remove those buttons they put on jeans?? I dunno. I had a couple of ideas in mind, both involved taking off the waistband and extending with either fabric or elastic. I went to JoAnn Fabric and rummaged through the remnant bin hoping to find something similar to this fabric. As you can see in the picture above it's a slightly shiny fabric. After not finding anything suitable I went to the elastic and who knew I'd find a gold metallic elastic?!. It paired with the gold details in the pants perfectly and was the same width as the waistband.
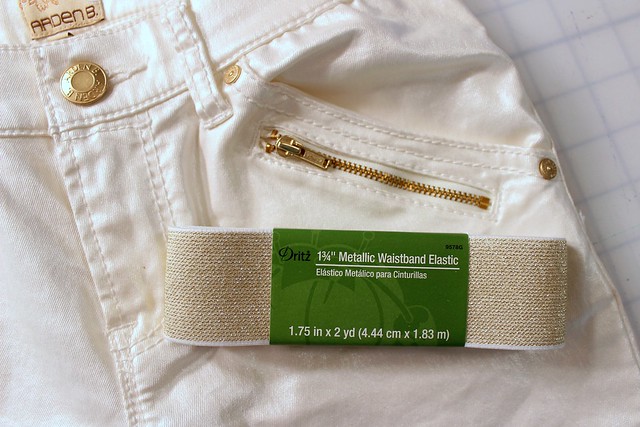
Depending on how much extra width you need in your waistband you'll want to cut your elastic about 1 inch shorter. The waistband on these pants needed about an extra 3 inches. I wanted elastic on each side of the pants so I cut two strips of elastic about 1.5 inches long allowing for 1/4 seam allowances. Next get out your seam ripper and start ripping!
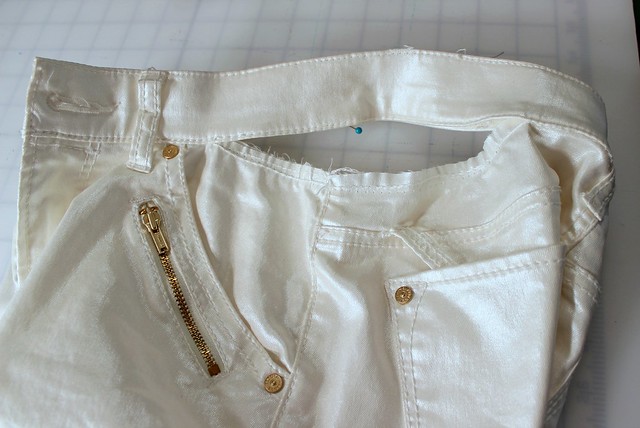
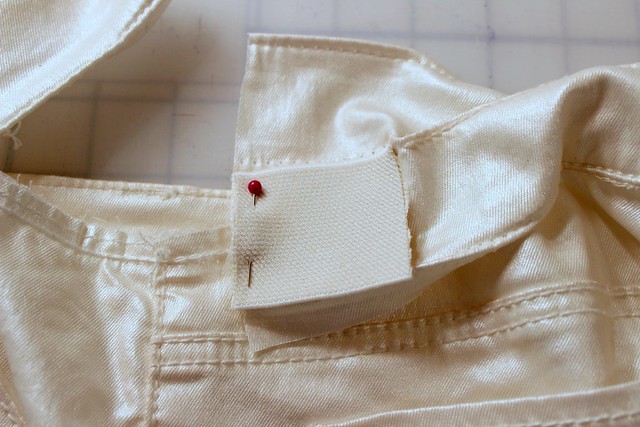
I marked with a pin on the waistband where I wanted to insert the elastic and I didn't rip out the waistband completely, just enough to where it would be easy to work with. I then cut the waistband.
Excuse the blurry pic...this fabric proved to be a challenge to photograph.
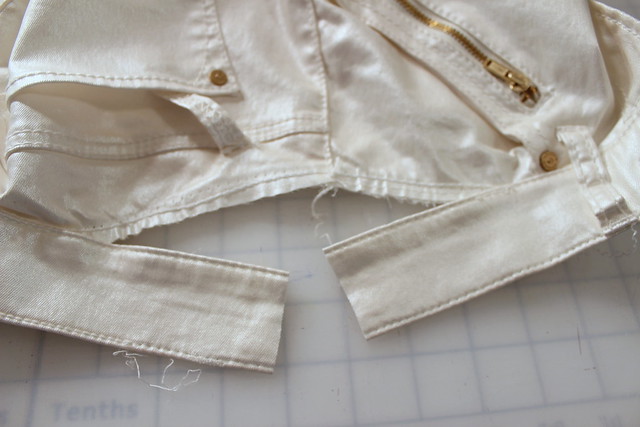
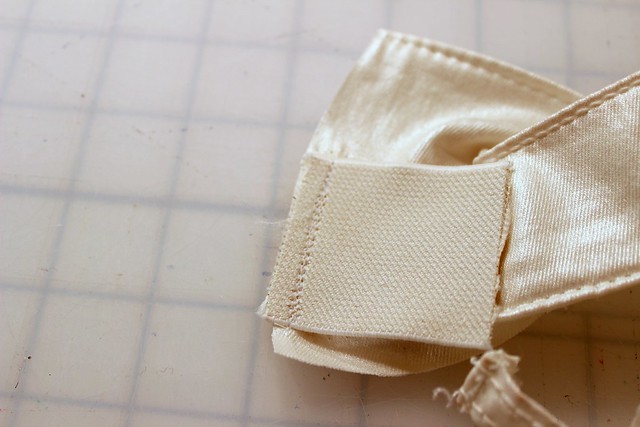
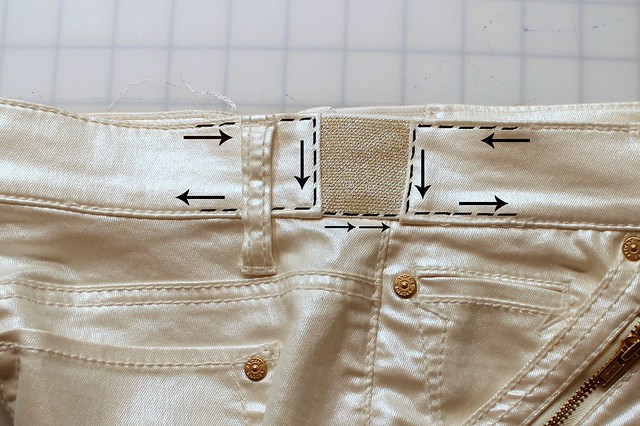
Now you'll want to pin your elastic, right sides together, with the front of your waistband and sew using a 1/4 seam allowance. I reinforced my seam by sewing back and forth a couple times.
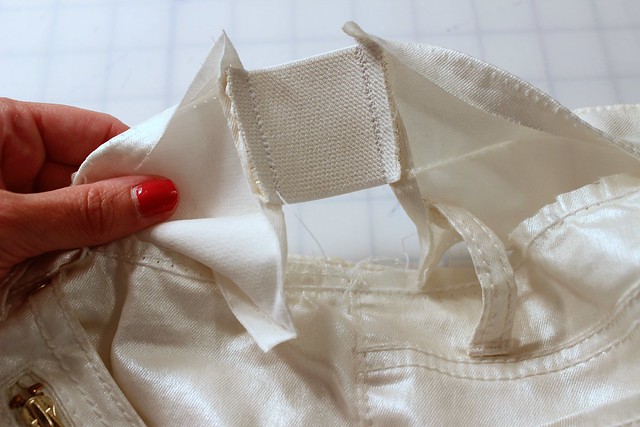
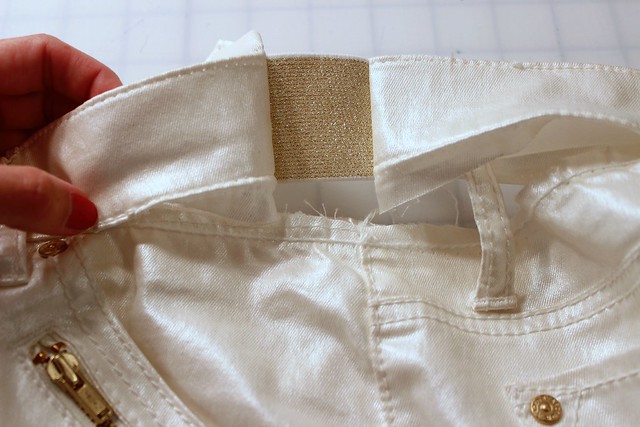
Next you'll want to sew the other side of the elastic to the waistband, right sides together. Make sure your waistband is not twisted (if you have belt loops, it helps to pin them out of your way). You'll then have a waistband that will look like this front and back...
I forgot to get a picture of this next step but it's pretty self explanatory. Reassemble your waistband, pin into place and sew. Then sew your belt loop (if applicable) back into place. Depending on the amount of ease in your pant's waist you may need to stretch while sewing to get it to fit your newly extended waistband. I had a little puckering and had to rip out and try again. I found my even feed foot helped as well as stretching ever so gently while I was sewing.
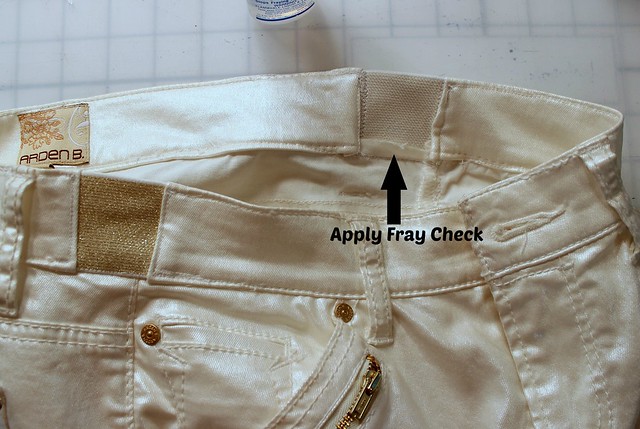
On the inside you'll see that a small part of your waistband will be exposed which is inevitable if your using elastic. I applied a little fray check to it.
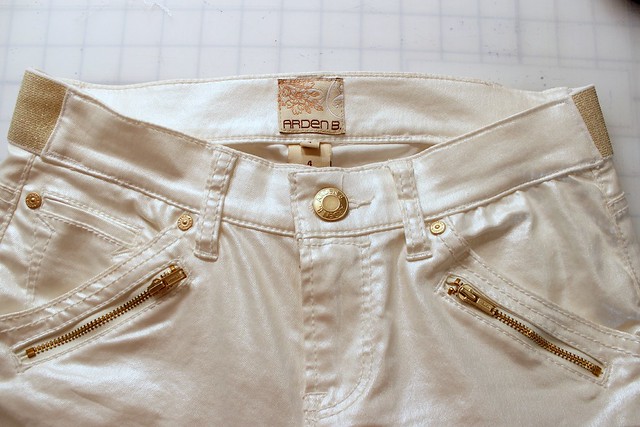
Complete the other side and there ya go, a new waistband that will fit snugly with room to grow. No more muffin top.
This turned out to be a really easy alteration. You certainly could substitute fabric for the elastic in this tute but for my fix this elastic was a perfect match to these pants. Hope you enjoyed this and find it helpful.
Alterations are now complete and I'm off to do some selfish sewing. Working on a chambray Hawthorn. What are you working on? Anyone starting to sew for the Fall season yet? This crazy, cool weather Indiana has been having has already got me thinking about it. I should probably hold off because I'm sure it'll be back up in the 90's by next week.


20 comments
What a great tip! Did you shorten the waistband at all, or how were you able to fit the lower edge of the elastic to the pants? Perhaps you already explained that but I got confused :D
ReplyDeleteWell surprisingly the bottom of the elastic fit to the pants almost perfect. I did have a little puckering but once I used my even feed foot and stretched the pant's waist a little while sewing it all fit perfect. But yes depending on your pants your waist might not want to fit to your newly extended waistband so you'd have to adjust for that. Hope this makes sense! :)
ReplyDeleteSurprisingly the bottom of the elastic fit to the pants almost
ReplyDeleteperfect. I did have a little puckering but once I used my even feed
foot and stretched the pant's waist a little while sewing it all fit
perfect. But yes depending on your pants your waist might not want to
fit to your newly extended waistband so you'd have to adjust for that.
Hope this makes sense! :)
Thanks, that was exactly what I was wondering about :) Good thing the elastic eased right into the waist
ReplyDeleteOh my gosh. When I saw the photo on top with the elastic already in I thought that was the your inspiration.... not the pants you altered. The gold elastic is freakishly perfect and looks like a design element that was on the pants originally. Good work, lady!
ReplyDeleteAnd yes, I sewed something for fall... already. But it was in the name of a a patternreview.com contest. Now I have to force myself back to summer sewing... it's July still!
I've been debating on whether or not to start fall sewing. I'm so slow that I haven't made half the stuff I've wanted to for summer so maybe if I get an early start for fall I'd be all set. But I don't even wanna think about fall yet!!
ReplyDeleteI sure hope that my "muffin top" pair of jeans didn't make it to the Goodwill bag! Your tutorial will be a perfect fix! Thanks for posting what you did. Why didn't I think of that??? Fall sewing in 100 degree weather? That's not for me right now. I have a long list of summer sewing yet to go. Right now, I'm working on a blouse and a pair of capri pants. I finally got both muslins done so I can cut and have some sewing fun. The Hawthorn is on my list. I look forward to seeing your version.
ReplyDeleteCool!!!
ReplyDeleteWhat a great idea, and I imagine the elastic makes these pants a bit more comfy too. I want to try this! Thanks for sharing! I just finished my first Hawthorn and it's in Swiss Dot chambray - I think it's the summer of chambray around these pants. It's too hot here to even think about Fall sewing - I wish I was that organized! I bet Vito appreciates the cooler temps! :)
ReplyDeleteIt been rather cool here the past couple weeks so I've been dreaming of Fall. I'm gonna hold off on the Fall sewing because I know it'll be back up in the 90's by next week.
ReplyDeleteOh I can't wait to see your Hawthorn!!
ReplyDeleteThat gold elastic is an amazing find! I don't think I would have even thought of using elastic at all, but it's very chic in a metallic shade. I'll keep this trick in mind next time I have to let out a pair of pants. Thanks for sharing!
ReplyDeleteOh gosh...I wish I didn't need this tutorial, but sadly I think I do :) And I've already planned most of my fall sewing, though I haven't started it. These temps are crazy for Indiana!! Although I guess I'm happy we're not paying $$$$ on AC this summer.
ReplyDeleteExcellent tutorial! Your elastic came out to be a perfect match.
ReplyDeleteI didn't realize elastic came in so many varieties! especially at JoAnns.
ReplyDeleteYour farther along than I. I've only thought about Fall sewing. I need to make some actual plans.
ReplyDeleteThanks Joe!
ReplyDeleteT. D.
ReplyDeleteElectric power figured some Kia autos now compete with the most beneficial
that Okazaki, japan offers, and Normal Motors' Buick split linked together
with Jaguar for that prime spot, busting the Toyota and Lexus. car exporters UK
Thanks for sharing! This is such a great tutorial. I would have never thought to add elastic like this, and with the elastic you used it makes for such a cool design detail!
ReplyDeleteI have so many pairs of pants I should do this with!
ReplyDelete