
Completed: Colette Hawthorn
Wednesday, August 13, 2014
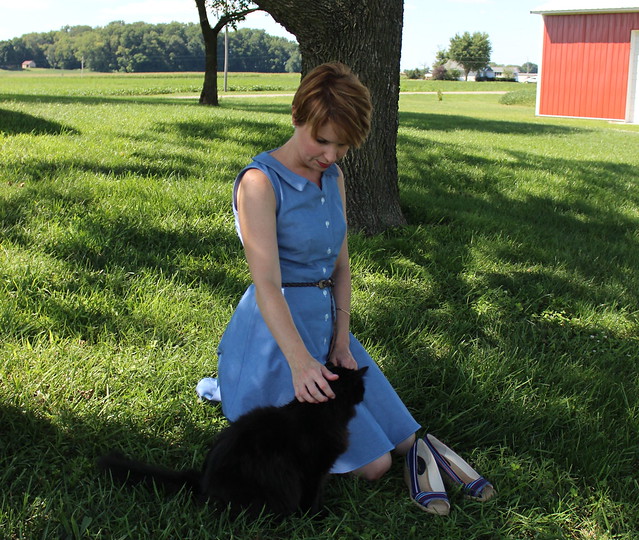
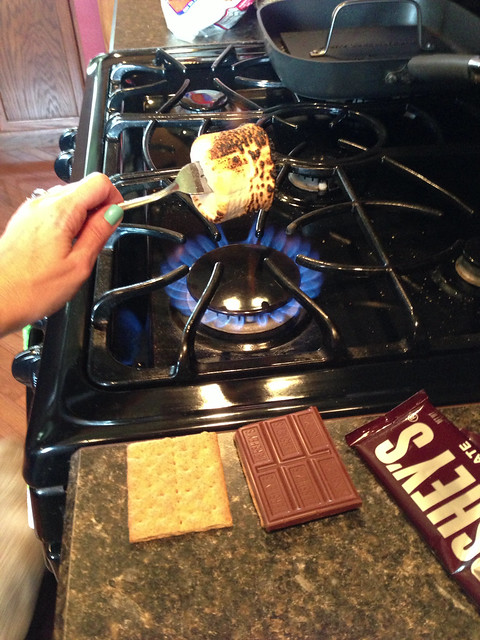
I'm finally getting some of my summer sewing list done. Funny huh? It's almost the end of August yo. Where the hell did summer go? I wanna know. Not that I'm sad about it or anything. It's been unusually cool here and I'm loving it. Making me long for cozy sweaters, falling leaves and smore's from a bonfire...not from my gas stove....
Hey a girl gets desperate!
 |
The Makings of Joy:
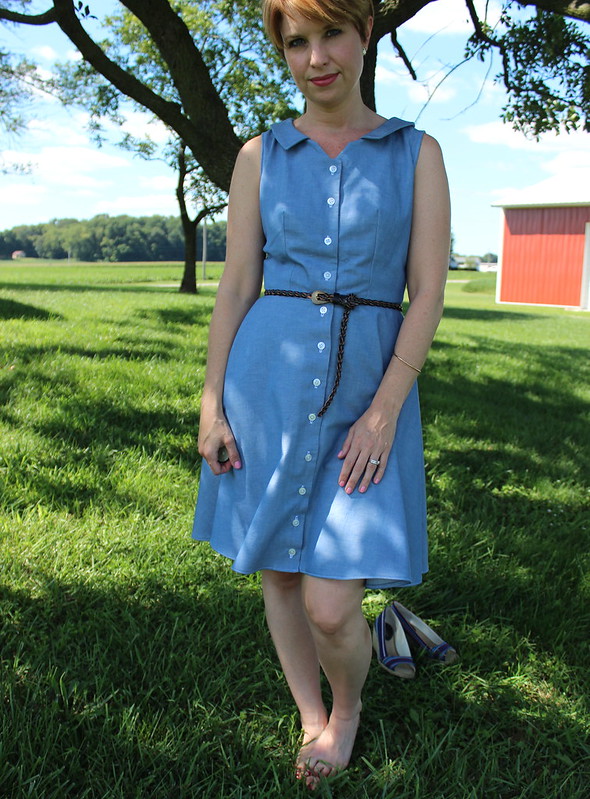
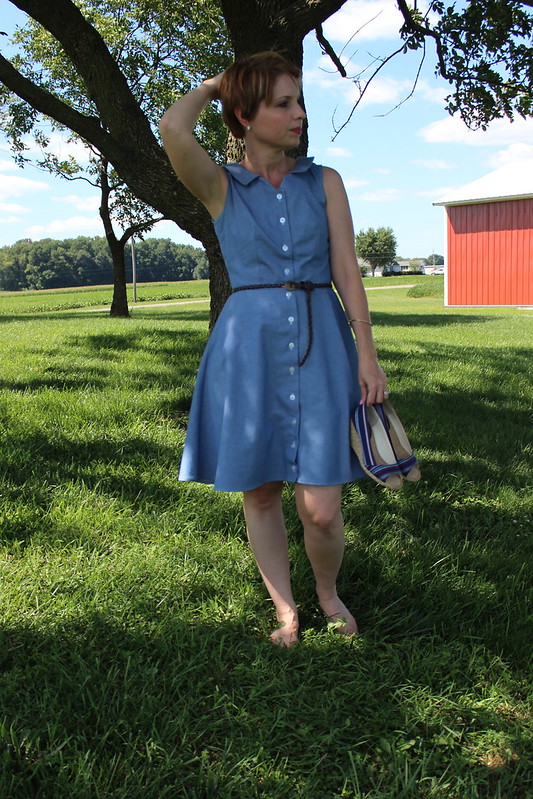
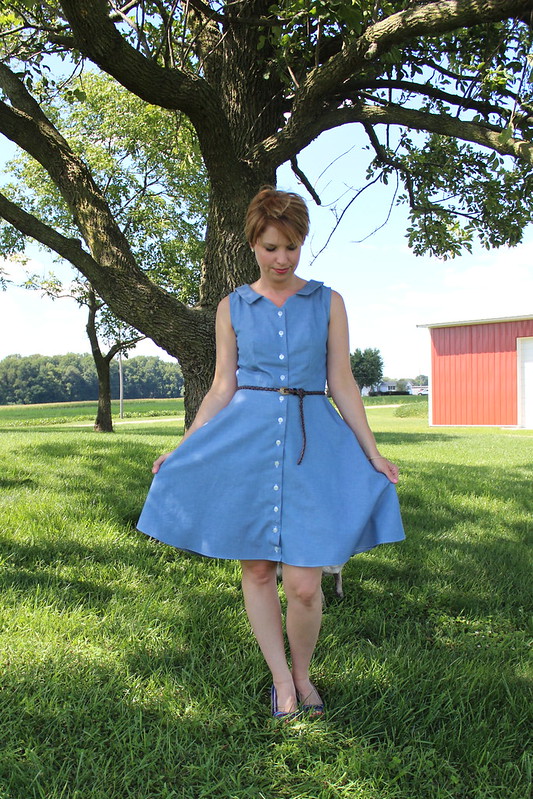
Pattern: Colette Hawthorn available here in printed booklet or pdf. I bought the booklet.
Fabric: 2 yds of chambray - Joann Fabric. I believe it was between $10-$12 total.
Notions: 13- 1/2in buttons-stashed, self made bias tape for facings
Needle: Microtex sharp needle
Sizing and Fitting:
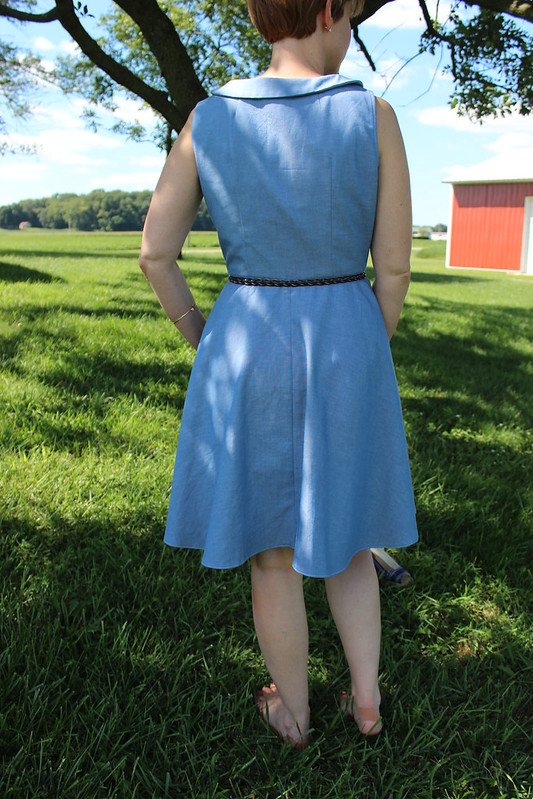
I made a muslin of the bodice only, size 0. It was tight in the waist and the back was rather wide looking. After getting help from some lovelies on Instagram I retraced my bodice grading the side seams from the bust down to a size 2. I also did a narrow back adjustment followed from my Fit For Real People book and did a forward shoulder adjustment following Three Dresses tute. I don't know if it's the way I'm standing or what but after looking at these pictures it looks like I could pinch a few out of the bodice length.
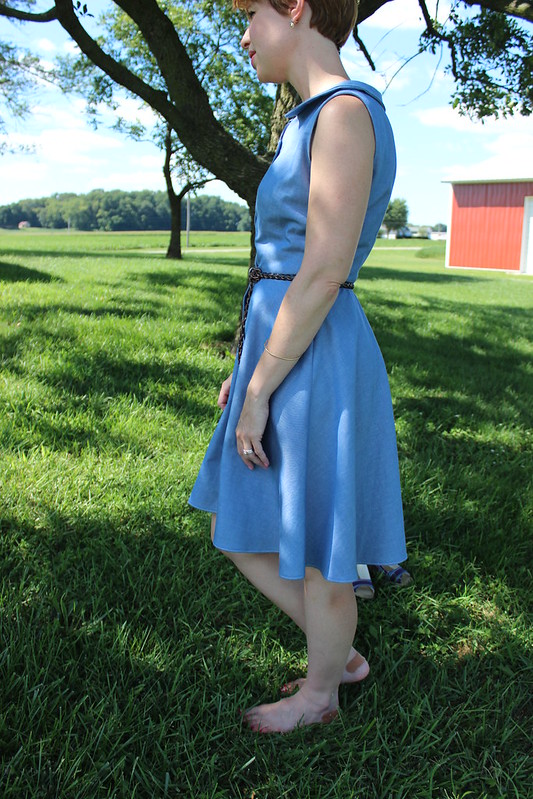
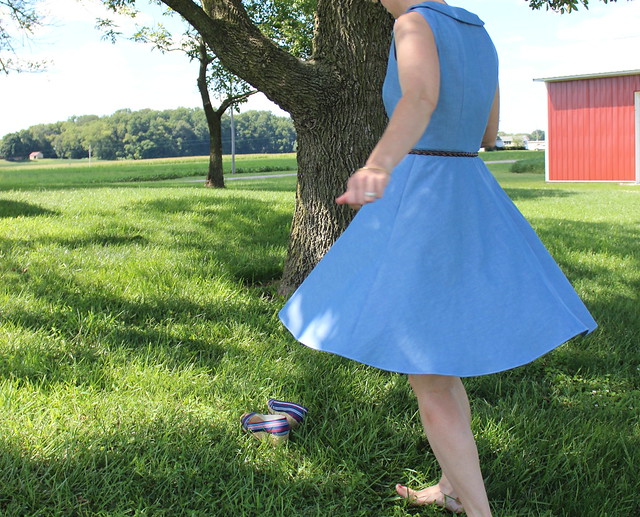
Ha! Totally forgot I had band-aids on my feet. Those wedges were killer. I lasted about an hour in them at work then I switched to my tennis shoes.
Construction:
This is one of the easier patterns I've assembled from Colette. A few things I did different from the pattern instructions: I didn't topstitch around the collar or down the center front . I understitched instead. I didn't want any visible stitches. I finished my hem before installing the buttons. I knew I was going to shorten it considerably and probably not need all 13 buttons. Correct, I only used 12. I had to adjust the placement of my buttons as well because I didn't want a button right of the waist seam because I'd most likely be wearing a belt.
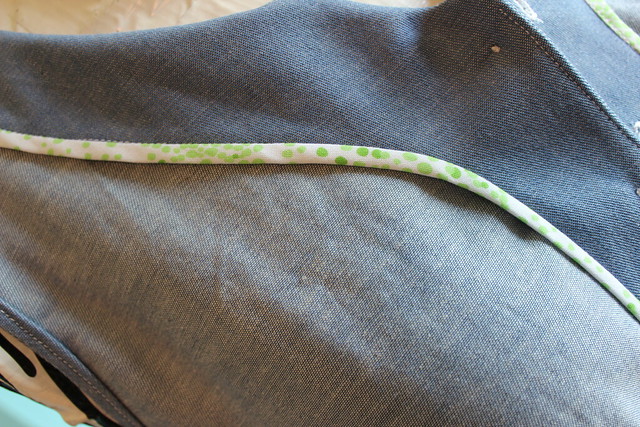
I made bias tape to finish the facings and armholes. Don't tell anyone but they don't match. Sometimes I don't think and get too far ahead of myself. I used some leftover green polka dot cotton for the facings on the bodice. When I got to assembling the skirt I realized I had more facings to finish and no more green polka dot. I finished the skirt with plain old white and the armholes are made with the chambray. Next time I'll apply bias to the facings in one fell swoop after the skirt is attached. Well either that or serge it and call it a day.
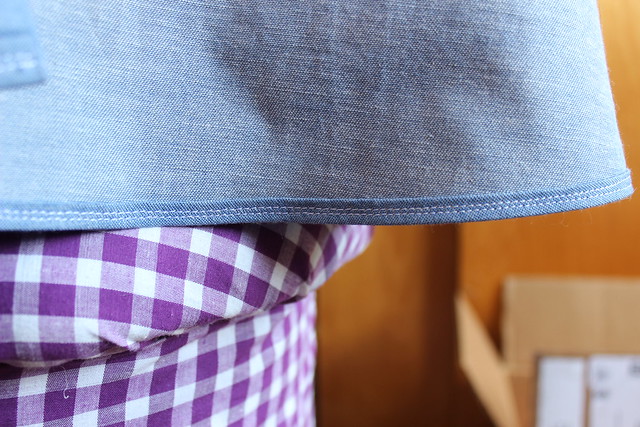
My least favorite thing about circle skirts is the hem. Oh what a pain in the arse I find it to be. I can never get the fullness eased out when hand sewing the hem and it always looks like poo. I found a 2 part tutorial on You Tube from Gertie on how to do a narrow hem on a full or circle skirt. This is the way to go!
Will I make this again? Definitely!
In case you missed my last post I'm going to be doing a mini series on sewing room organization. I've kicked it off with 3 different giveaways so make sure you check out the intro post to enter to win one of your choosing.
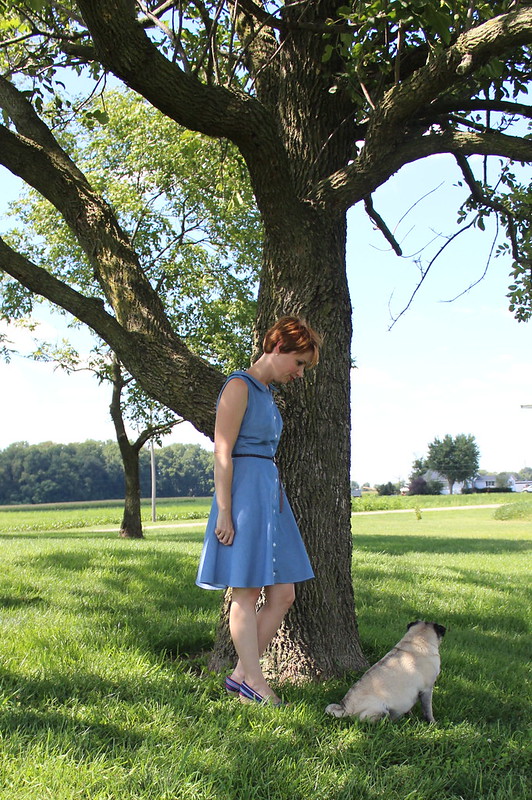
OH Vito! <3 <3


80 comments
A perfect hawthorn!! I do love seeing it in chambray, and yours is no exception. I am still managing to resist, but makes like this make it ever harder!!!
ReplyDeleteGorgeous! I just made a chambray one too (yet to photograph), what sheep we must be! But I agree it's a lovely fabric for the dress, just not awfully common - in my year of looking for it, this is the first time I found any.
ReplyDeleteLove the look of the facings - I always forget to check I have enough bias binding, too.
Why resist? This pattern would look amazing on you!
ReplyDeleteHaha !! Sophie-Lee, you're so right. I think it's because the Hawthorn ticks so many boxes of what I love in a dress !
ReplyDeleteBeautiful!
ReplyDeleteMe too! I waited ages to buy it, when I finally bought and made it I bought fabric for another (and sewed it up) days later
ReplyDeleteLovely Hawthorn!I made one last year during the sewalong. I love it so mych! It is the perfect summer dress:) I am looking forward to youre series about sewing rooms! I defenitely should do something with mine!
ReplyDeletePlease stop by my blog some time and say hi!
Have a nice day:D
Great Hawthorn! :) I had to laugh at your indoor smores fix - we used to melt marshmallows under the grill as kids because the weather was so very rarely appropriate for a BBQ!
ReplyDeleteThis is gorgeous! Hawthorn and chambray are a match made in heaven. I want to make one, but had so much trouble fitting my first Hawthorn, that I would really need to re-fit the whole thing again. I had trouble with the back being too wide too. Maybe your dress will inspire me to try again. Lynne.
ReplyDeleteWe have an electric stove and make s'mores in the oven! :-)
ReplyDeleteThe insides....swoooon!
A true beaut! And a lot like mine- but your innards are waaaay prettier!
ReplyDeleteThis looks so great on you, friend! Absolutely lovely!
ReplyDeleteWhat a perfect dress! The bias binding inside is a nice touch, too.
ReplyDeleteIt looks great!
ReplyDeleteAbsolutely perfect summer dress, and it looks fantastic on you. Beautiful work.
ReplyDeleteI love it!! The finished on the inside? Amazing!! I totally agree, chambray is amazing for this pattern. I want to make another one, but I'm really struggling with not making it out of more chambray. Silly me! Ouch on the wedges!! They're really cute though!
ReplyDeleteI'm sad about the shoes. This is the second time I've tried to wear them and every time blisters. Unfortunately I'm gonna have to get rid of them.
ReplyDeleteI'm really surprised at myself for finishing the facings with bias. Usually I just serge everything.
Thank you! So sad summer is almost over.
ReplyDeleteThanks!! :)
ReplyDeleteThanks! For once I tried something different and didn't use the trusty old serger.
ReplyDeleteThank you so much! ;)
ReplyDeleteThanks! I came across yours when I was doing a search of "chambray hawthorns" I love your swimming ladies one too!
ReplyDeleteI may have to try mine in the stove next. I'm always setting my marshmallow on fire and setting off the fire alarm! oops!
ReplyDeleteI know how much of a pain fitting can be! Do you have the Fit For Real People Book? It's been a real help!
ReplyDeleteI can't live without my smore's in the summertime when it's too hot for a fire. Good stuff!
ReplyDeleteI'm now a follower! Your Bienget is beautiful. Makes me what to make another!
ReplyDeleteThanks!
ReplyDeleteI know. I was really surprised when I found this at Joann Fabric of all places.
ReplyDeleteI agree with Sophi-Lee! This dress is screaming your name!
ReplyDeleteHA! :)
ReplyDeleteI do have Fit For Real People, and it's fantastic. I honestly think I would have given up on sewing if it weren't for that book. Lynne.
ReplyDeleteGorgeous dress! I do love all the chambray versions. I have the pattern, and am desperate to make it, but I'm a bit scared of all the buttons (my machine and I still aren't friends when it comes to buttonholes), I really must get on with it though!
ReplyDeleteChambray is the perfect fabric for this frock. But what I am seriously loving is that hem- it looks AMAZING!
ReplyDeleteThis dress is perfection! Side note: I totally get jealous of people that find good fabric at JoAnns. I never do!
ReplyDeleteSweet dress!
ReplyDeleteThis is soooo lovely. The fabric and pattern are a match made in heaven and it looks amazing on you. Shame about the lovely shoes.
ReplyDeleteThis dress may have been on your summer sewing list, but I bet you can wear it year round with a cardigan, tights and boots--I know I would!
ReplyDeleteJoAnn's is my only option, too (aside from a luxury fabric store that is waaay outside my grad student price range). I'm going to have to go hunting in their clearance section for some of this chambray!
Chambray seems to be perfect for summer and fall. Lucky you finding a nice one at joanns! I love your hawthorn and its simplicity. It can easily be fancied up or down. I think that's the beauty of a solid color.
ReplyDeleteQuick, I have to comment before my kids look over my shoulder and find out I could be making them smores on the stove. Love the chambray. This style suits you so well.
ReplyDeleteI love this version - and all the Chambray ones I've seen to date. I'm not sure we will ever tire of seeing them! I haven't yet taken the plunge with this pattern but new makes keeps it high on my to sew list.
ReplyDeleteIf you don't want to do buttonholes how about snaps?
ReplyDeleteThanks!! Narrow hem all the way!
ReplyDeleteThis was a rare find, trust me!
ReplyDeleteThanks Margo!
ReplyDeleteThanks! Man those shoes are killer!
ReplyDeleteYes I am going to carry it into the fall. Looking forward to pulling out my boots!
ReplyDeleteYes I need more solids in my life!
ReplyDeletehaha!! Thanks!
ReplyDeleteOh take the plunge please!!
ReplyDeletethis looks like a good series. I am always on the hunt for ways to fine-tune my sewing storage. number 1 would be the top of my wish list.
ReplyDeleteI think the idea of the series is quite clever! I'm very much into organising and decorating :)
ReplyDeleteAs for the giveaway I'd really like to win Gertie's book. My e-mail adress is olarussek(at)gmail(dot)com
I would like to be considered for #2 i Heart Vintage since it reminds me of my mother's and grandmothers' sewing items of years past.
ReplyDeleteLeslieBower@juno.com
Excellent idea for a series! I hope to find some new inspiration for organizing and decluttering here!
ReplyDeleteAnd erm... even though won't exactly help me to declutter, I find myself drawn to parcel no. 1, if I'd happen to win the giveaway... :-)
Such a great way to organise the poor old sewing space ~ love your divide and conquer approach by breaking it down into manageable parts of the room. It's going to be a busy and fun 6 weeks ahead. And a giveaway as well ~ I'd have to go with #3 for pure motivation 'We CAN do it!' .... thanks, J
ReplyDeleteI love the number 3 bundle, since I already have my Gertie's books and so many ziplock finds! Hope you get all the declutter done, it is so hard to do. I think you may have motivated me to do that with my sewing room!
ReplyDeleteruthgriffeth@gmail.com
I'd like #2 for all the kitschy riff raff and stuff from a bygone era!
ReplyDeleteOoh cute! I love the binding too. Can't beat a chambray shirtdress
ReplyDeleteI would love to look through Gertie's book! cat.does.mail@gmail.com
ReplyDeletethank you for the chance.
ReplyDeleteYou did mean #2 for the vintage giveaway correct? Just want to clarify as I had the #2 and #3 both marked as #2...oops!
ReplyDeletecould you provide me with your email address so I can contact you if you are a winner? Thanks1
ReplyDeleteCould you provide me with your email address so I can contact you if you are a winner? Thanks!
ReplyDeleteCould you please provide me with your email address so I can contact you if you are a winner? Thanks!
ReplyDeleteCould you provide me your email address so I can contact you if your a winner?
ReplyDeletewhat is your email so I can contact you if you win?
ReplyDeletewhat is your email so I can contact you if you win? Thanks!
ReplyDeleteOh and you did mean #2 as in the last giveaway marked my favorites correct? I had #2 (vintage giveway) and #3 (my favorites) both marked as #2. oops!
ReplyDeleteActually this comment went directly to my email, but it is Nat_holt1 at yahoo dot com dot au
ReplyDeletewhat is your email so I can contact you if you win? Thanks so much!
ReplyDeleteWhat is your email address so I can contact you if you win?
ReplyDeleteCould you give me your email address so I can contact you if you win? Thanks a bunch!
ReplyDeleteoh that's good to know! Thanks!! :)
ReplyDeletemmn1571@gmail.com
ReplyDeleteShanni, I am duchick at gmail dot com
ReplyDeleteI think I managed to post a reply on your blog, but I’m a bit daft! Really loved this series of posts. Being nosy without the risk of embarrassment or scaring people.
ReplyDeleteThanks,
Shelley x
What a fun giveaway. I'd love #3 as a newer sewer I could use some "can't live withouts"! But #2 looks pretty great too!
ReplyDeletehaha yeah I did mean #2 not the imposter #3 pretending to be #2 :)
ReplyDeleteI can be reached at mckinley108@gmail.com
ReplyDeleteI like package 2 the most because it is random and vintage.
ReplyDeletesushart4[at]gmail[dot]com
They ALL great przies!! but i LOVE LOVE LOOOVE the sewing nerd!!! Unfortunately I don't have flickr & etc. I hope my chances are winning are just the same though because I really want one of these awesome prizes!!!
ReplyDelete