
Sewing in Harmony Part Two: Setting Up An Efficient Space ~ Layout & Furnishings
Monday, August 18, 2014
Hello! Welcome to part two of my little mini series: Sewing in Harmony. In this post I want to share with you steps I took in setting up my own space and ways I made it more efficient for me. Everyone's space is going to be different so I hope you take from this ways to make your space work for you. I will also be talking about furniture for your space and all the options available.
Layout
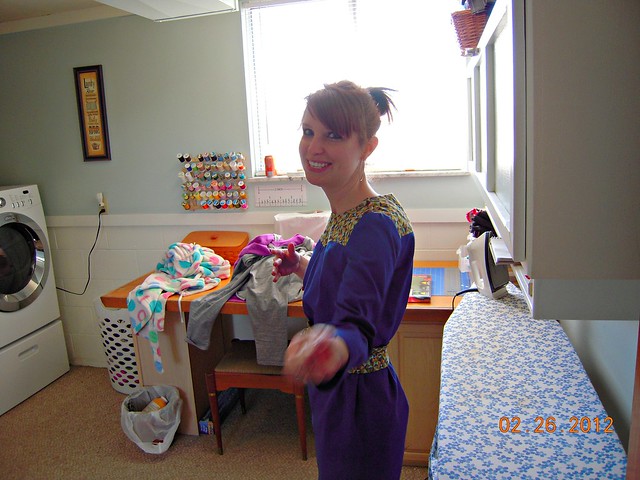
Throw back to 2012...my first sewing space and the first dress I ever made. Hideous. I was crammed downstairs in our laundry room. Not very motivating to sew when you have to fold a mound of laundry first in order to find your sewing machine. It took some convincing but I talked my husband into letting me move to a spare bedroom upstairs. The room decor consisted of my husband's Iron Maiden posters from teen years past and a bed and dresser that never got any use. Let's face it Hubs, the room is breeding grounds for junk and clutter! Luckily I didn't have to pull his arm too hard and my journey began. Coming from the basement my first thought was to create a space that would inspire me. I wanted to avoid any more tragedies that took the form of blue dresses made of corduroy. ;) After clearing the room and staring at a blank canvas I realized I needed a plan before I just started loading things into the room haphazardly. Here's how I approached it.
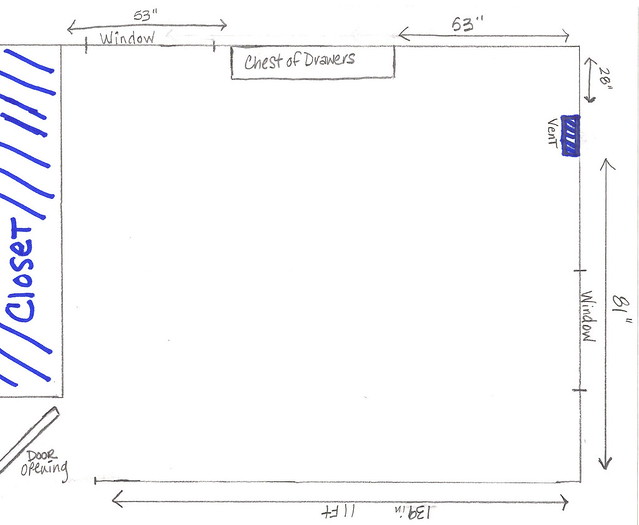
Step One: Start out by drawing a floor plan. You will need a visual on how much space your working with. You can get real fancy like and make it to scale on a computer but I just drew a box and did some rough measurements. Include any permanent fixtures that you will need to work around like windows and floor vents even electrical outlets. I didn't bother including the outlets in my drawing only because I had two per wall and knew I'd have plenty to work with. Extension cords also come in handy if your in a pinch. My room would be serving double duty..sewing room plus dressing room. I had a dresser full of clothes that I had to make room for so I included it in the layout where I would be permanently placing it. The results gave me a clear idea of where in the room the majority of my sewing furniture could be placed and how much room I had to work with.
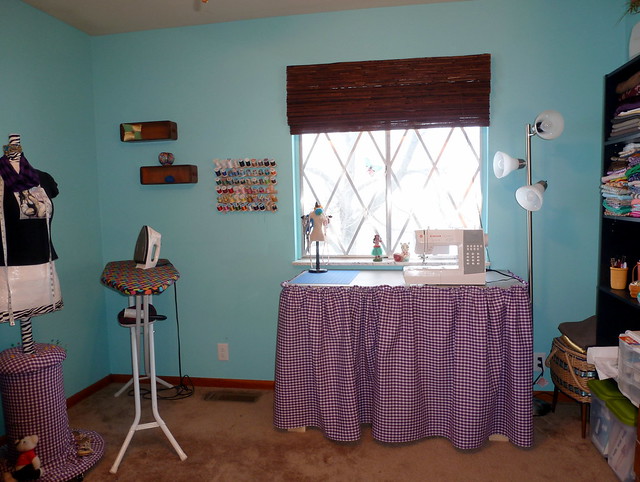
Step Two: Think about what you sew and the steps involved. I sew clothing so I thought about the steps that are involved with sewing a dress..tracing the pattern, cutting, sewing and ironing. You'll want to accommodate for those steps by making separate workstations in your room. For my workstations and most of you reading I would need a cutting/tracing table, sewing table and ironing board. The goal here is to arrange your workstations in a way that allows you to move from one task to the next in an easy and efficient manner. For the size and layout of my room arranging my workstations in the shape of a U proved to be most efficient. Your layout might be totally different from mine but one thing I can stress is to keep your ironing board close if you can. Sewing clothes requires a lot of pressing and you don't want to be getting up and walking clear to the other side of the room to press every seam if you don't have to. You can see below in blue how these three key pieces are set up in my sewing room. I can easily get up and take just a few steps from one station to the next. One other thing I could suggest, place your sewing machine in front of a window. For me it just makes the whole process more enjoyable. I like the natural light it provides and the view is pretty awesome.
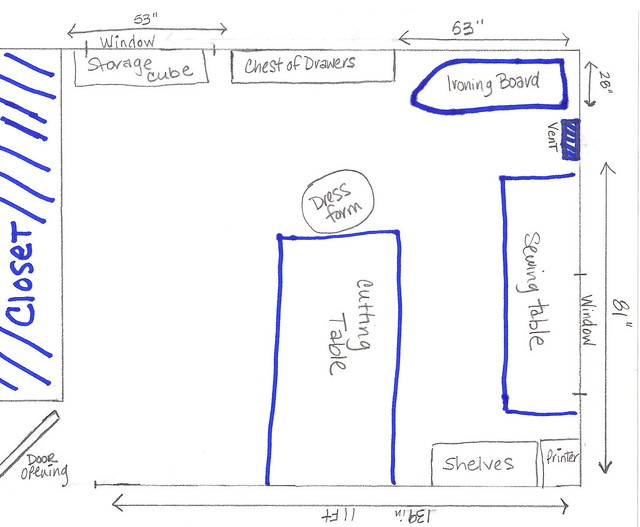
Step Three: After you get your main pieces all laid out add in your storage options like a bookcase (my shelves should read bookcase), storage cubes or wall shelving if you don't have the floor space. A dress form is another helpful item for garment construction that you might want to consider. My layout above shows you pretty much how my room looks right now present time. You can see below how my room first looked. I didn't have a cutting table, nor the printer or storage cube as detailed in the room layout above. You will want to take those kind of future purchases into consideration as well in your drawing so you'll have space for them when you do acquire them in the future.
~~~~~~~~~~~~~~~~~~~~~~~~~~~~~~~~~~~~~~~~~~~~~~~~~~~~~~~~~~~~~~~~~~~~~~~~
Sewing Room Furnishings
Sewing Machine Table:
Thrift store desk to cozy sewing nook:
Check out Sarah's tutorial and cute little sewing room at While They Snooze
 |
| Photo credit: While They Snooze |
 |
| Photo courtesy of Wiki Commons |
If your not into DIY Ikea is always a great source for furniture. If you have one nearby you can visit and browse through well then I'm super jealous! It's on my bucket list. ;) I would love to have this for my room. The pullout would be great to sit an extra machine like a serger or coverstitch. There are so many options there!
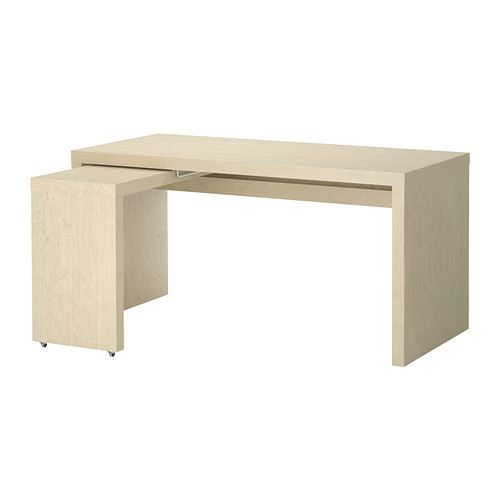 |
| Photo Source: Ikea |
One thing on my project DIY list is a cutting table. Currently my cutting/tracing table is the folding table I first used for my sewing machine. Not quite big enough when it comes to cutting out big projects so for those I use our kitchen island.
The table below would be easy enough to make using storage cubes and a thick piece of plywood. It does double duty for you, fabric storage and cutting! There is a complete tutorial available over at Georgia Peachez. Go check it out!
 |
| Photo Credit: Georgia Peachez |
Another hands on approach is from Heather Lou of Closet Case Files. She has a tutorial for creating a table from scratch. Don't you think that you need a man to do this for you because ya don't. Heather made this table with her own two hands!. How awesome is that? Girl power! Yeah!
 |
| Photo Credit: Closet Case Files |
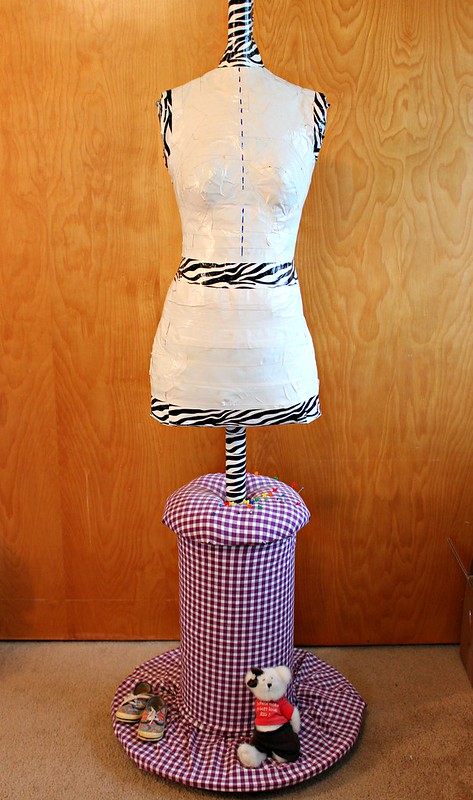
Dress Forms:
If garment construction is your main focus a dress form can be a very valuable piece in your room. Beside the obvious option of buying one a DIY might be more your style and a more budget friendly option. I think making your own is a great choice as it will be a complete replica of your body. I made my own using duct tape and shared the process here. Included in the post are links I found helpful when making my own.
Storage:
Flea markets, thrift stores or Craigslist are places in which you can find affordable storage options. Bookcases make the perfect place for organizing your fabric stash. Closet cubes are a great choice as well. I found mine at Big Lots for $30. More talk on fabric storage and organization in part 4 of this series.

I've created a Pinterest board where I've included all these links as well as many more. Check it out here to find great tutorials and ideas for working with any kind of space, (really loving the diy ironing board for small spaces).
I hope you found this post helpful whether your starting out or looking to makeover your current space. Stay tuned for next Monday's post all about pattern organization. Ooooh one of my organizing favorites!
What is your favorite piece in your sewing room? Your sewing table or a DIY piece? Comment below or share a picture in the Flickr group!
To see the schedule for the Sewing in Harmony mini series or enter the giveaway visit this post. You'll want to stay tuned to the end because if your nosy like me you'll enjoy the video I'll be sharing of my sewing room!
Have a great week!
Shanni :)


8 comments
You are inspiring me so much Shanni! I currently use our dining room as my sewing room and am having a hard time with not having dedicated sewing room. I already have a home office so I would feel way to guilty trying to convince my husband that I need yet another room in our house, but we'll see - our living room never really gets used LOL.
ReplyDeleteCould you combine your office with a sewing room? Office on one side, Sewing Room other? I just read a blog post of someone who turned their living room into a sewing room. I can not remember who it was now or I'd link you the post.
ReplyDeleteI have a sewing room/office that works well, but could be organized to be more efficient and decorated. I work on that bit by bit and have some ideas. Now, you have inspired me to make a plan. I'm so glad that you are doing this series. Thanks, Shanni!
ReplyDeleteYay!! So glad to hear this!
ReplyDeleteOoh, to have a separate sewing room! I'm so jealous! I live in a tiny apartment that houses two adults and two dogs, but I have gradually taken over more and more space for my sewing stuff :D
ReplyDeleteI hope you'll get some ideas for organization in the upcoming posts!
ReplyDeleteOk, why are you not in my reader anymore!?! :(
ReplyDeleteThis was a great post!
huh that's weird..Are you following me through Bloglovin? Try readding me.
ReplyDelete