
The Marbella Dress + A Giveaway
Tuesday, January 06, 2015
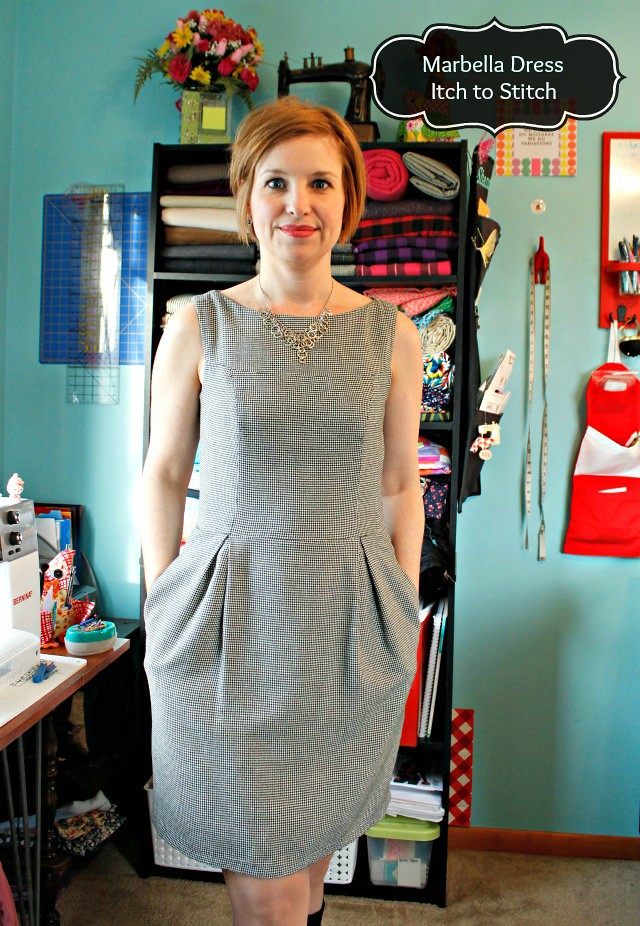
Hello there and welcome my first make of 2015! Well a majority of this dress was made in 2014 but I finished it in 2015 so I'm just gonna claim it my first make of 2015. Okeedokee?! It's the Marbella Dress and it's the first pattern from a new independent designer, Kennis Wong of Itch to Stitch.
I was contacted by Kennis back in October asking if I'd be interested in making and reviewing her new pattern. First off let's address the fact that that was back in October! I feel bad it's taken me so long to make up this pattern as I had other obligations, holidays, sickness and time to overcome. Ah but such is life. I'm stricken with the mentality of being able to sew all the things all the time... "Oh I'll get my 5 page sewing list done over the weekend" or "Oh how's about I whip up a quick blouse after work tonight? I'll have something new to wear tomorrow!" I wish I was half the sewing wizard that I think I am but I digress.
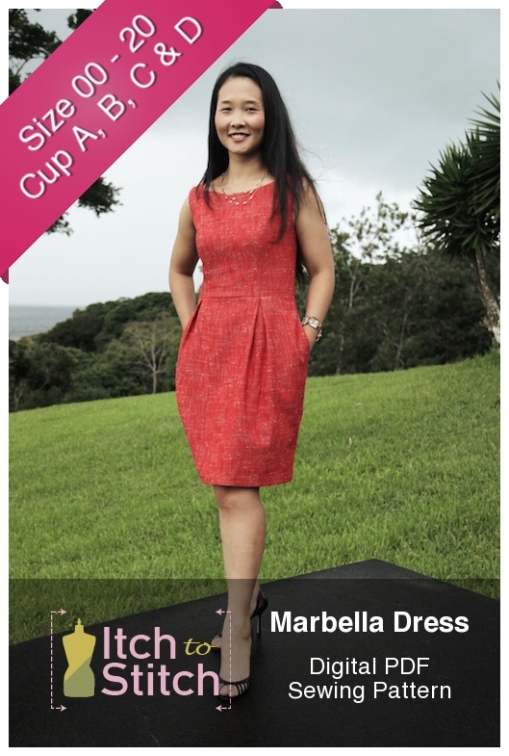
The Marbella features a princess seamed bodice with front and back yokes, a tulip skirt and yes...pockets! You can line the skirt if you chose. Their is a wide selection of sizes and you choose your cup size. The pattern is only available as a PDF. All you PDF haters wait, hear me out! Let me tell you what makes this PDF different from any other PDF I've ever worked with! This pattern has layered pattern tiles that allow you to choose and print only the size(s) you need. That's right, no going cross eyed trying to follow your size line among the many when cutting. Need to grade between sizes? No worries you can print each size you need. The how to print sizes and grade if needed is all in the instructions. Another plus, cup sizes are all on their own pages so you only need to print the pages specific for your cup size. Paper saver!!
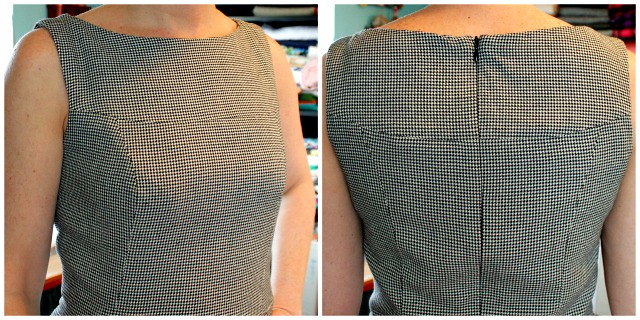
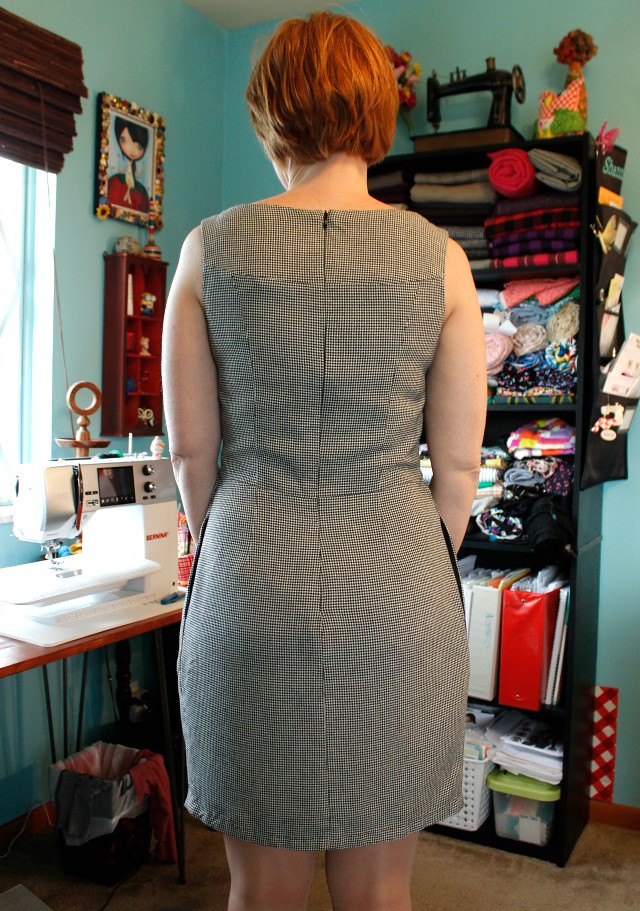
I ended up making 2 muslins. My measurements were all over the place and I was worried about the extra ease in the hips. The extra ease is needed for the tulip design but I've never been a big fan of that style. Basing my measurements against the finished garment measurements I started with a size 0 at the bust and waist and graded down to a 00 at the hips. The pattern does state because of the skirt design if you down size at the hips you risk the back of the skirt becoming too tight. This is something to keep in mind. I myself didn't see a problem but I only graded down one size. I could foresee a problem if you went down two sizes. My first muslin showed some major gaping on the back neckline. A usual problem of mine. I cut two 1/2 inch wedges from the back bodice pattern and also shortened the hem line 1 1/2 inches. Being pretty happy with the fit of muslin #2 I cut into my real fabric a vintage mini houndstooth print. I won this fabric some time ago from a giveaway hosted by Sue of Sewin' Steady. I believe it's some type of wool blend.
I chose to fully line my dress which I don't have photographic evidence of. I was so totally wrapped up in getting good photos of the outside that I just forgot about the inside. The print of this fabric made it a real bear to photograph. The print in the photos was showing up wavy and reminded me of one of those hypnotizing wheels. Apparently there is a name for the problem I was having, it's called moire. I have a few better choice names for it....After about 200 photos (I'm not kidding) my best bet was either up close or holding something in my hand for the camera to focus on then quickly tossing it before the camera took the picture..not always an easy task.
The instructions are very thorough and detailed. I really appreciated this when it come to installing the lining, which is rayon bemberg btw. Instructions for stay stitching, clipping, stitch in the ditch and finishing seams are all there when needed.
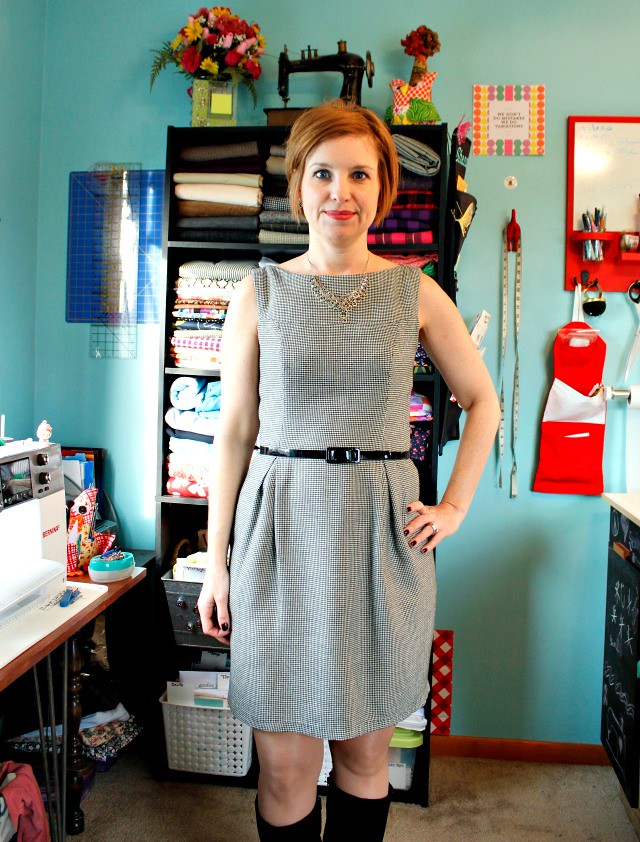
I shouldn't point it out because it's barely noticeable but I had one heck of a time trying to get the waist seam to match on the back. I started to let the perfectionist get the best of me and ripped out the right side of the zipper twice trying to line it up perfectly. If you've worked with wool before you'll know ripping out stitches is not exactly easy as they tend to sink into the fabric. I finally said, good enough. Not sure why it bothered me so much as it will be covered by a cardigan anyway. I don't ever see myself wearing this without some type of cover up. And while we are spilling secrets here I ended up shortening the hemline an extra inch. It ended nicely above my knees until I washed and dried the dress. Now it's a tad on the short side when sitting. Oopsie!
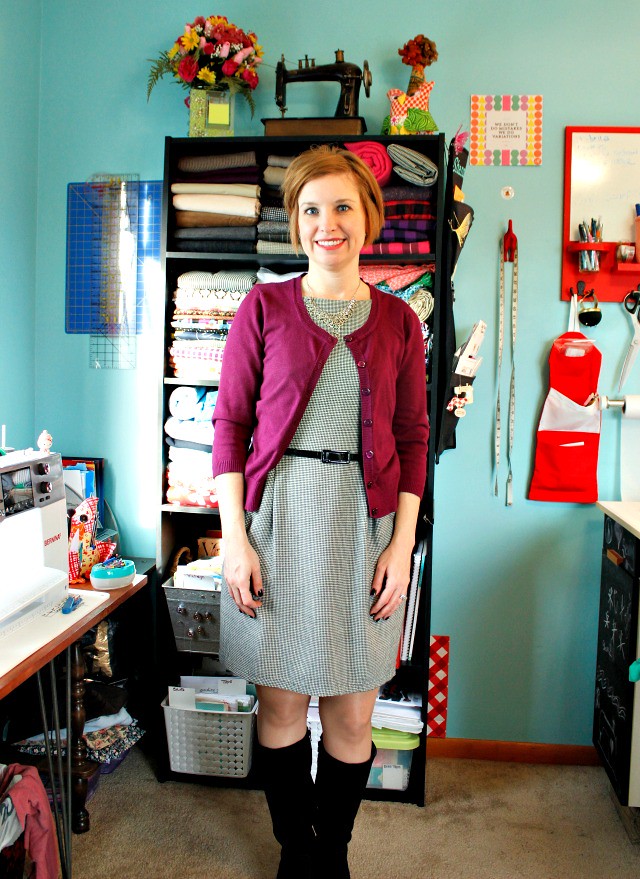
I'm really pleased with the way my dress turned out and think it will be a good work staple. If I had to make any changes at all I wouldn't mess anymore with the hemline. I think the fit of the back needs a little tweaking and the bodice is a little long. I did not notice this with my muslin which is really annoying.
The Marbella is available for purchase as a PDF download here.
GIVEAWAY NOW CLOSED..but first try your chance at winning a copy! Kennis is giving away one pdf download of the pattern to one of you lucky peeps. If you would like to be entered in this giveaway please say so in the comments and tell me what your favorite design feature of the pattern is. Please make sure I have a way of contacting you either by your blog address or email address.
GIVEAWAY NOW CLOSED..
I will draw one lucky winner's name out of a hat in one week - Tuesday, January 13th. Good Luck!


35 comments
What a beautiful dress! And it looks so good on you, congratulations! I like the bodice (princess seams and all) part best.
ReplyDeleteI would love to win this pattern... I'm one of the few who actually enjoy cutting and taping PDFs haha
ReplyDeleteI love the pockets on this dress!
The dress looks lovely on you, I'd love to give it a try!
ReplyDeleteNice job on this dress! It's simple but elegant. You did a lovely job on your seams. I know what you mean about wanting the seams to line up across an invisible zipper.
ReplyDeleteI love that this pattern comes in a variety of cup size and that files are nested. I confess that I'm not usually a fan of tulip shape either but this one isn't so dramatic as some I've seen.
I usually have to do an SBA and go up a size in the hips. I wonder how that will work with this pattern. I would love to win it and give it a whirl! You can contact me via my blog or IG account (@csews) - but you already know that. ;)
Very cool make!
ReplyDeleteThe dress looks great, I like the combination of the princes seams with the yokes
ReplyDeleteLovely make! You totally notice your perfectly lined up darts at the back. I enjoy a puzzle, so using PDF patterns appeals to my puzzling side. Having said that, being able to print only your size sounds like a great feature. Bobemm@gmail.com
ReplyDeleteI would love to win this dress pattern and bizarrely my favourite design feature is the pockets! Many smart dresses don't have pockets and I do so love a good pocket! Butterfliesandlemondrops.blogspot.com
ReplyDeleteHi! This dress looks great on you! I've had the pattern pinned on Pinterest since it came out as it really caught my eye and, as a newbie sew-er of about a year really think I could tackle it now. My fave features are the princess seams and the tulip skirt, which I feel are very flattering! Never sewn the former but am just finishing S2451, a tulip skirt, which I love. I'd love to make this dress! Jen
ReplyDeleteI'm in love with this fabric!!! It must look even better IRL :)
ReplyDeleteAs for the dress, my favourite feature is the tulip skirt. Never tried to sew one, but I'd really like to try.
my e-mail address: olarussek (at) gmail (dot) com
That looks fabulous on you, Shannon! Perfect wear-to-work dress! I, too, think I can sew more than time allows. I guess that why I was still sewing buttons on a Christmas gift the night before Christmas....
ReplyDeleteI'd love to be entered in the Marbella drawing!
I like the yokes with the princess seams and the boat neck opening. Mahlica@gmail.com
ReplyDeleteThe back yoke is definitely my favourite feature! That and the cup sizes :-) Your version is lovely, I'd love to make my own!
ReplyDeleteThis is so pretty on you! As for the zipper matching problem, I pin one side in and make a chalk or pencil mark on the zipper tape where it hits the waist. Then, I close the zipper, extend the chalk mark across to the teeth to the other side of the zipper tape, and match that mark to the waist seam on the other side. Sometimes, if I'm really feeling particular, I stitch just an inch or so right at the waist on each side to make sure it doesn't shift while I'm sewing. :)
ReplyDeleteI love it! You can leave me out of the giveaway (my pattern stash is... opressive).
I love the tulip skirt of the dress! I am fan of extra volume :) I would be happy to enter this giveaway and sew a cute Marbella dress like yours...
ReplyDeleteI'd love to be entered to win! (victoriabeppler at gmail dot com)
ReplyDeleteI love how the pockets are there but they are so subtle! It is gorgeous on you!
Oooh, I'm with the commenter below, I love this fabric! And those pockets and pleats are pretty awesome too!
ReplyDeleteThis pattern looks so good! Also, I'm a sucker for separate cup size patterns. That would save me about 1 hour of fitting & flat pattern adjustments!
ReplyDeleteYou look great in your version. I think that length is lovely on you!
I love princess seams, they're so flattering. I really like the neckline, too, although it looks higher on you than on the pattern. Did you alter that? Thanks for the chance to win :)
ReplyDeleteI ljke the detail of the seaming and the pleats I'm the skirt. I can see wearing this to work too!
ReplyDeleteWell, you ended up getting great photos of it in the end. This dress looks great on you and I love the houndstooth! Sounds like a cool pdf for sure, and with the yoke I'm sure there are all kinds of variations to be made. Lovely make Shanni!
ReplyDeleteI like the princess seams but would probably do something different with the pleats since I am always trying to hide my stomach. Maybe make more and smaller pleats.
ReplyDeleteIt fits you nicely and I love the fabric. Hope I win, I want to make one. (Cute sewing room too)
ReplyDeleteI absolutely love that it has big pockets, but the thing that first grabbed my attention was the combo of yoke and princess seams which might make it fun to play with some color blocking. Thanks for the giveaway! Your version looks so nicely finished with the addition of belt - did you make thread loops for it?
ReplyDeleteSo glad to know I'm not the only one who thinks I am a sewing wizard, when in fact I'm lucky to sew one thing a week! It's so easy to make grandiose plans in our head, but having the time, organization, and discipline to actually make it happen is a whole other story - lol :) Very cute dress, also - love it with the cardi!
ReplyDeleteI'm so glad I lurked the comments because your zipper matching tips are excellent! Thank you!
ReplyDeleteThanks! Nope I didn't need to make any loops for the belt.
ReplyDeleteTruth!! Time is a buzzkill!
ReplyDeleteGreat dress! I'd love to win a copy because the pattern offers multiple bust sizes. Thanks :).
ReplyDeleteI love the versatility of this pattern and the fact you have areas you can alter. Sorry, no one design feature. If I don't get it, I'm definitely ordering it- how cute!
ReplyDeleteI like the princess bodice and the unusual neckline. I would love to win this pattern and make several of these dresses for my daughter.
ReplyDeleteGorgeous dress! I love the princess seams, so I'd love to win a copy and try this myself. Thank you for the giveaway!
ReplyDeleteI like the yoke and the darts on the back--lots of opportunity for fiittiing. Thank you for the opportunity. I have a long dormant blog at needlespinsthorns.blogspot.com.
ReplyDeleteRose in SV
The pockets are fabulous! They don't make the skirt look too poofy or weird, but look big enough to put your hands in when you don't know what to do with them. :-)
ReplyDeleteI think my details should come through, but in case not: jtknittersan at gmail dot com
I love that the yolk and princess seams are carried out on the back as well as the front.
ReplyDeletekath_rhodes at hotmail dot com. or seekatsew.wordpress.com